Tagged Under
MOXF BASIC AUDIO RECORDING PART III
In the first installment we setup and recorded audio from a MO-XF PERFORMANCE to Cubase, and learned some basics about how the audio could be routed. In part two we saw how a vocal microphone could be routed and recorded simultaneously to its own discreet track while playing and recording the synth to its own discreet track. In this installment we will add MIDI communication to the equation.
The driver (Yamaha Steinberg USB) is capable of handling both AUDIO and MIDI communication bi-directionally through this single connection. Until now we have been using the 4 channels of audio and stereo audio return, now we will begin to introduce some of the power and functions of the bi-directional MIDI communication. This will allow us to take advantage of some unique functions, the first of which is allow the clocked functions in the MO-XF to synchronize with the tempo of your Cubase Project. This will allow the music you play to line up to Measures:Beats and opens the door to adding additional tracks, using the arpeggiators, synchronizing effects and a myriad of inspirational/creative things with which to play.
Time for Music
One of the first advantages of the MIDI communication is it will allow your computer to become ‘aware’ of musician time (measures/beats). We will set Cubase to send MIDI Clock and set the MO-XF to receive it and follow commands from the software. Cubase can record referencing just regular clock time minutes and seconds (as well as timecode for film work). By setting up this MIDI communication we will be able to transfer data between sequencers, utilize the MO-XF’s many tempo driven effects, work with the various arpeggio patterns so that they accurately fall into musical alignment – these things make it easy to add data at a later time. Cubase can also generate a click for you to follow when inputting data to tracks.
The Yamaha Steinberg USB driver that we are using combines both audio and MIDI communication through the single connection. Not only does this make things easier, more efficient, but will allow us great flexibility in our music production endeavors. The routing is flexible – please recognize that while these short tutorials can suggest ways to work, you are certainly free to customize the workflow. What we hope to do is introduce you to the routing functions and point you in the right direction.
Let’s verify the following MIDI settings in the MO-XF:
_ Press [UTILITY]
_ Press [F6] MIDI
_ Press [SF2] SWITCH
_ Make sure that “LocalCtrl” (Local Control) is set to ON
Local Control will allow the MO-XF keyboard to trigger the MO-XF tone generator directly. We will still need this because we are going to be generating audio signal to be sent to Cubase. (…AUDIO signal as opposed to MIDI signal). In a future installment we will introduce Basic MIDI Recording – where we will be recording MIDI data to Cubase, but for now, we are going to be introducing MIDI here, simply to use the synchronization functions.
_ Press [SF3] SYNC
_ Make sure that “MIDI Sync” is set to “EXTERNAL” and “SeqCtrl” (Sequencer Control) is set to IN/OUT
For this experiment we want the MO-XF to run on its own clock. Alternatively, the “MIDI Sync” could be set to “AUTO”. This setting is for when you want to use the arpeggiator of the MO-XF independent of running Cubase. When we set Cubase as the Master clock, the arpeggiator of the MO-XF will only run when Cubase is actively sending clock out… so the AUTO setting allows the MO-XF to run on its own clock, but at the last external tempo received from the DAW. (This is strictly to make it convenient to rehearse when working with the MO-XF’s four arpeggiators).
_ Press [SF4] OTHER
_ Make sure “MIDI IN/OUT” = USB
In Cubase:
Go to TRANSPORT > PROJECT SYNCHRONIZATION SETUP… > MIDI CLOCK OUT > DESTINATION = Yamaha MOXF6/MO8-1 (port 1)
Go to DEVICES > VST CONNECTIONS > OUTPUT
Just to the right of the AUDIO DEVICE you will see the word “CLICK” – this sends the Cubase metronome sound to the DAW output.
Raise the DAW LEVEL control on the MO-XFF just enough to hear as much of the metronome as you require. The METRONOME function of Cubase can be accessed on the Transport Bar – CLICK ON/OFF and an icon that allows for PRE-COUNT are available (please see your Cubase documentation for more details).
Clock Synchronization
Now that you have setup the DAW to be the master clock, starting and stopping Cubase can also cause the MO-XF sequencer to start and stop. By making the clock output available to the MO-XF you can synchronize any TEMPO driven effects to the beat as derived in the DAW. This also synchronizes the arpeggiators of the MO-XF, as they also use this same clock.
If you would rather the sequencer of the MO-XF not start and stop when you start and stop Cubase, simply set the parameter SEQUENCER CONTROL (SeqCtrl) = OFF
Press [UTILITY]
Press [F5] MIDI
Press [SF2] SWITCH
Set “SeqCtrl” = OFF
Sequencer Control is literally the commands that start/stop/continue the transport.
You would place “SeqCtrl” = IN when you want to transfer data from the MO-XF sequencer to Cubase in real time. When working with Cubase while the MO-XF is in SONG mode, locating a measure in Cubase will cause the MO-XF to advance to the same measure number (provided the time signatures are the same). This is handled by a function in MIDI called SONG POSITION POINTER. It works based on subdivisions of 16th notes. It actually counts the number of 16th notes you are into the composition, and it tells all receiving (clocked) devices exactly how many 16th notes into the composition you have advanced.
If you are in PATTERN mode, quite naturally, SONG POSITION POINTER does not work. PATTERN mode is mainly looping sections so a linear location in Pattern mode is illogical – so any location of the slave transport when working in PATTERN mode must be done manually.
Working with Measures and Beats will open the doors to adding MIDI content later (after the fact) and have it easily match timing and tempo. In the next few installments we will begin to study what possibilities recording MIDI data brings to the table. These include:
_ Score notation – MIDI can be turned into notation and printed as charts
_ Correction of performance data – incorrect notes can be fixed, tempo can be changed, etc.
_ Easy reconstruction of composition: try out different arrangements
_ Change your mind: about instrumentation, tempo, key, etc. MIDI data is easily edited, auditioned, and changed
Until now, we have been using the computer DAW as if it were a large tape recorder – simply to record data as audio. In this fashion you can build up as many audio tracks as your DAW allows. You will never run out of polyphony, you will never run out of resources in terms of effects. Because you are “Multi-tracking” – building your composition up one track at a time, you get to reuse your hardware at its full potential for each pass. Multi-tracking was first invented by guitarist Les Paul back in the post-World War II era when he and wife, singer Mary Ford, would double and triple parts on a modified tape machine. The process of building musical tracks in this fashion has developed and morphed throughout the rest of the 20th Century – and has become a creative way to assemble musical compositions.
As we go through these tutorials we will add more MIDI functions that can be used as music composition and production tools. If you are new to the world of MIDI it can take the form of many useful tools. In fact, the workflow of recording data as MIDI data first has become quite commonplace as a method to building tracks and constructing musical compositions.
Experiment 1:
Try working with the Cubase click. Notice that the Click is heard via the DAW LEVEL return. To understand what is going on here you have to recognize that the DAW LEVEL slider is responsible for allowing audio to return to your MO-XF from Cubase. When you are direct monitoring signal, and you are returning audio from the DAW, the possibility exists for doubling of the signal. That is, listening to both the direct monitor signal and the signal post it going through Cubase. Raise the DAW LEVEL control just enough to hear the CLICK (but not enough to allow the doubling signal to disturb your listening). The signal traveling through the DAW is always slightly behind the direct monitor signal (by a precise amount, called the latency). This is only a problem when you are at the mercy of the latency. You will be monitoring via the Direct Monitor Switch (no latency) and only using the DAW LEVEL to allow the CLICK through.
Let’s setup and record a 4-measure Drum groove to Cubase as AUDIO. Instead of using the MOXF6/MOXF8 Performance mode, with its abundance of musical content, let’s manually record drums as audio to track in Cubase. Not that we are suggesting you work this way, but simply as an example of how one can proceed utilizing what we have learned thus far.
About the MOXF6/MOXF8 setup
_ On the MOXF6/MOXF8 go to a blank SONG or PATTERN location; place the Power Standard Kit 1 in PART 1
A blank SONG location will have 16 PARTS. These PARTS are similar to the PARTS as found in a PERFORMANCE mode program. The main difference is that in a SONG or PATTERN each of the PARTS can be set to a different MIDI channel. PERFORMANCES can actually be contained within a SONG or PATTERN setup. When you want to use the MOXF6/MOXF8 as a multi-timbral, multi-MIDI channeled tone generator, you would place it in SONG mode or PATTERN mode, and address the sounds via the [MIXING] button.
[MIXING] is literally a program that contains 16 independent VOICES (each placed in a PART), 16 3-band PART EQs, 3 pairs of Insertion Effects, each of the 16 PARTS have a Send amount to the System Reverb and Time Delay (Chorus) Effects, and finally there is a Master Effect, and a 5-band Master EQ. A MIXING program is used whenever you are going to setup for music production sequencing (recording) whether internal/external or whenever you need multiple sounds simultaneously or in rapid succession. A Mixing program can contain more than enough sounds for you to pull off most musical compositions whether you are performing “live” on-stage or are creating a musical composition within your DAW at your studio.
About the Cubase setup
_ In Cubase go to a blank PROJECT location, and create a Stereo Audio Track assigned to receive audio via MOXF6/MOXF8 USB3/4 (see “Basic Audio Recording”)
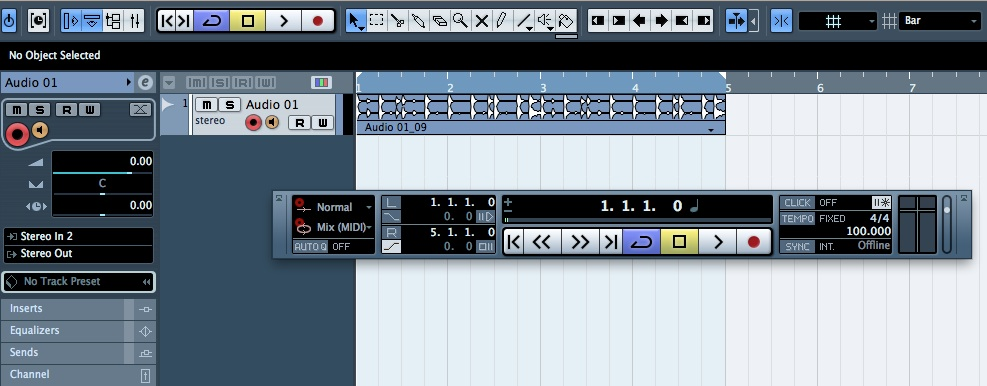
_ On the Cubase Transport bar set the LEFT and RIGHT markers so that you are marking a FOUR measure region 1.1.1.0 ~ 5.1.1.0
_ Set the Transport bar so you that you can have it automatically punch you in and out (see below)
_ Mark the “Click” = ON and the “PreCount” (||*)= ON
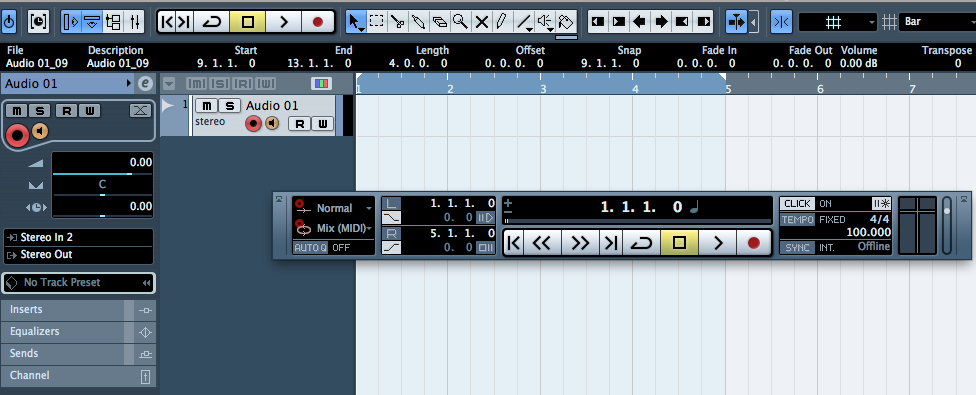
Record a simple four measure drum groove as audio.
Once you have it, set the Transport to loop _ Mark the CYCLE icon on the transport