Mastering CP: Menus vs Settings
CP73/88 feature [MENU] and [SETTINGS]. This article will explain the difference between the two.
MENU
MENU items are global affect the entire instrument. Here you can configure different parameters, functions and set ups. I’ll cover the basics here. More in-depth articles are coming that will go deeper into other MENU items. For a list of all the MENU selections check out the CP73/88 Owner’s Manual starting on page 28.
Press the [MENU] button and you’ll see the top-level list of items:
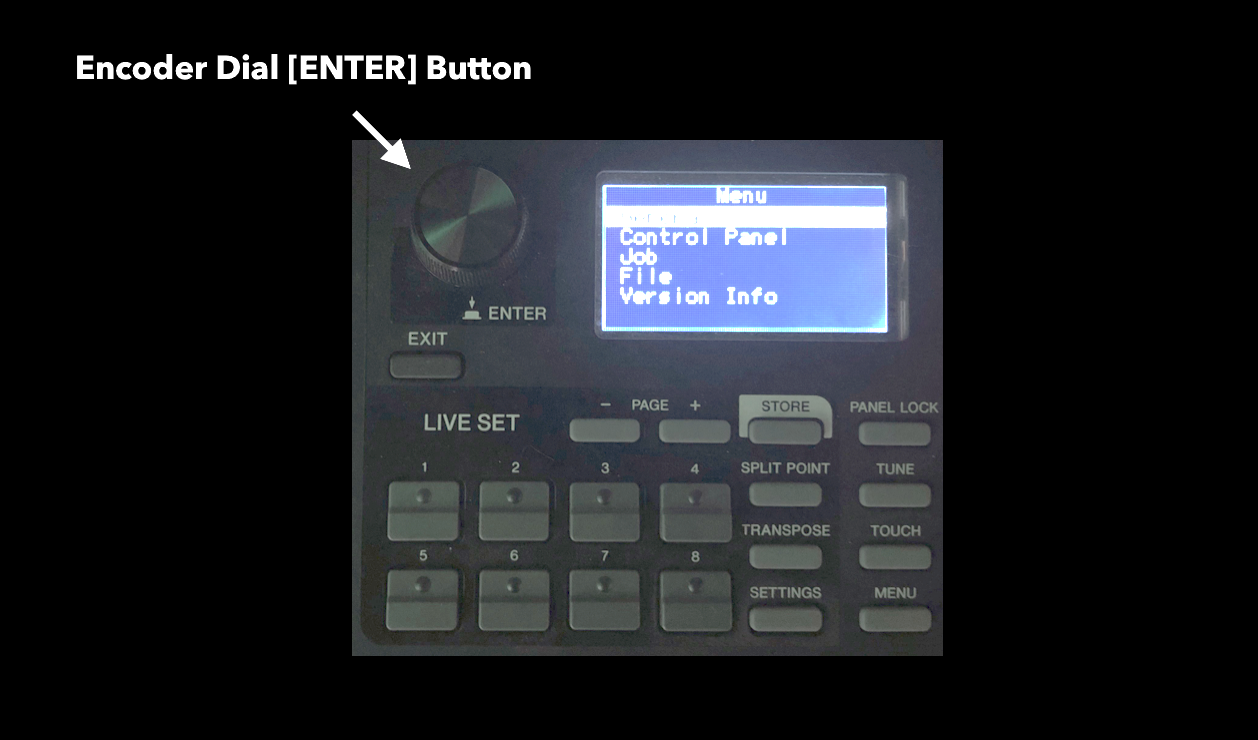
Use the Encoder dial to select an item and press down on the dial (the [ENTER] button. I’ll go through each item and highlight some of the important ones. Top level CP73/88 menu items are the top heading, next level are in Bold Underline and below that tems are bulleted.
General
Under the “General” item you will see the following selections:
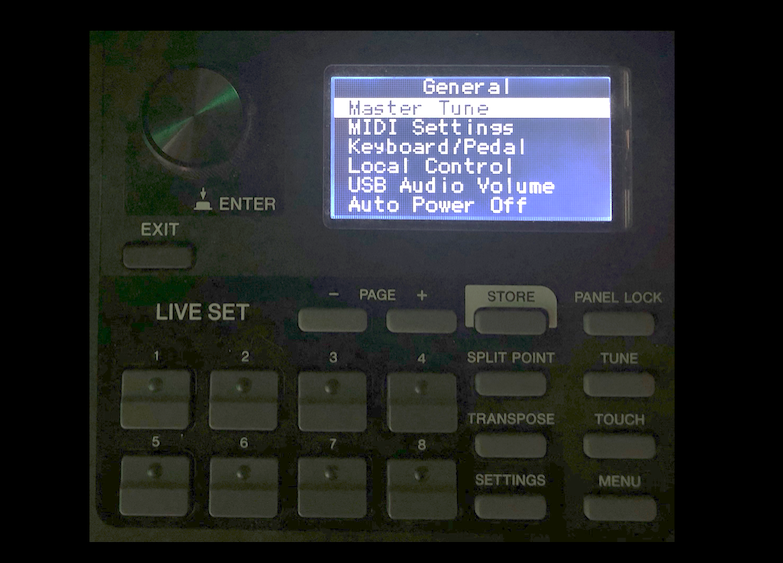
Master Tune: This sets the overall tuning of from the default of A=440 Hz to a range between 414.72-466.78Hz Hz. In situations where you need to adjust this setting you will find this useful. There is a dedicated [TUNE] button as well on the front panel.
MIDI Settings: There are a few important items under MIDI settings.
- MIDI Port: Selects USB and MIDI for MIDI transmission. BOTH USB and MIDI are active when they are set to ON and both default to ON.
Interestingly enough, when the MIDI Port is set to OFF MIDI messages received via the MIDI terminals output to USB port 2 and MIDI messages received via USB port 2 will be output to the MIDI terminals. This allows you to use the CP MIDI terminal as a second set of MIDI ports for external gear
- MIDI Channel: Sets the MIDI receive and transmit channel for CP independently. Default is set to channel 1 for both transmit and receive.
- MIDI Control: This setting turns MIDI control changes On, Off or Invert.
“Invert” is a pretty cool option. In Invert mode all the panel lights illuminate and MIDI control changes only send or receive when a Section is switched OFF. This is cool when using CP73/88 with a DAW. For example, say you want to have the E.Piano Section ON layered with a virtual instrument in a DAW. With Invert On, you can use the Sub Section controls to change the virtual instrument parameters when that section is switched OFF.
Invert is cool for this reason: It’s like a hybrid mode where I can play the CP73/88 E.Piano, record the note data and automate the Section controls when the E.Piano is in the ON position and simultaneously control a virtual instrument using the Sub Section in the OFF position.
You cannot change the CC# for the CP73/88 controls, but most if not all DAW support “learn” modes so you can assign specific controls to controllers. Invert is pretty cool and useful.
- Tx/Rx Pgm Change: Determines whether program changes are transmitted or received to an external device.
- Tx/Rx Bank Select: Determines whether bank select messages changes are transmitted or received to an external device.
- Controller Reset: Resets controllers to default states when switching between LIVE SETS. The default is “Reset”.
Keyboard/Pedal
- Octave: Sets the octave settings +/- 3 Octaves. There is a dedicated [OCTAVE] button on the front panel as well.
- Transpose: Transposes the pitch of the CP73/88 -12 to +12. There is a dedicated [TRANSPOSE] button on the front panel as well.
- Touch Curve: This sets the velocity sensitivity of the CP73/88.
This is an important setting to get the best experience with the instrument. I like to play acoustic pianos with the “Hard” setting but that is ENTIRELY subjective. Experiment with these settings to find what works for you. One thing to try is the Wide setting for Electric Piano voices which functions a bit like a velocity compressor/expander. I like it with the 75Rd Funky Voice to really grab the “bark” of the sound!
- Fixed Velocity: When fixed velocity is On you can fix the note velocity between 1 and 127. This is useful for instruments that don’t respond to traditional velocity like harpsichord or organ experience
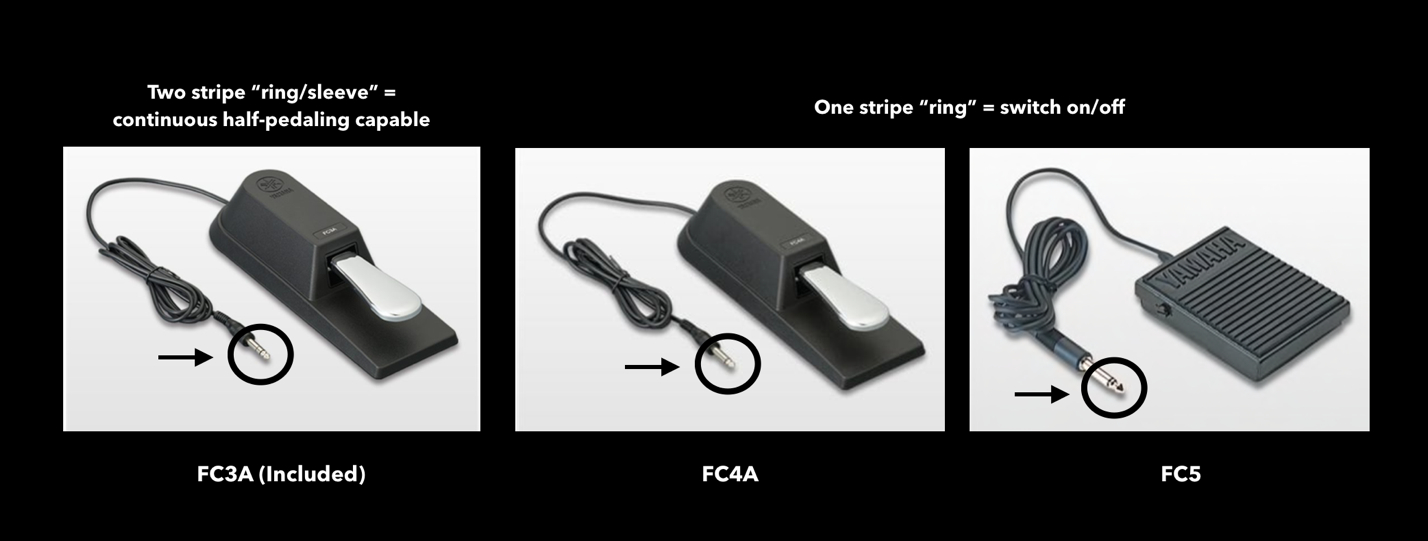
- Sustain Pedal Type: Determines the type of foot switch you are using. The CP73/88 includes an FC3A sustain pedal which is capable of half-damper like an acoustic piano. When set to “FC3A (HalfOn)” it functions in this half-damper mode. When set to “FC3A (HalfOff”) half-damper is defeated and it will function as a standard switch pedal. The last setting—“FC4A/FC5”—is what you would select if you are using the Yamaha FC4A or FC5 which are both switch pedals.
- Foot Switch Assign: Determines the assignment of the Assignable Foot Switch. This is a global setting and you can set it to do some useful things like engage a Section effect, adjust the volume of a Section, engage the Reverb/Delay or advance incrementally from one LIVE SET to another which is the default.
Local Control: Turns Local Control On or Off.
USB Audio Volume: Adjusts the incoming USB audio level from computer/DAW or iOS device.
Auto Power Off: Determines whether or not Audio Power Off is engaged.
General has the most selections of any of the MENU items. Let’s take a look at the rest.
Control Panel
Panel Lock Settings: Determines which features you want locked out when engaging Panel Lock. For example, you can choose to lock out the Section Switches but allow control over the Delay/Reverb Section.
Display Lights: This allows you to set how the front panel Display Lights illuminate. You can choose to turn all the Section Lights ON (default is OFF), or turn the Section Effects OFF (default is ON).
Advanced Settings: There are a number of items you can select here.
- Section Hold: When this is set to “Enable,” you can select another LIVE SET and still Hold certain settings as you select different LIVE SETS.
Example: Say you want to keep the same Reverb Setting for every LIVE SET but you don’t want to save that setting in a LIVE SET. With Section Hold enabled, switch the Reverb Section ON and HOLD THE SWITCH on until the red Reverb Section LED blinks. You can now switch between different LIVE SETS and the Reverb setting will remain the same, overriding what was saved with the LIVE SET. An entire Section can be set to “Hold” as well and will override whatever is set to Live set, so if you wanted to keep a Sub Voice like a string pad the same regardless of the LIVE SET selected switch the Sub Section ON and HOLD THE SWITCH until the red Sub Section lamp blinks. The screen will say “Sub Section Hold On” to confirm.
- LIVE SET View Mode: Determines whether to maintain the LIVE SET View (Keep) or return to the Top screen (Close) when switching between LIVE SETS. When this is set to “Keep,” eight LIVE SETS are displayed in one screen. The Default is “Close”.
- Value Indication: Determines whether or not to display the values of each of the knobs on the LCD. Default is ON.
- SW Direction: Determines whether if a switch turns a Section On by switching UP (the default) or DOWN.
- Power On Sound: Allows you to choose the default LIVE SET when you power the CP73/88 ON.
- MIDI Device Number: Allows you to set a MIDI device number of ALL, OFF or 1-16. The device number of this instrument must match the device number of the external MIDI device when transmitting/receiving SysEx bulk data or parameter changes. This is important in multi-keyboard set ups when you want send SysEx data between multiple CPs.
- MIDI Control Delay: This function was one added with CP OS v1.1 and allows you to adjust the timing of control change messages transmitted with LIVE SETS. If you are using a DAW or other app that is having issues receiving MIDI control changes, this setting may help by adjusting the timing from 0 to up to 1500 milliseconds.
Job
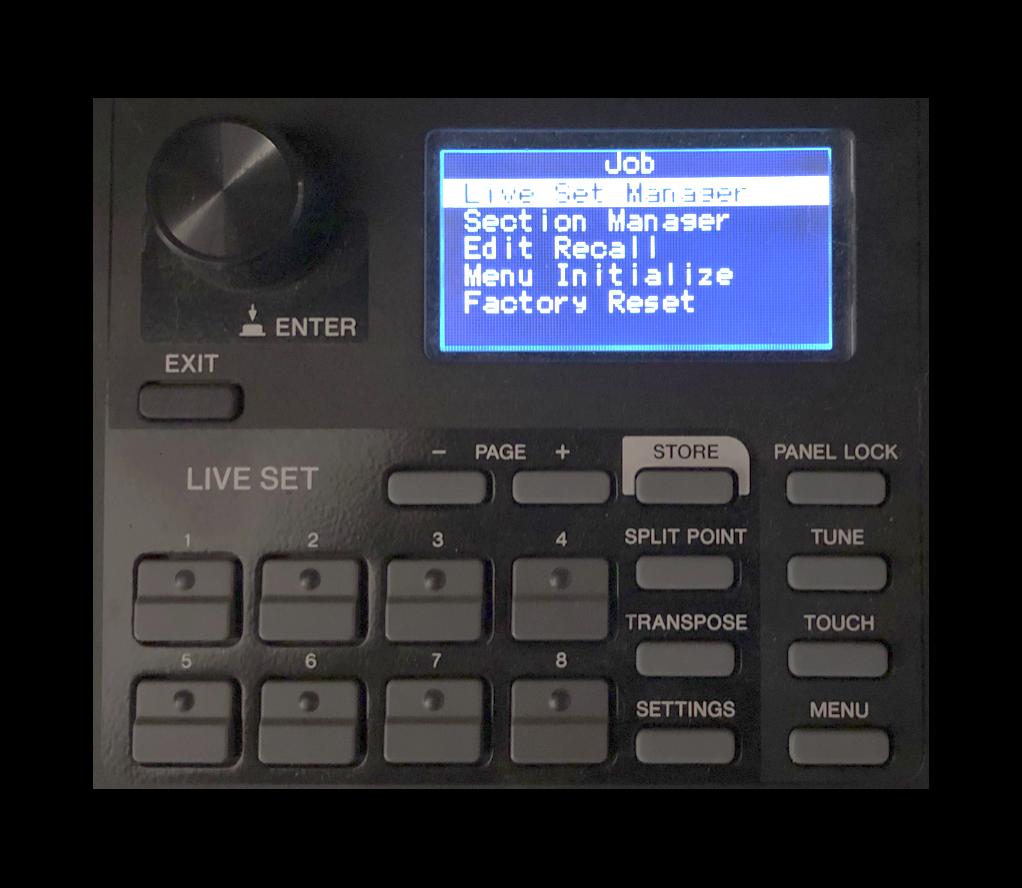
LIVE SET Manager
: This function allows you to move LIVE SETS. You can choose between “Swap”, “Copy” and “Initialize”.
Section Manager: The next level down from LIVE SET Manager is Section Manager. This allows you to “Copy” one LIVE SET Section and “Paste” that Section into another LIVE SET Section. This is useful if you want to select a cool Sub Section Pad with all the Section Effects and levels set exactly how you want them and use it with a different LIVE SET.
Edit Recall: If, while editing a LIVE SET you have not yet stored, you select a different LIVE SET and then return to the one being edited, the latest stored version will be selected. Using this function, you can restore your latest edits and keep them intact.
Menu Intialize: Resets the settings of MENU screens to the default values.
Factory Reset: Restores this instrument to its default (factory) condition.
File
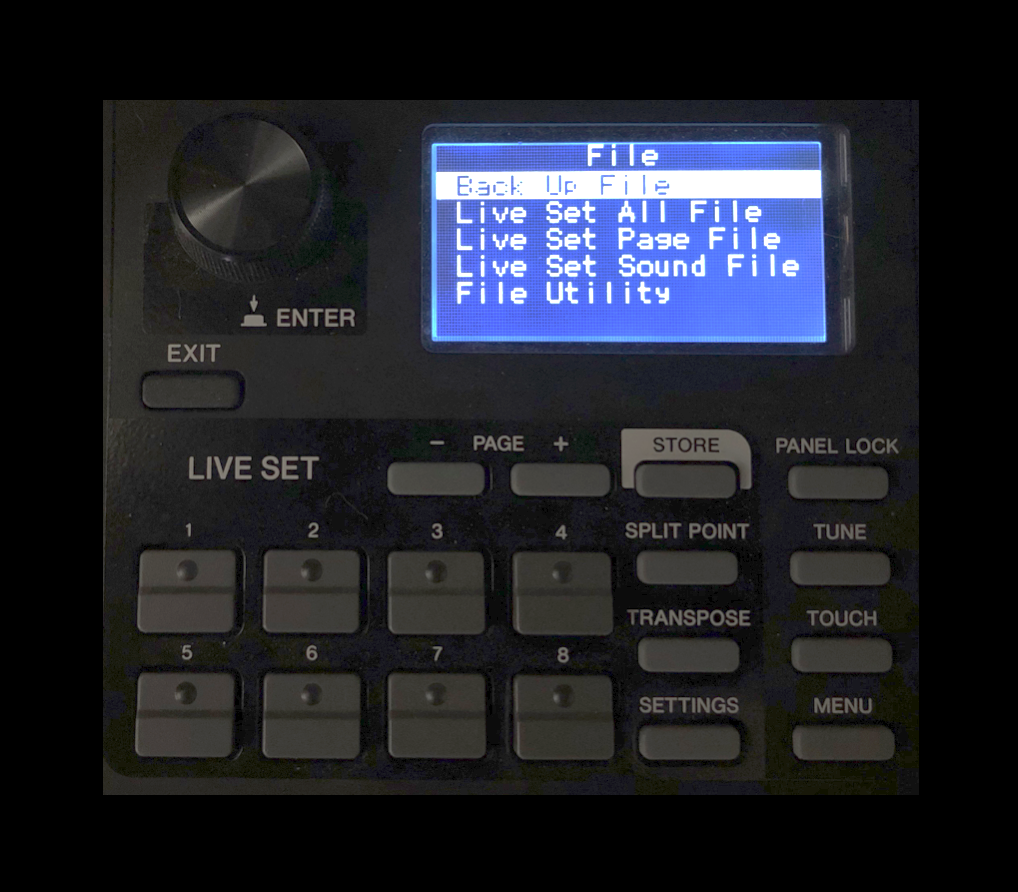
This is all about saving, loading, renaming and formatting.
Back Up File: Saves or loads all the data stored in CP73/88 including the system settings to a USB flash drive as a “Back Up File” with the extension “.X9A”.
LIVE SET All File: Saves or loads all the LIVE SET data stored in this instrument but NOT the system settings to a USB flash drive as a “LIVE SET All File” with the extension “.X9L”.
LIVE SET Page File: Saves or loads a LIVE SET Page (Eight LIVE SETS) stored in CP73/88 to a USB flash drive as a “LIVE SET Page File” with the extension “.X9P”.
LIVE SET File: Saves or loads a single LIVE SET stored in CP73/88 to a USB flash drive as “LIVE SET File” with the extension “.X9S”
File Utility: Allows you to “Rename” a file, “Delete” a file or “Format” a USB flash drive.
Version Info:
This shows the CP OS Version currently installed in your CP73/88.
Those are some of the highlights in the MENU section. Now let’s take a look at the SETTINGS which work with LIVE SETS. SETTINGS are saved with each Live Set Sound.
SETTINGS
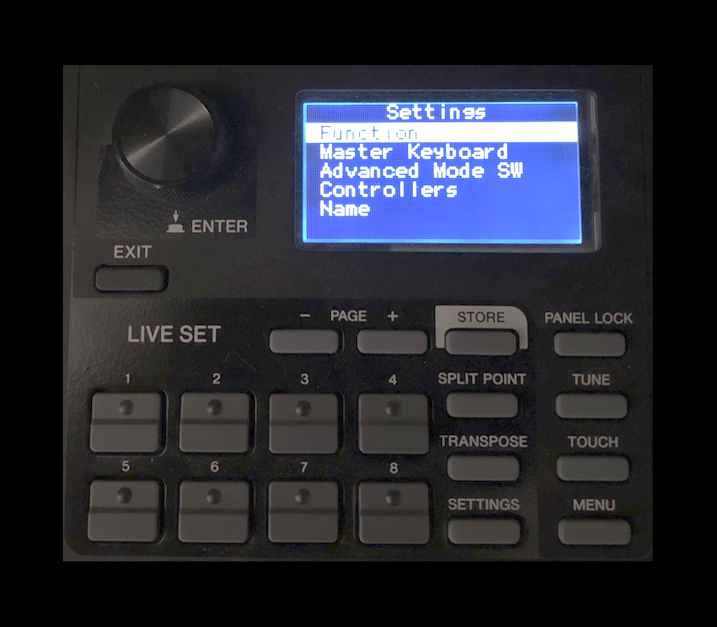
Press the [SETTINGS] button to see the items you can select:
Function
Under the Function Sub Menu you have two selections: “Sound Transpose” and “Split Point”. You can transpose CP73/88 by +/- 12 semitones and you can set a Split anywhere on the keyboard. There are of course dedicated buttons directly above the [SETTINGS] button to accomplish the same thing.
Master Keyboard
This sets up Master Keyboard control features to set up CP73/88 as a four Zone Master Keyboard Controller. The diagram below shows one possible way you could set up the CP73/88 with three external instruments assigned to three Zones: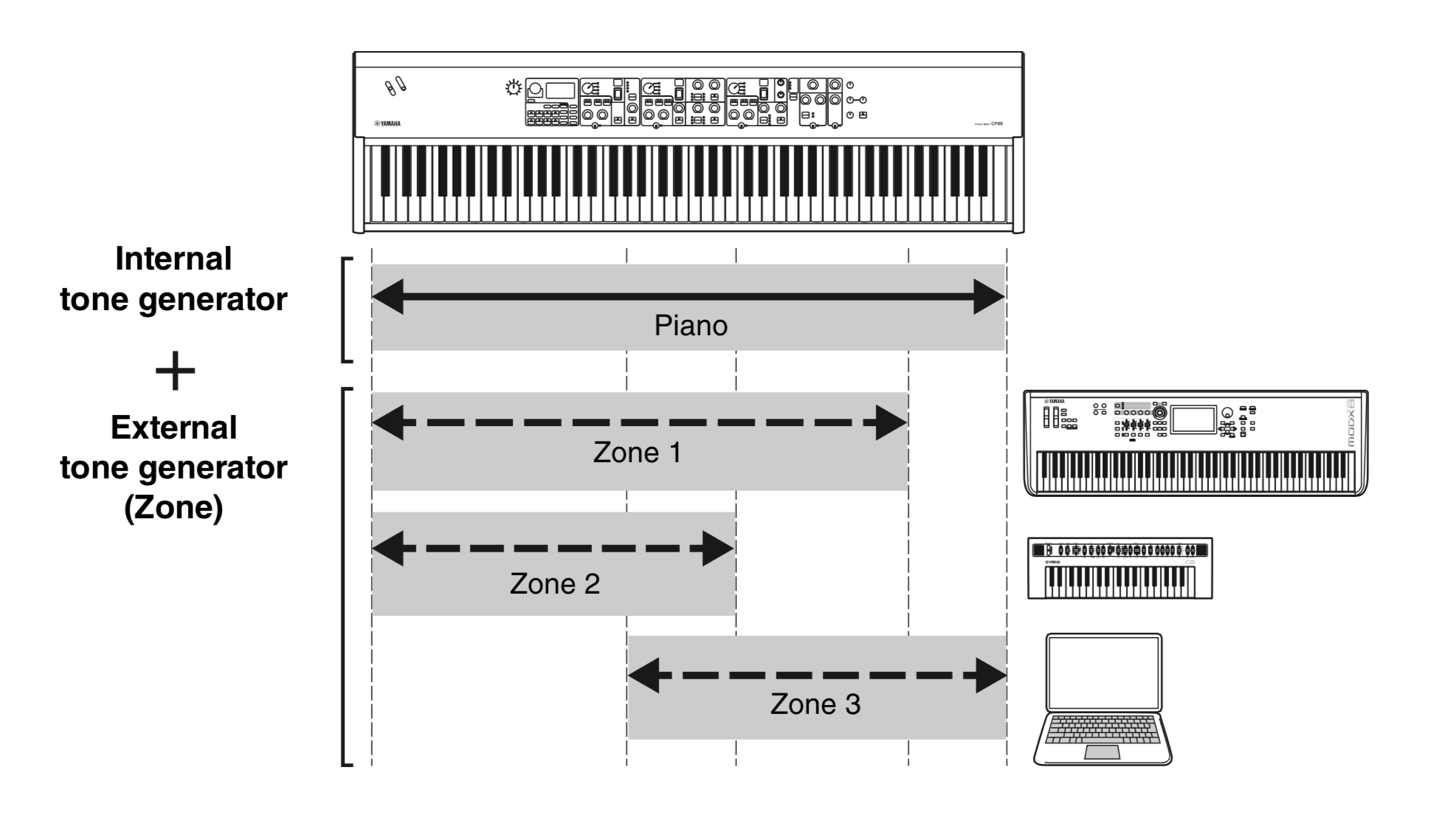
Take a look at the Sub Menu under Master Keyboard:
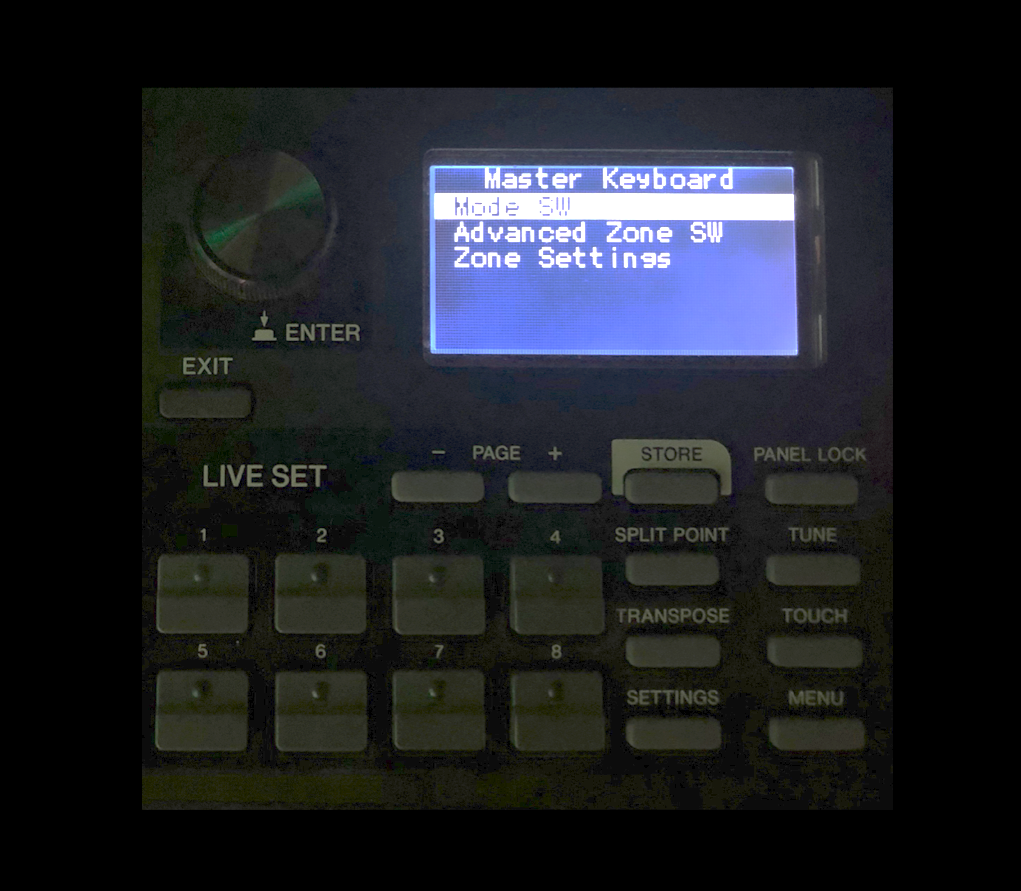
- Mode SW: This switches the Master Keyboard Mode settings. When “On” is selected, the Master Keyboard Mode is enabled, and the indication appears on the LIVE SET screen:
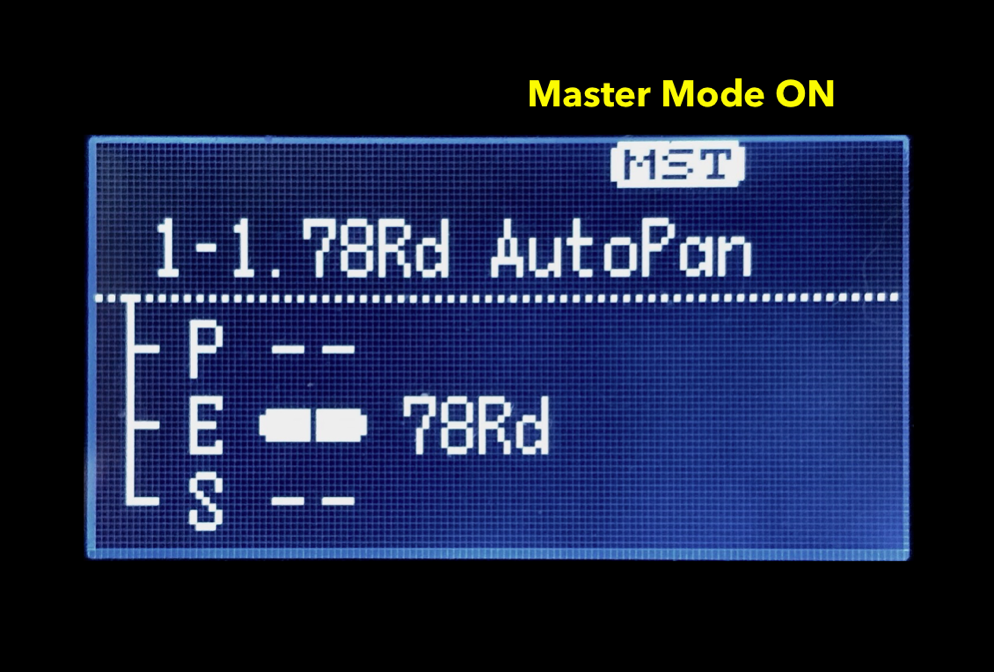
When the Mode SW is ON. basic parameters can be set. In the image below I skipped down to “Zone Settings” to view the basic parameters available when the Mode SW is ON:
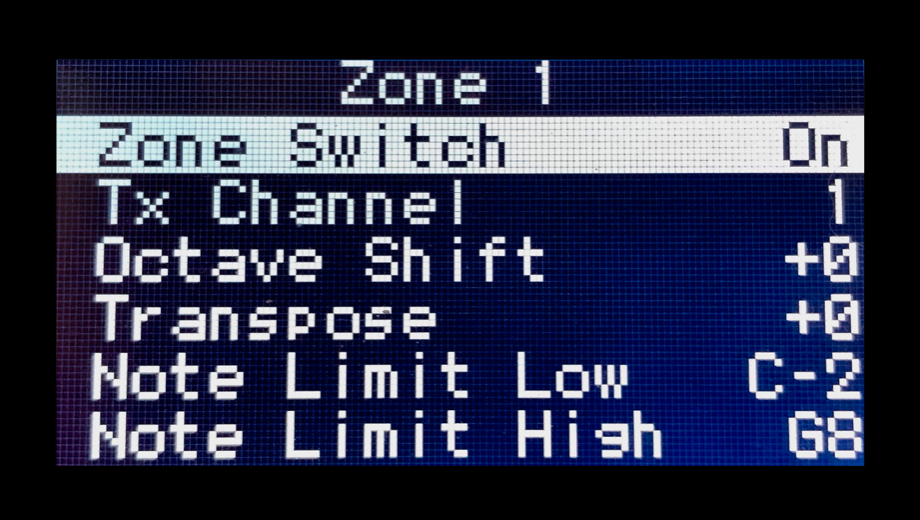
If you want more detailed Zone control you will want to engage the Advanced Zone SW.
Advanced Zone SW
With the Mode SW ON you get the settings above, but turning the Advanced Mode SW ON allows the following parameters (Advanced Mode parameters in highlight):
- Zone Switch: Determines whether to enable (On) or disable (Off) the currently selected Zone.
- Tx (Transmit) Channel: Determines the MIDI transmit channel for the currently selected Zone.
- Octave Shift: Shifts the pitch of the currently selected Zone by octaves.
- Transpose: Transposes the pitch of the currently selected Zone in semitones.
- Note Limit Low: Determines the lowest key in the currently selected Zone.
- Note Limit High: Determines the highest key in the currently selected Zone.
- Bank MSB: Determines the Bank Select MSB to be sent as a MIDI message from the currently selected Zone to an external instrument.
- Bank LSB: Determines the Bank Select LSB to be sent as a MIDI message from the currently selected Zone to an external instrument.
- Program Change: Determines the Program Change Number to be sent as a MIDI message from the currently selected Zone to an external instrument.
- Volume: Determines the volume an external instrument corresponding to the currently selected Zone.
- Pan: Determines the stereo panning of an external instrument corresponding to the currently selected Zone.
- Tx SW Note: Determines if MIDI note messages are sent from the currently selected Zone to an external instrument.
- Tx SW Bank: Determines if MIDI Bank Select messages are sent from the currently selected zone an external instrument.
- Tx SW Program: Determines if MIDI Program Change messages are sent from the currently selected Zone to an external instrument.
- Tx SW Volume: Determines if Volume (CC7) messages are sent from the currently selected Zone to an external instrument.
- Tx SW Pan: Determines if Pan (CC10) messages are sent from the currently selected Zone to an external instrument.
- Tx SW PB: Determines if Pitchbend messages are sent from the currently selected Zone to an external instrument.
- Tx SW MOD: Determines if Modulation (CC1) messages are sent from the currently selected Zone to an external instrument.
- Tx SW Sustain: Determines if Sustain (CC64) messages are sent from the currently selected Zone to an external instrument.
- Tx SW FS: Determines if the assignable Foot Switch sends MIDI messages from the currently selected Zone to an external instrument (FS control assignment takes place in the MENU).
- Tx SW FC1: Determines if the Foot Controller 1 sends MIDI messages from the currently selected Zone to an external instrument (FC1 control assignment is made under “Controllers” below and the default is CC11, Expression).
- Tx SW FC2: Determines if the Foot Controller 2 sends MIDI messages from the currently selected Zone to an external instrument (FC1 control assignment is made under “Controllers” below and the default is CC4, which defaults to the Pedal Wah effect).
So where do you set all of these control settings? That’s what Zone Settings are all about.
Zone Settings
This is where each of the four Zones are configured. Selecting any of these gives you the parameter selections mentioned above.
Advanced Mode SW
This engaged Advanced Mode for each of the three Sections. For an article about how to use this check out “Mastering CP: Advanced Mode”.
Controllers
Here you can set up physical controllers for each Section. Take a look at the CP73/88 screen below:
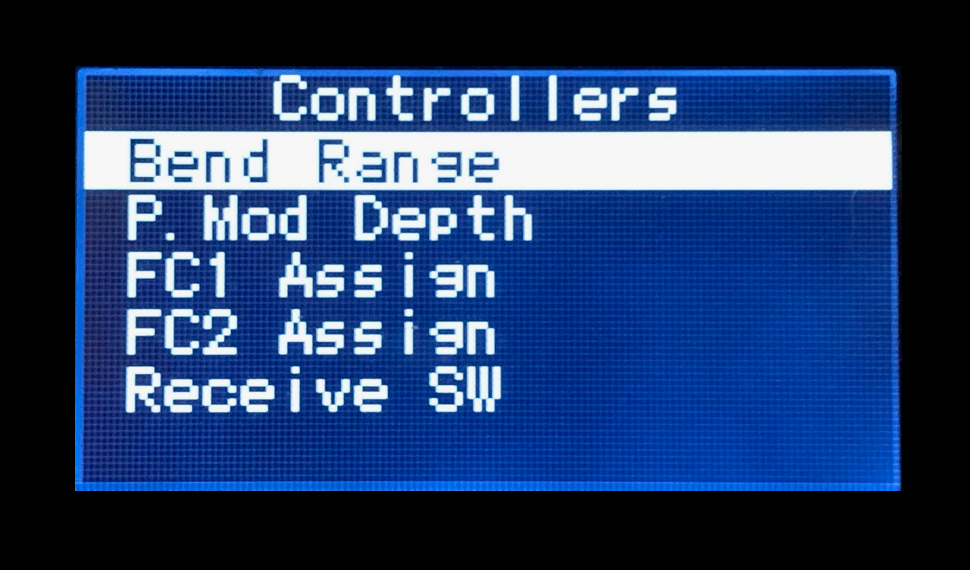
In this screen you can make the following settings for each selection:
- Bend Range: You can set the pitch bend range for each Section independently +/- 24 semitones. Default is +2 for each Section
- P. Mod Depth: You can set the Pitch Modulation Depth of the Modulation lever for each Section independently from 0-127. Default is 0 for the Piano and E.Piano Sections and +10 for the Sub Section.
- FC1 Assign: This is where you can set the MIDI CC for Foot Controller 1. Default is CC11, Expression.
- FC2 Assign: This is where you can set the MIDI CC for Foot Controller 2. Default is CC4, Foot Controller which internally controls the Pedal Wah effect
- Receive SW: Here you can set whether or not Foot Controller or Foot Switch messages are received or ignored for each Section. This works if you are using an external MIDI controller as well. Expression, Sustain, Sostenuto and Soft are can be set to ON or OFF for each section. The default is all ON.
Name
Last but not least, this is where you name your LIVE SET.
Understanding how the MENU and SETTINGS function will help you get the most out of your CP73/88. Stay tuned for more articles in the “Master CP” article series coming soon!
Have thoughts / comments? Join the conversation in the Forum here.

