Blake’s Take:
E.S.P. for MONTAGE M

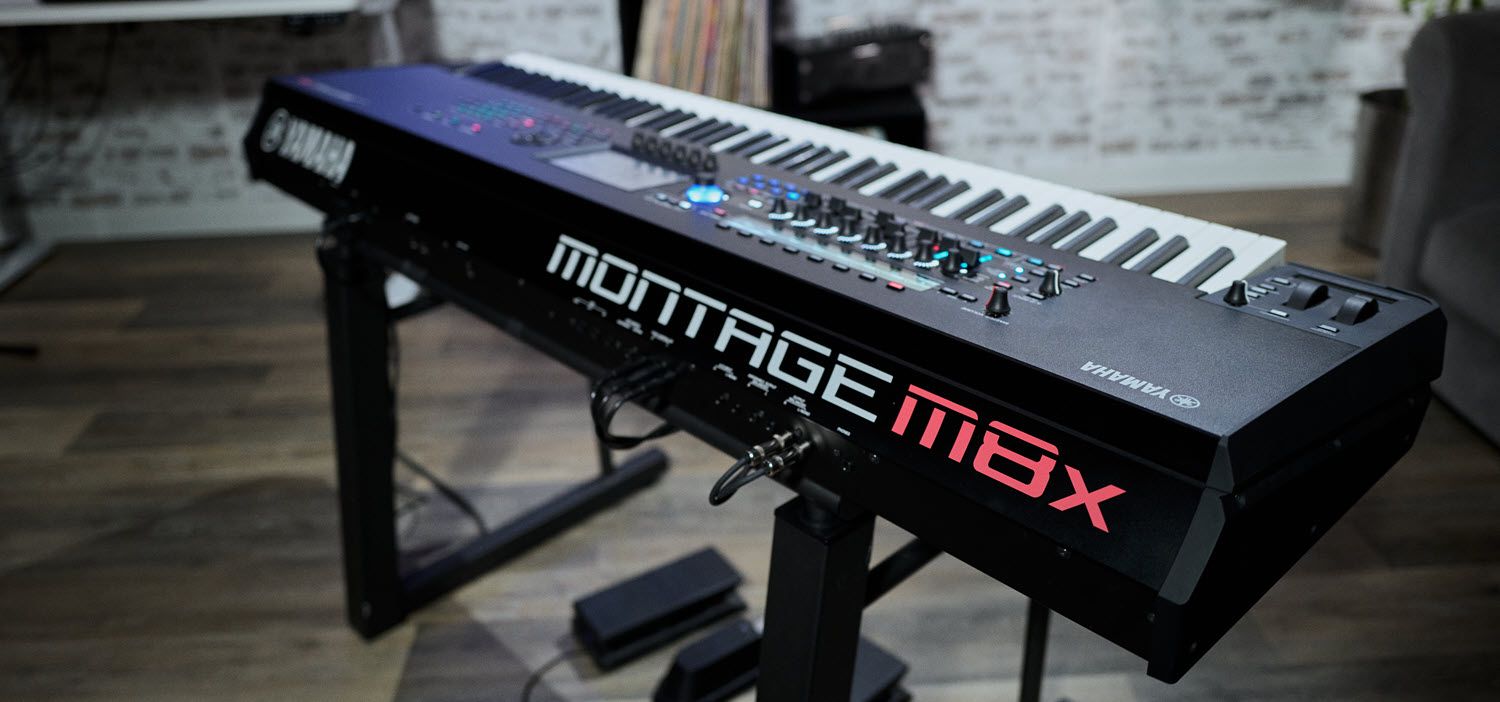
The MONTAGE M Expanded Softsynth Plugin (E.S.P.) is here – putting MONTAGE M in your computer!

This initial “Quick Edit “version offers MONTAGE M sound plus basic editing. Future versions (coming soon) will add full editing, enhanced connectivity and more. Read on to learn more.

UPDATE: Get MONTAGE M OS v1.22 here! This update fixes previous connection issues.

E.S.P. Computer Hardware and Software Requirements:

  • Hardware
    • Windows: Windows 10 or later. 64-bit required
      • Plugin format: VST 3.
      • Minimum CPU: Intel Core i5 (4th Gen)
      Mac: MacOS Monterey or later
      • Plugin format: VST 3, AU v2.
      • Minimum CPU: Intel Core i5 (late 2015 or later) or Apple Silicon M1 or later. Apple Silicon M series processor is recommended.
      Minimum system memory: 8 Gb RAM or more
      • Storage required: 10 Gb free space.
      • Display resolution: 1440 x 870 or above recommended.
  • Software
    • MONTAGE OS v1.22: E.S.P. Quick Edit requires MONTAGE M OS v1.22. This latest OS version adds additional integration components for seamless connection between MONTAGE M and E.S.P. Get MONTAGE M OS v1.22 here. Please see the READ ME file included with the MONTAGE M OS v1.22 download package for more information.
    • DAW: E.S.P. is available in VST3 and Apple AU Plugin formats. If you don’t own DAW software, no worries: MONTAGE M owners can download Cubase AI for Mac or PC here free of charge. In the box with MONTAGE M is the Cubase AI Download Information card. It looks like this:

If you need to download Cubase AI follow the instructions at the link above.

You’ll also need the authorization code printed at the bottom of the Expanded Softsynth Plugin for MONTAGE M Download information Card that came in the box with your MONTAGE M. It looks like this:

Follow the authorization and installation instructions located HERE to get to get the Expanded Softsynth Plugin for MONTAGE M.

E.S.P. in Cubase

Let’s look at E.S.P. in Cubase. I’ve opened a blank Cubase Project. I’ve connected MONTAGE M via USB with the Yamaha Steinberg USB Driver. The quickest method for adding E.S.P. to my project is the Instrument Track:

When the Instrument Track is added the main E.S.P. Quick Edit screen appears. This is the Performance “CFX + FM EP”, the tried-and-true CFX Concert Grand with FM-X classic EP. When you move the Super Knob on your MONTAGE M it will respond in E.S.P. in the same way as the hardware: All the way to the right is just CFX, all the way life is FM-X electric piano, and the center is the balanced layer of both Voices. Click on the magnifying glass right next the Performance (see the red box) to call up Category Search:

This opens the MONTAGE M Category Search window in E.S.P. You’ll immediately notice familiar Preset Performances, the blue AND green text identifying Multipart and Single Part Performances respectively and the Main/Sub/Attribute Category Search Menu:

Use Category Search in the same way you would on MONTAGE M. In the example below I searched Main Pad/Choir, Sub Analog, and Attribute AN-X:

I selected the AN-X Performance “Peaceful Gardens” from this list. Here is the main window with Part 1 selected:

E.S.P. Quick Edit mirrors the MONTAGE M Quick Edit controls in the 512 x 64 screen. You have Part controls like Mute, Solo, Pan and Volume on the right. Note the Super Knob control as well. A connected MONTAGE M can control the E.S.P. Super Knob. The Super Knob responds to a standard MIDI cc (default is cc 95) so it can be controlled by a different MIDI controller with an assignable knob. This underscores what I love about E.S.P.—When I’m away from my MONTAGE M I can play the same sounds from a different MIDI controller (In fact, as I write this, I am in a hotel room with reface CP connected playing E.S.P.).

In the Quick Edit Screen at the bottom, you’ll see three areas for Pitch, Filter, and EQ/Effect

You can view/edit at the Part Common level (parameters related to individual Parts of a Performance) by clicking the Part number, or Performance Common level (parameters related to all Parts) by clicking on COMMON. Check it out below:

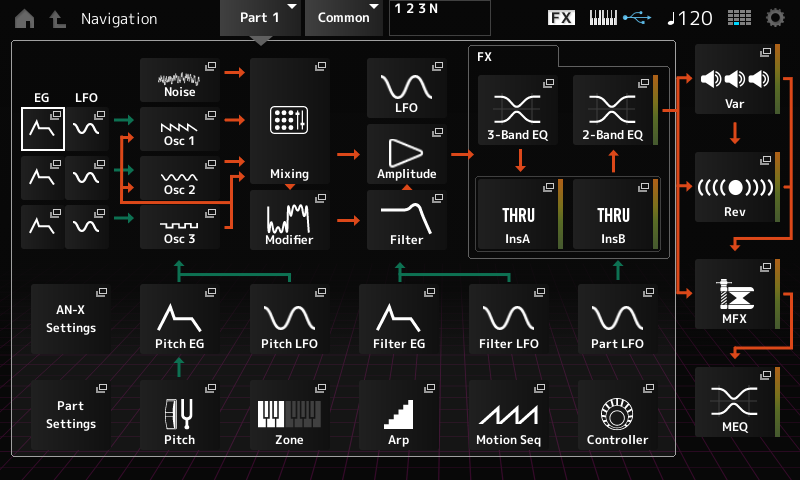
The Quick Edit view offers fast and easy access to high level sound shaping parameters. Signal flow and control graphics show you how parameter changes will alter the sound. Check out the Quick Edit view below:

Here’s a closer look at the bottom three boxes starting with the Pitch, Portamento Setting and Pitch LFO. The Pitch tab sets Part Note Shift, Detune and Pitch Bend Upper/Lower Range, the Portamento tab turns Portamento On/Off, Time and sets Portamento to Fingered or Full-time, and the Pitch LFO tab offers independent depth settings for each Oscillator, LFO speed control and LFO wave shape:

Next to Pitch settings are the Filter and Amplitude Settings. You have a choice between 10 filter resonant filter types, cutoff and resonance settings, Filter EG and LFO, and Amplitude EG and LFO. Check it out:

The Quick Edit area on the right is for Part EQ and Insertion Effect offsets. You have a Part three band EQ with gain and frequency settings, two Part Effects with effect offset controls and a final two-band Part EQ with five settings:

Over on the right you’ll see the double chevron button that changes the view to Motion Sequence or Arpeggio offsets. E.S.P. Quick Edit offers only top-level editing, so deep Motion Sequence or Arpeggio Editing isn’t available yet, but you can add Preset Arpeggios with this version. Check it out:

AWM2, FM-X and Multipart Performances

The Part Editor of an AWM2 Performance has a similar layout with Quick Edit parameters for Pitch, Filter, Amplitude, LFO, EQ and Insertion Effects. With AWM2 Parts you see Element Settings:

Each Part Element has settings for Level, Element Switch on/off, Pan, Filter Type, Cutoff, Element EQ, Note Limit, Velocity Limit and Element Name. Even though this is a Quick Edit version, you still have a solid number of parameters you can edit. For deeper editing you can sync with your MONTAGE M. Send the Performance over, make deeper edits those edits and send it back to E.S.P. More on that in a moment. Here’s the great MONTAGE M Multipart Performance “sFz Tremolo BPM Sync”in E.S.P., Performance Common level:

Here’s an FM-X Performance. Here you have Operator settings and the handy FM Color editor with controls for FM Depth, Harmonics and Texture:

Synchronization with MONTAGE M

Synchronization allows you to send Performances between E.S.P. and MONTAGE M. The Sync Icon Is located at the top of the editor. When connected, MONTAGE M appears as a four-port MIDI interface. The Ports handle data transmission in this manner:

  • MONTAGE M Port 1: MONTAGE M Tone Generator.
  • MONTAGE M Port 2: DAW Remote Control.
  • MONTAGE M Port 3: Turns the MONTAGE M physical MIDI I/O into a MIDI interface
  • MONTAGE M Port 4: Used for connection to E.S.P.

Here’s how E.S.P. Sync appears in MONTAGE M:

This is cool for a few reasons. I put a song together at home using E.S.P. and my MONTAGE M8x. The song has several Performances that I created in MONTAGE M and sent over to E.S.P. and saved in a Cubase Project. I left home, when to another location with a different MONTAGE M and connected it to Cubase. If I had forgotten to save a User file or Backup file from my MONTAGE M there are no worries because I synced MONTAGE to E.S.P., and all I need to do is send from E.S.P. to the new MONTAGE M. This is a great feature for touring musicians, worship players or anyone who needs to use multiple MONTAGE M keyboards for whatever reason.

Of course, the real benefit of the Expanded Softsynth Plugin for MONTAGE M is the considerable power it adds. You can open multiple instances in a DAW and drastically increase your music making potential. With modern computer systems the horsepower needed is completely within reach and won’t cost a fortune. E.S.P. is a powerful update to MONTAGE M. And best of all, it’s free for all MONTAGE M owners.

MONTAGE M Owners: Download the installation guide for the free Expanded Softsynth Plugin for MONTAGE M here.

Blake’s Take: SEQTRAK

Capture, Create and Connect: That’s the focus of SEQTRAK. This compact and lightweight box gives modern creators powerful tools to create compelling music quickly and easily. SEQTRAK is packed with lots of great sounds, effects, multitrack step sequencing, real-time control, and both wired and wireless connectivity options. And if that’s not enough, the free SEQTRAK App offers visual sound and sequence editing, project management, an interactive tutorial app and a unique Visualizer feature for adding animations to your music that you can share to social media and more. There’s nothing quite like it that offers so much in such a compact package.

SEQTRAK Overview

What’s in the Box?

SEQTRAK comes with the following accessories in the box:

  • USB-C Cable
  • MIDI Breakout Cable
  • Quick Operation Guide/Safety Guide

SEQTRAK Basics

SEQTRAK comes in two models, SEQTRAK OR and SEQTRAK BK. SEQTRAK BK features dark grey and black design and SEQTRAK OR features orange and white design. This is the only difference, and both models are identical under the hood:

Looking at the front panel you’ll see that SEQTRAK is divided into three sections for Drums, Synth and Sound Design/FX:

SEQTRAK’s tone generator features AWM2, FM Synthesis, an onboard Sampler, and comprehensive effects. 

  • SYNTH 1 & 2 (AWM2): In the 128-note polyphonic AWM2 engine, MOTIF users will recognize versions of classic sounds like “Full Concert Grand”, the phaser EP “Sweetness”, the dynamic classical guitar “Nylon Side Vel” and more. You’ll find lots of pianos, electric pianos, acoustic and electric guitars, brass, woodwinds, and strings.
  • DX (FM): The 4 Operator, 8-note polyphonic FM synth like reface DX and comes with lots of great synth basses, leads, pads, synth strings and cool special effects.
  • SAMPLER: The onboard sampler features 392 presets loadable from the SEQTRAK App. You can sample external sounds via the built in internal MEMS (Micro-Electromechanical Systems) microphone, the stereo 1/8” mini-input or from computer or mobile device via the USB-C connection. More on on this below.
  • Effects: You get twelve Reverb types, nine Delay types and 85 Master Effect types. And if that’s not enough, each of SEQTRAK’s Eleven Tracks can have their own dedicated effect. There’s also a Master 5-band EQ and LP/HP filters available for each Track!

Music data in SEQTRAK is configured in a hierarchy of Projects, Tracks within Projects, and Patterns within Tracks. You can have a single Project active at one time, and you can store up to eight Projects in SEQTRAK. Each Track has up to six different Patterns available to choose from during playback. Check it out:

Tracks and Panel Overview

For music production SEQTRAK offers a total of eleven Tracks. There are three types of Tracks: Drum Tracks, Synth Tracks (SYNTH 1, SYNTH 2, and DX), and a Sampler Track. Tracks are set on their own MIDI channel corresponding with Track number:

  • Track one: Kick
  • Track two: Snare
  • Track three: Clap
  • Track four: Hat 1
  • Track five: Hat 2
  • Track six: Perc 1
  • Track seven: Perc 2
  • Track eight: Synth 1
  • Track nine: Synth 2
  • Track ten: DX (FM Synthesizer)
  • Track eleven: Sampler

The default length of a Pattern is one 16 step measure, but Patterns can be as long as eight/128 steps (with any step length in  between!). That gives you a lot to work with since each Track can have up to six different Pattern variations that you can freely combine. Track recording is accomplished using the keys located at the bottom of SEQTRAK. You can record Drum Tracks using the 16 Drum Keys. The Synth/Sampler Keys trigger notes and can play single line parts or chords when set to chord mode. Synth/Sampler Keys are recorded in real time and, with live record quantization set to 1/16th note byu default. With the SEQTRAK App you can record quantization to 1/32, 1/16T, 1/16 (default), 1/8T, 1/8, or OFF. You can connect a MIDI controller to SEQTRAK, play and record sounds in real time, too.

On SEQTRAK there are 16 Drum keys for drum step recording and 7 Synth/Sampler keys with a Record key for realtime entry:

The Knobs in the Drum and Synth Sections are used to change Patterns:

  • [ALL] Knob changes all Patterns on all Tracks (in red below).
  • Track Knobs change Patterns only on the dedicated Track (in yellow below).
  • Pushing down on a Part Knob auditions the sound assigned to the Track:

Check out the top, bottom and side buttons and the physical connections on SEQTRAK:

Buttons on the right side (highlighted in cyan above) are for control and editing music data:

  • [VOL+] & [VOL-]: Adjusts the volume of sound coming from the built-in speaker or headphones connected to the [PHONES] jack.
  • [DELETE]: Deletes a pattern or project.
  • [MUTE]: Mutes a specific Track.
  • [SOLO]: Solos a specific Track.
  • [PAGE]: Switches the range of patterns (pages) displayed on the Drum keys and to change the length of the patterns on the Drum Tracks.
  • [PLAY]: Starts and stops playback and Powers SEQTRAK on/off.

Buttons and connections on the left side (highlighted in yellow above) are for connectivity and Project level parameters:

  • USB-C Connector: The included USB-C cable can be used to Charge SEQTRAK and connect to computers, mobile devices and even MIDI gear that can interface over USB like MONTAGE M and MODX+!
  • 1/8” Headphone Out: Connect headphones, or connect to studio monitors.
  • 1/8” Stereo Audio In: Use for audio input (stereo mini jack).
  • MIDI Breakout: Use for connecting an external MIDI device.
  • [BPM+] & [BPM-]: Adjusts the Project tempo between 5 and 300 BPM. Pressing both buttons simultaneously resets the tempo to the Project’s original tempo.
  • [SWING]: Applies swing to the entire project.
  • [PROJECT]: Selects one of the eight available Projects.

The five Synth Section buttons on the top (highlighted in red above) control Synth Section parameters:

  • [BAR LENGTH]: Change the length of the pattern for the currently selected Synth Track (SYNTH 1, SYNTH 2, DX) and SAMPLER Track.
  • [OCTAVE]: Change octave of the selected Synth Part.
  • [SCALE]: Change the keyboard scale that is used when the Synth keys are pressed.
  • [KEY]: Change the keyboard key that is used when the Synth keys are pressed, in half steps.
  • [REC SAMPLE]: Sample on the SAMPLER Track.

Two buttons on the top (also highlighted in red above) in the Sound Design Section do the following:

  • [UNDO/REDO]: Used to UNDO/REDO sound and effect parameter changes.
  • [CLEAR FX]: Press to reduce an effect to the minimum level.

And finally, there are two buttons on the bottom of SEQTRAK in the Sound Design Section (highlighted in white above):

  • Sound Design Page: Press to switch between the sound parameters controlled by the Sound Design knobs.
  • FX Page: Press to change the parameters controlled by the touch sliders.

Once you get familiar with the user interface, you’ll discover just how much you can do right from the front panel. The Quick Guide and User Manual are well organized, clear, and concise. Music creation is fast and easy. And SEQTRAK gives you a dynamic interface for further production with the Sound Design Section. This where you can select sounds, change the pitch, pan position and volume of sounds, adjust the envelope and filter settings, and adjust effects levels. Check it out:

The sound design section makes real-time changes fast and easy. And when it comes down to the final mix, SEQTRAK provides a cool Mixer Mode that turns the entire front panel into a mixer. All Track panel lamps turn blue, the selected Track turns yellow, and the four Sound Design Knobs change to mixing functions:

SEQTRAK Connectivity and Rechargeable Battery

You have multiple ways to connect SEQTRAK to your devices. Onboard you have USB-C, Bluetooth, WiFi and MIDI In/Out with the included MIDI Breakout cable. Each connection type serves a different purpose:

  • USB-C: Connect USB-C to a computer or mobile device for stereo audio I/O to and from a computer or mobile device. You also power and recharge the internal battery with the USB-C connection. You can use USB-C for Project and Sound Management, too.
  • Bluetooth: Built-in Bluetooth connects SEQTRAK to the App wirelessly. More on that below.
  • WiFi: The built-in 2.4 GHz WiFi connection is used for exclusively for Project and Sound Management and can be used simultaneously with the other connections. You can choose to connect directly to a mobile device or an external access point like your home WiFi router.
  • MIDI Breakout: The included MIDI breakout cable connects to the MIDI port on the right side of SEQTRAK. It provides standard 5-pin MIDI IN/OUT connectivity for use with external keyboard controllers and tone generators.

Create while connected to power or not. With SEQTRAK, batteries are included! SEQTRAK comes with a rechargeable lithium-ion battery that provides 3-4 hours of power on a single charge. Charging happens through the USB-C port. Simply connect to a USB-C port on a computer or use an external USB-C power supply like the one you might have for a mobile device.

SEQTRAK App

SEQTRAK’s hardware user interface is so cool, and there’s much more you can accomplish right from the front panel. However, the SEQTRAK App really streamlines workflow and best of all it’s free and available on multiple platforms. Get it here:

The SEQTRAK App offers a suite of tools to help you create, edit, manage files, learn the hardware, and create cool animations to go with your music creations. It also includes the User Manual, Parameter List and FX Preset List. There’s even a handy Shortcut List that shows all the different button combinations on SEQTRAK that access deeper edit functions.

Device Connection

Connecting the hardware to the SEQTRAK App is where it all begins, and the App makes it and easy process. Open the SEQTRAK App and you’ll see this page:

For a wired connection simply connect the USB-C cable to a USC-C port on the device (iOS users with Apple Lightning connectors may need a Lightning to USB 3 Camera Adapter and USB-C Cable).

Bluetooth: To connect Bluetooth, enable on the external device and power on SEQTRAK and open the SEQTRAK App. You may see this:

Select “GO TO DEVICE CONNECTION”. On SEQTRAK, press and hold the [ALL] knob and the [SWING] button:

Your SEQTRAK will appear in the screen. Select the name (highlighted in the red square below) to connect:

Once connected you’ll be taken to the GUI Editor MASTER Page.

Dynamic Tutorial and Shortcut List

Before diving into the powerful GUI Editor, let’s explore the Dynamic Tutorial and Shortcut List. Select HOME in the right corner to go back to the main SEQTRAK App page and select DYNAMIC TUTORIAL:

The Dynamic Tutorial is an interactive guide that works with SEQTRAK, showing the functions of the knobs, buttons, and touch sliders as you interact with the hardware. It’s a fast, tactile, and visual way to learn SEQTRAK. Check it out:


Any control moved on SEQTRAK highlights the control in the tutorial, explains the function and provides related information on the right. In very little time you learn what you need to get started creating music. It’s a great place to start!

After checking out the Dynamic Tutorial a good thing to check out is the Shortcut List. This useful guide shows all the different button combinations accessing important features on SEQTRAK. Go back to the main SEQTRAK App page (Touch HOME in the upper right corner) and select “SHORTCUT LIST”:

SEQTRAK has a lot of two-button functions that are all listed in the manual, but the Shortcut List give you an organized way to see them in a single place:


Both the Dynamic Tutorial and Shortcut List are great ways to learn SEQTRAK hardware functions. But wait, there’s more!

GUI Editor

I think the star of the SEQTRAK App is the excellent GUI Editor. The editor is well organized, easy to use, allows you to edit sounds, effects, sequences and mixing parameters. You can use either the USB-C connection or Bluetooth for MIDI connection. From the HOME screen select “GUI EDITOR”:

When you open the GUI EDITOR the first page, you’ll see is the MASTER Overview. This page gives you an overview of the current Project. Across the top is where you select DRUMS, SYNTHS and SAMPLER Tracks, the PERFORM page for mixer and live performance setups, and the overall App SETTINGS page. Over on the right you’ll see the selection and parameter pages for EFFECT 1&2, Reverb and Delay SEND Effect settings and Master Compressor and EQ Settings. On the left is the “GUIDE”. These are three sets of four knobs that function as Quick Edit controls for various Track parameters. Check out the MASTER Page below:

Moving across the top you’ll see the DRUMS and SYNTHS/SAMPLER Pages. When you select DRUMS the list on the right shows the seven individual Drum Tracks: Kick, Snare, Clap, Hat 1, Hat 2, Perc 1 and Perc 2. Each Drum Track has its own Pitch, Pan and Volume Settings, Attack and Decay, High or Low Pass filter with resonance and a Track Effect. As previously mentioned, Drum Tracks are on their own MIDI channel, so you have independent MIDI CC control per Track. Next to the DRUMS are the SYNTHS/SAMPLER Pages accessing AWM2 Synths 1 & 2, the 4 Operator “DX” FM Synth and Sampler settings. Like the Drum Tracks, each Synth/Sampler Track is on its own MIDI channel:

A few things to point out in the screens above:

  1. The Synths and Sample Tracks have similar parameters like the Drum Tracks like Pan, Volume, High Pass or Low Pass resonant filter and Attack/Decay of the amplitude envelope. They also have the additional Sound Design Tab shown in the upper right. This adds an additional two-band EQ, LFO (with modulation destination settings, depth, and delay, LFO shape and LFO tempo sync), portamento settings and arpeggiator.
  2. The Sampler has three source settings:
    1. MIC/LINE IN: Use either the built in MEMS mic or source connected to the AUDIO IN Jack on the right side.
    1. RESAMPLING: This allows you to internally sample SEQTRAK. You can set up a groove, select RESAMPLE on as the Sampling Source and create a cool sample loop. SEQTRAK is a serious sample loop creation tool.
    1. USB: This allows you to sample incoming audio from a device connected via USB-C. This is a very, very cool feature offer unlimited sample content from the Internet and beyond.
  3. SEQTRAK has over 2000 sounds built in, and the App offers a familiar Category Search interface that makes finding the right sound fast and easy. The quality of sounds is superb, and lots of the content is derived from the MOTIF Series library.

The DX 4 Operator FM Synth engine has a great visual editor, too. It offers eight note polyphony and like the other Voices has a High or Low Pass resonant filter, Track Effect and two band EQ. Check out the DX Editor screens below:

Next to the SYNTHS/SAMPLER Page is the PERFORM Page. Here you’ll find essential multiTrack production tools like a Track MIXER, Effect SEND 1/2 and Pattern Selection controls. PAD/KEY gives you direct control over the sounds from the device. It’s especially cool with a touchscreen device. You can play chords with the Keyboard Input, Drums with the Pad Input, and both screens have record enable right there. I found this to be extremely handy when creating grooves on SEQTRAK:

WiFi Connection and Project/Sound Manager

For Project and Sound Management SEQTRAK offers the wired USB-C connection or wireless WiFi connection. You can either connect directly to devices or through a wireless network. The App has an information connection wizard that makes set up easy.  Once connected you can save and load Projects into one of eight memory locations on SEQTRAK, audition, choose and manage Track sounds and create a new Project.

When you are connected to the Project and Sound Manager three red lamps appear next the [ALL] Knob showing the SEQTRAK is connected. In this state it isn’t operable, but once you exit SEQTRAK returns to normal operation.

Visualizer

Here’s my “and one more thing” moment with SEQTRAK: The Visualizer! Visualizer allows you to create engaging visual animations for your SEQTRAK creations. Once created you can share them to social media. The editor is easy to use, gives you a library of presets that you can use right away, the ability to edit those presets and create your own and some deep object customization tools. I really like the uniqueness and ease of use of Visualizer:

User Manual, Parameter List, FX Preset List

The SEQTRAK App is really packed with a lot of cool features but doesn’t forget to include important resources like the online User Manual, Parameter and FX Preset Lists. It’s great to have all that reference included right in the App.

OS Update and Drivers

Get the latest SEQTRAK OS update right here. You’ll need the latest version of the YamahaSteinberg USB Driver, too:

Finally, there will be content packs coming with future App updates! Check back right here at YamahaSynth.com for more SEQTRAK news!

Conclusion

I have to say, the more time I spend with SEQTRAK the more I love what it offers. Under the hood you get great sounds, step and real time loop recording, sampling, built-in effects, and multiple connectivity options with Bluetooth MIDI, USB-C and WiFi. Throw in a rechargeable battery and built-in speaker, USB-C MIDI + Stereo audio interface and a standard MIDI breakout cable for connecting MIDI controllers. I want to emphasize that last part: When you connect a MIDI controller and play SEQTRAK sounds, you’ll be impressed. Derived from MOTIF content, they sound and play great, with lots of expressive response. For anyone looking to add a bit of MOTIF sound to their rig, SEQTRAK delivers. With all that said, the SEQTRAK App takes everything to an entirely different level. It’s easy to connect, easy to use, supports all the major platforms (Mac, PC, iOS, and Android) and even includes a cool Visualizer component. An entire channel could be dedicated to SEQTRAK content alone. SEQTRAK is truly a remarkable music production beast.

© 2024 Yamaha Corporation of America and Yamaha Corporation. All rights reserved.    Terms of Use | Privacy Policy | Contact Us