MONTAGE OS v2.5: Arp Record
In MONTAGE OS v2.5, the ability to choose whether or not to record data generated by the MONTAGE Arpeggiator was added. There are benefits to both approaches – I’ll cover that later in the article- but before getting into the new Arp record feature in MONTAGE OS v2.5, some background on Arpeggios might be helpful: why they are cool and basic concepts on how you can creatively use them.
One of the cool features of the MOTIF series was the inclusion of a large Arpeggio database, and each MOTIF version (MOTIF, MOTIF ES, MOTIF XS, MOTIF XF) added more Arp content over the years. With MONTAGE, all the 7881 Arpeggio phrases from MOTIF XF are included along with over 2000 more. Furthermore, because a MONTAGE Performance contains 8 directly playable Parts (as opposed to 4 playable Parts on MOTIF XF), 8 simultaneous Arpeggios can play simultaneously.
Arpeggios are great places to start when composing songs because you can get music happening immediately by playing a few chords—the Arpeggios do the rest! The Arpeggio engine and the database included with MONTAGE are a great feature, and there are a few articles on YamahaSynth covering Arps likeMastering MONTAGE:
The 4-Track Arpeggio
Mastering MONTAGE: Arp Rec on DAW
Arpeggio Making 101, Part I
Arpeggio Making 101, Part II
With Arpeggios, I find that sometimes there is confusion with what is actually being recorded by a sequencer. A question I have gotten many times over the years is: “I recorded this cool Arpeggio Performance but when I play it back in my computer sequencer all I get are single chords. How do I get all those notes to record?” That is what this article is all about: How to get all those notes to record, why that can be cool and why it can be cool to NOT record all those notes!
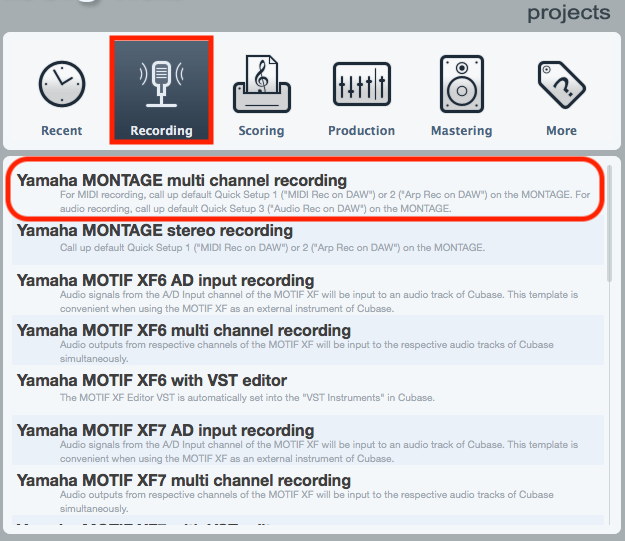
MIDI Rec on DAW/Arp Rec on DAW
MONTAGE actually has a visual way to show you the difference between the two ways Arps are recorded to a sequencer. Press [UTILITY] and touch “Settings” then Quick Setup” and touch “MIDI Rec on DAW”. The important thing to see is that the Arpeggiator sits after the MIDI output data path: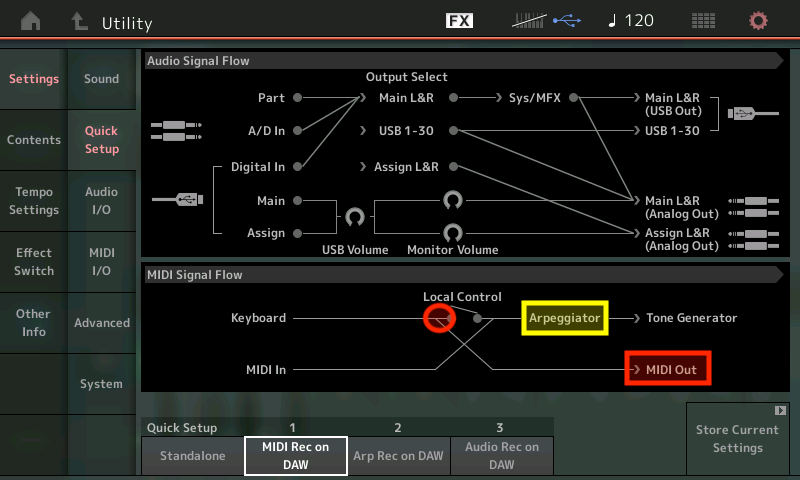 Now touch “Arp Rec on DAW”. The Arpeggiator now comes before the MIDI Out data path:
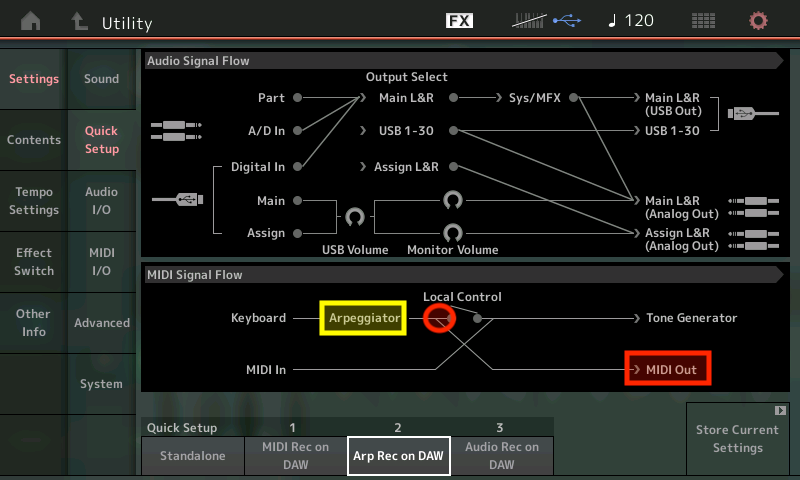 This is why this setting is called “Arp Rec on DAW”: The Arpeggio data comes before the MIDI out and passes to the DAW.
This choice is what you now have in MONTAGE OS v2.5 when recording to the onboard Performance Song Record: To record the notes that trigger the Arpeggiator, OR, to record the notes generated by the Arpeggiator. Both of these are useful for different reasons.
Recording the Performance “FM&AN Classic Arps” With and Without Arp
For this article I chose one of my favorite Arpeggio Performances “FM&AN Classic Arps”, a 4-Part Performance with 1 FM Part and 3 AWM2 Parts. Parts 1-3 have Arpeggios assigned and Part 4 is a nice Pad sound: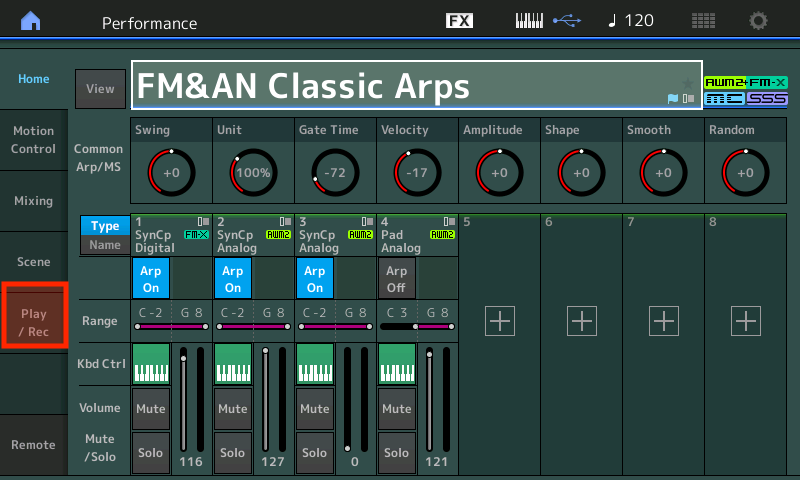 I recorded an 8-measure chord passage and created two separate songs. The first time I recorded with Arp Record “ON”. I then created a second song with the exact same chords but for that one I recorded with Arp Record “OFF”. Check it out below. Here is the first recording:
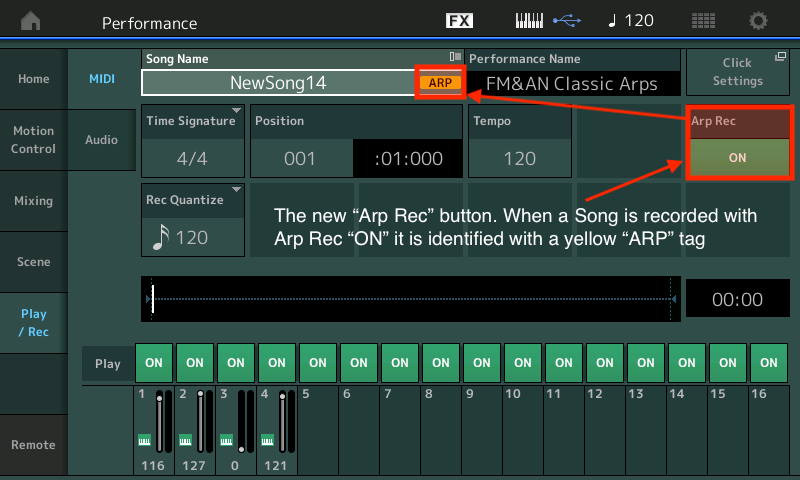 …and the second recording….
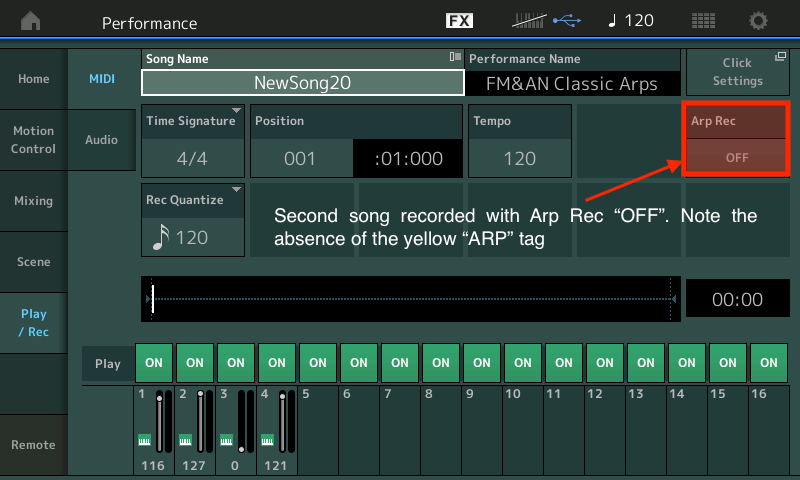 Now I have my two Song recordings. In the first version with Arp Rec “ON” the Arpeggio data was recorded as note data: The Arpeggiator sits before the Song Recorder. In the second version with Arp Rec “OFF”, only the chord data was recorded with no Arpeggio generated note data: The Arpeggiator sits after the Song Recorder.
After the Songs were created I named them “FM&AN_W-ARP” (with ARP) and “FM&AN_W-O ARP” (without ARP). Here they are in my MONTAGE (under Utility/Contents/Data Utility/Songs). Note the Arp tag appears in the actual file: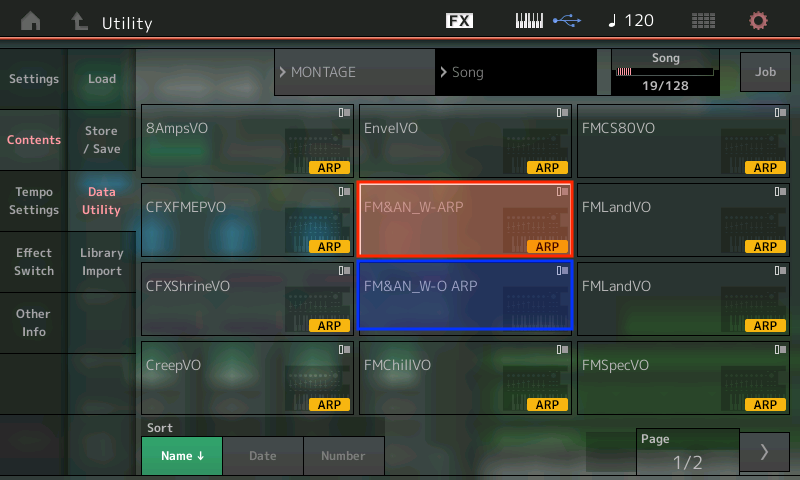
Importing the Songs into the DAW
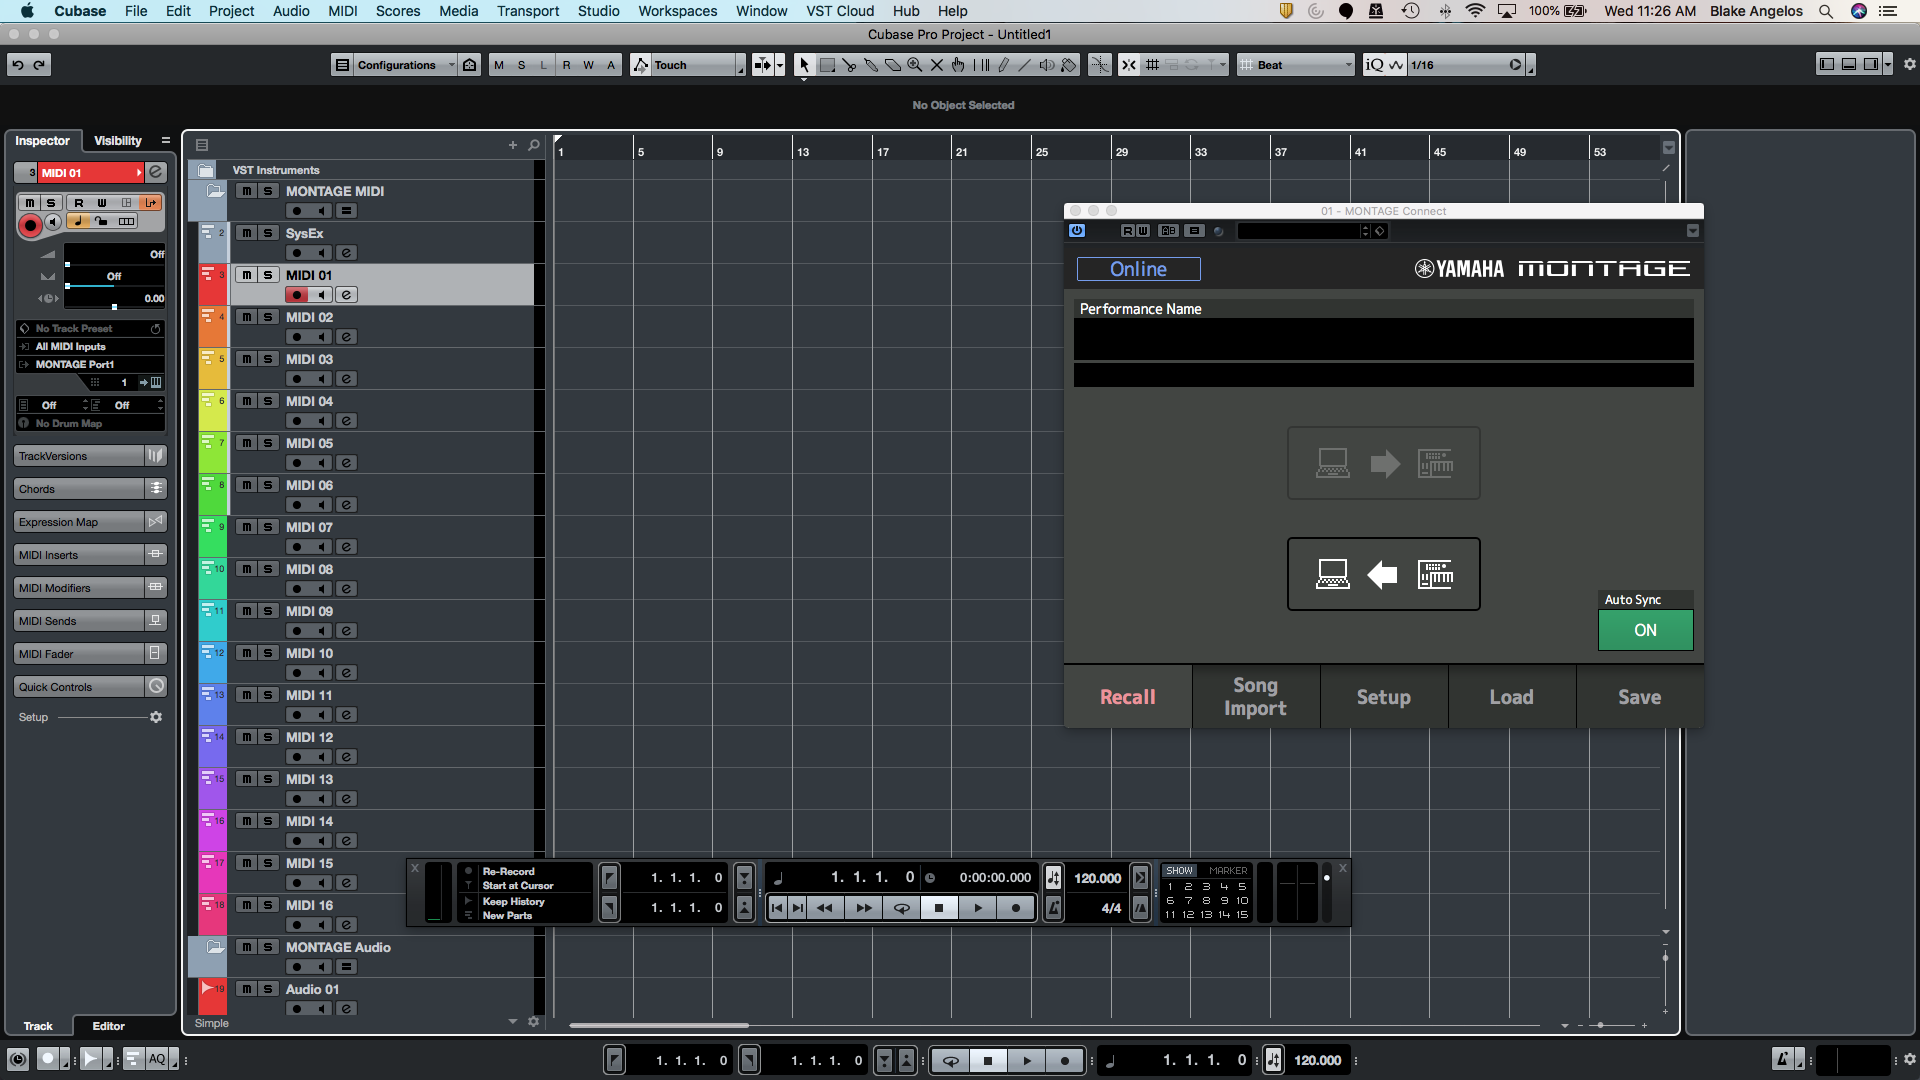
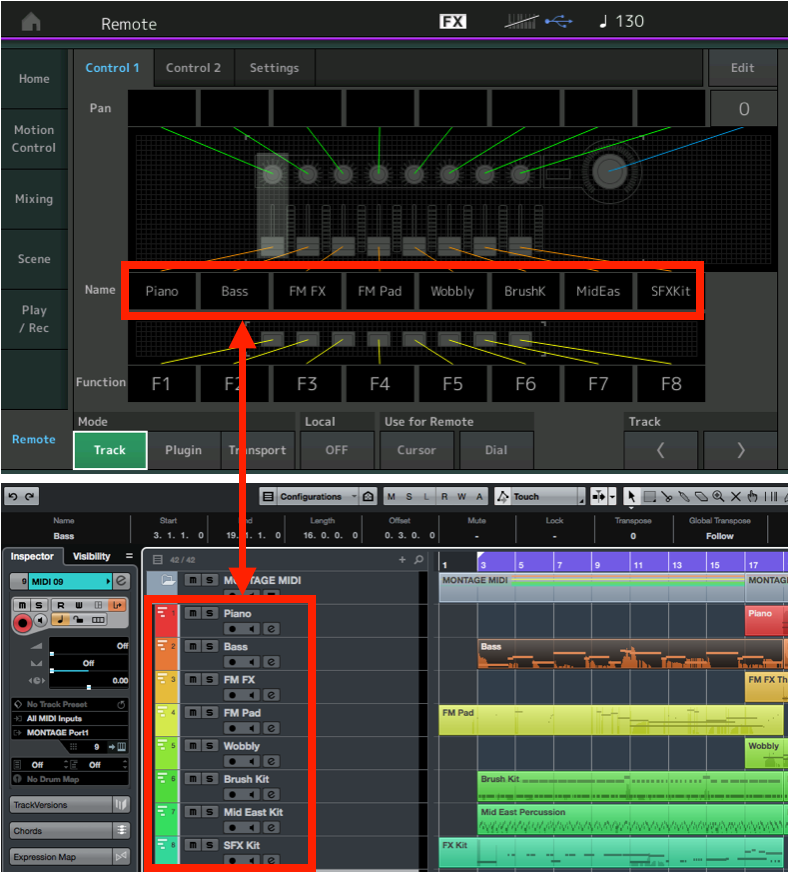
Let’s take a look at them in Cubase. To bring them into Cubase I could have exported them from MONTAGE as MIDI files to a flash drive, taken the flash drive out of MONTAGE and put it into the computer and loaded that way…OR I could just use MONTAGE Connect and simply drag them from the Connect right into Cubase. I chose MONTAGE Connect (obviously). Check it out below: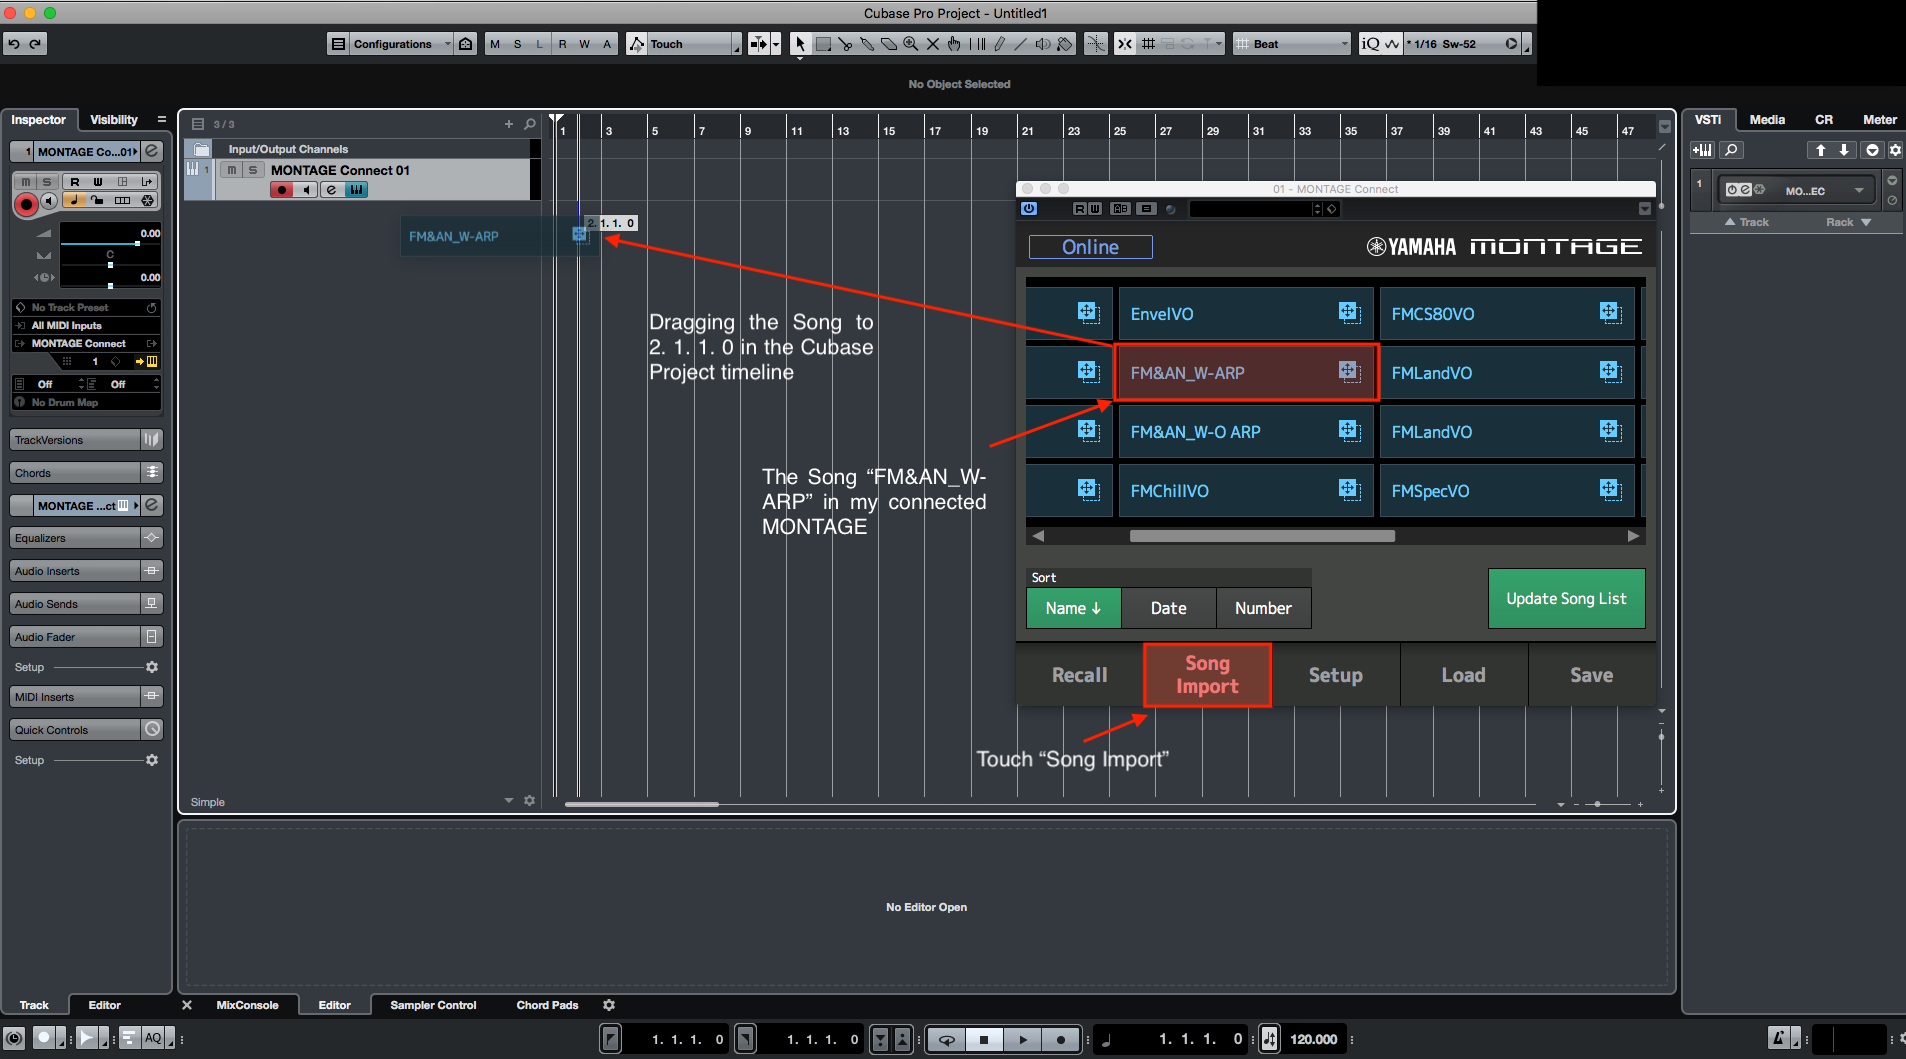 I dragged both songs over, created a marker track and named the tracks. Check out the difference between the files:
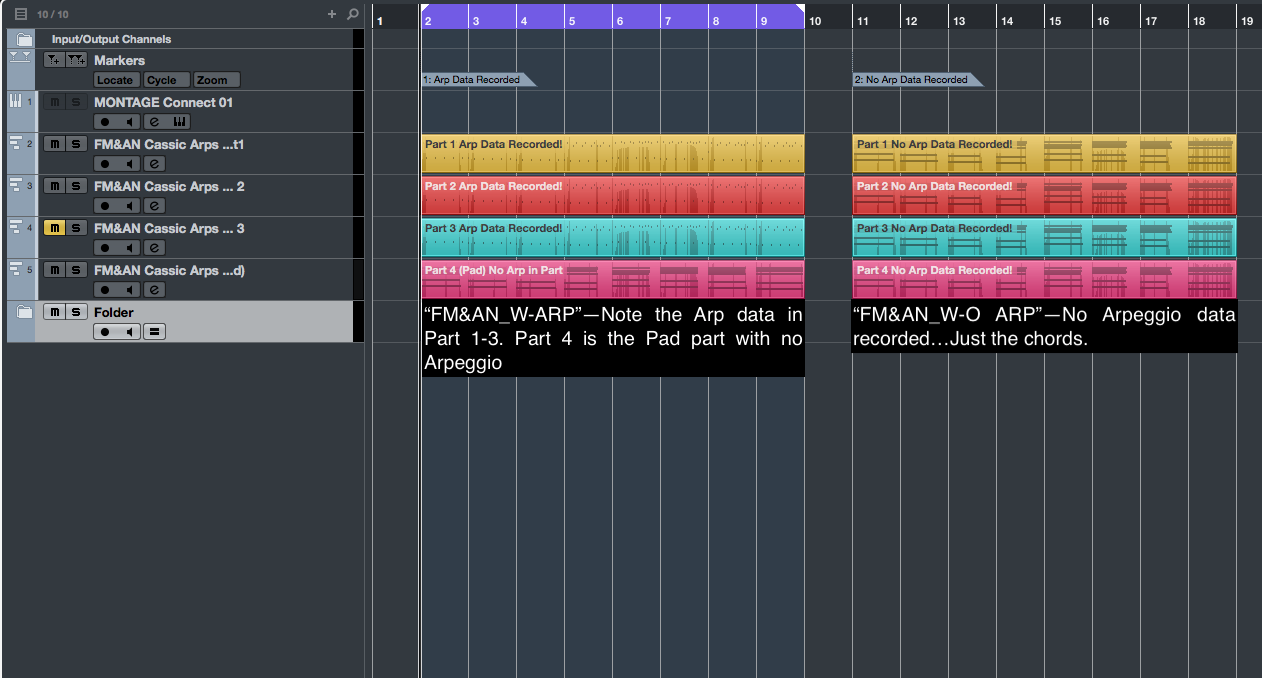
To Arp or Not to Arp…That is the Question
There are different reasons why you’d want to record Songs with Arp Rec ON or Arp Rec OFF:
ARP Rec ON:
With Arp Rec ON you get all the note data generated by the Arpeggiator. What I find creatively interesting is copying the tracks to virtual instruments or different external tone generators to come up with different sounds.
Quick Tip: When you record a MONTAGE Performance with Arps into a DAW and want to play them back correctly you MUST turn off all the Arps first! To do this press and hold [SHIFT} and touch the [ARP ON/OFF] button. This enables Arpeggio Bypass. If you don’t do this the notes coming back from the DAW will retrigger the Arpeggios in MONTAGE and it not sound as expected!
In the audio example below I used the Performance “FM&AN Classic Arps”, copied the Arp tracks to three different Virtual Instruments in Cubase (Retrologue, Spector and Dark Planet) and added a few audio loops. I only used the generated Arp data and simply brought tracks in and out. Check it out below:
With a single MONTAGE and a DAW, the amount of music you can create using the Arps is really amazing!
Arp Rec OFF:
The main benefit of recording just the chords and not the generated Arpeggio data is you can try out different Performances with different Arpeggios using the same chord progression. In the examples below, I selected three very different Performances with Arps: “Purple Stone” (Originally a MOTIF XF Performance now included in the MONTAGE Preset memory with Super Knob programming added), “Songwriter 2015” and “Cool Dis Comp”.
With each of these Performances I touched “Play/Rec”, touched on the “Song Name” and loaded my song “FM&AN_W-O ARP”. I set the Loop to “ON” and press play. Because the Song playback triggers the Arps because Song playback sits before the Arpeggiator. The cool thing is any Super Knob movement, Scene changes, or any Rotary Encoder movements like filter sweeps, ADSR changes, or Arp control changes like “Gate Time” or “Velocity” – all can be used in real time while playing back. You can get a lot of mileage out of a simple chord progression which is great for creative experimentation. Check out the songs below using these three contrasting Performances:
Try out some of the approaches with your system. There are LOTS of creative ways to use Arpeggio content!
Want to share your thoughts/comments? Join the conversation on the Forum here.


