The MD/UD-BT01 Bluetooth MIDI interfaces allow for wireless connectivity between MIDI gear and Mac or iOS. This is perfect for creating a cable-free (or “cable-reduced”) MIDI setup, having MIDI connectivity where cabling is difficult or fulfilling those keytar dreams you’ve always had. The MD-BT01 connects to gear with 5-pin DIN MIDI. The UD-BT01 connects to gear with a USB TO HOST (also known as “USB Type B”) port. This article will take you though:
- Connecting and setting up a MD-BT01 using the MD/UD-BT01 iOS set-up app
- Connecting an MD/UD-BT01 to iOS apps.
- Supported iOS devices are iPhone, iPad and iPod Touch running iOS 9.0 or later.
Connection settings on the UD-BT01 work the same. The difference between the two is the physical connection to the keyboard.
Connection and Set Up
Connect the MD-BT01 to the 5-pin MIDI In/Out jacks of your instrument. Note: you need to at least connect the MIDI OUT because the MD-BT01 gets power from the MIDI OUT jack. Connect the MD-BT01 to the respective MIDI In/Out jacks on your instrument as shown below:
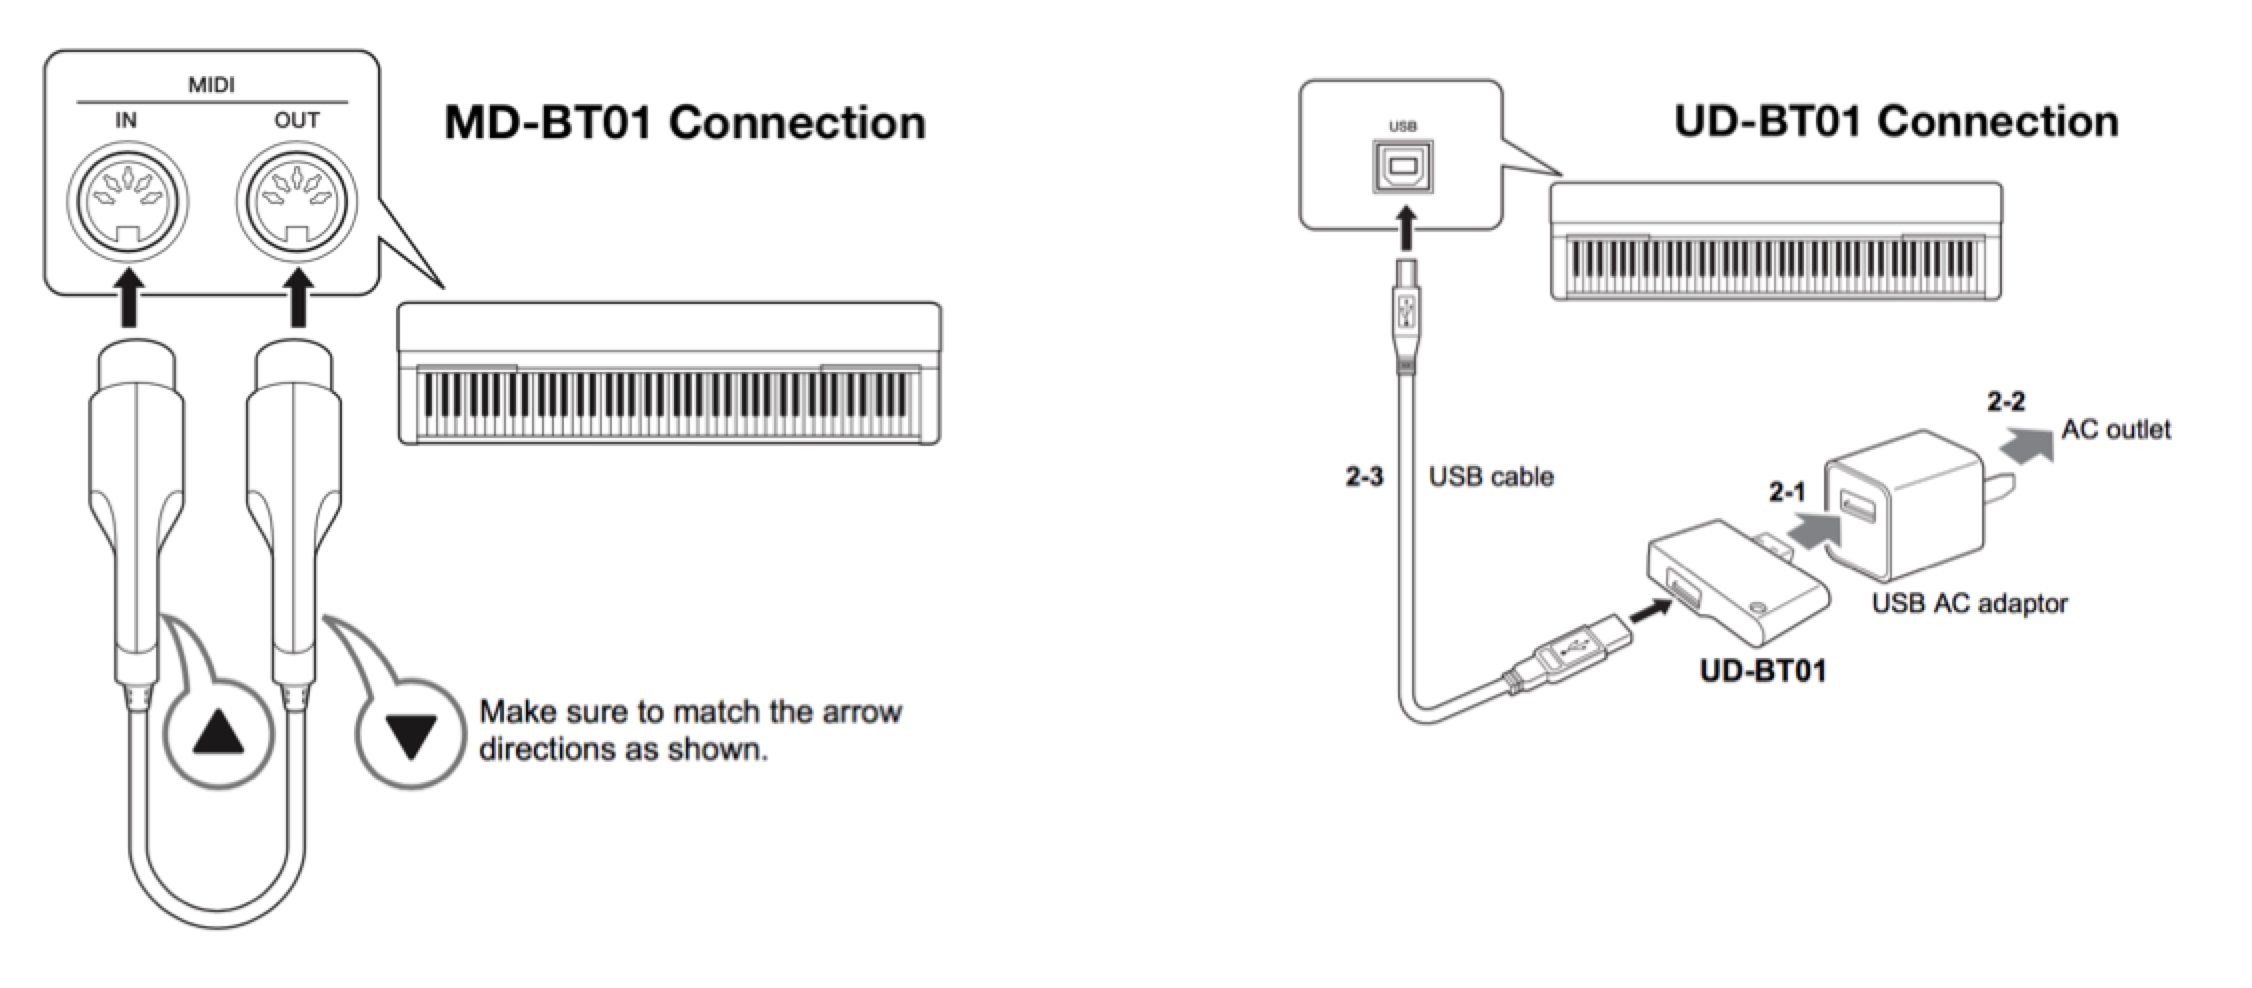
The MD-BT01 will power on automatically when connected and you should see a red light.
The UD-BT01 needs to be connected to a USB AC Adaptor for power (USB AC adaptor sold separately). To configure the MD/UD-BT01 with your iOS device, download the MD-BT01/UD-BT01 Utility located here. This simple app allows you to both update the firmware on the MD/UD-BT01 (if needed) and create a unique name – perfect if you are using multiple devices.
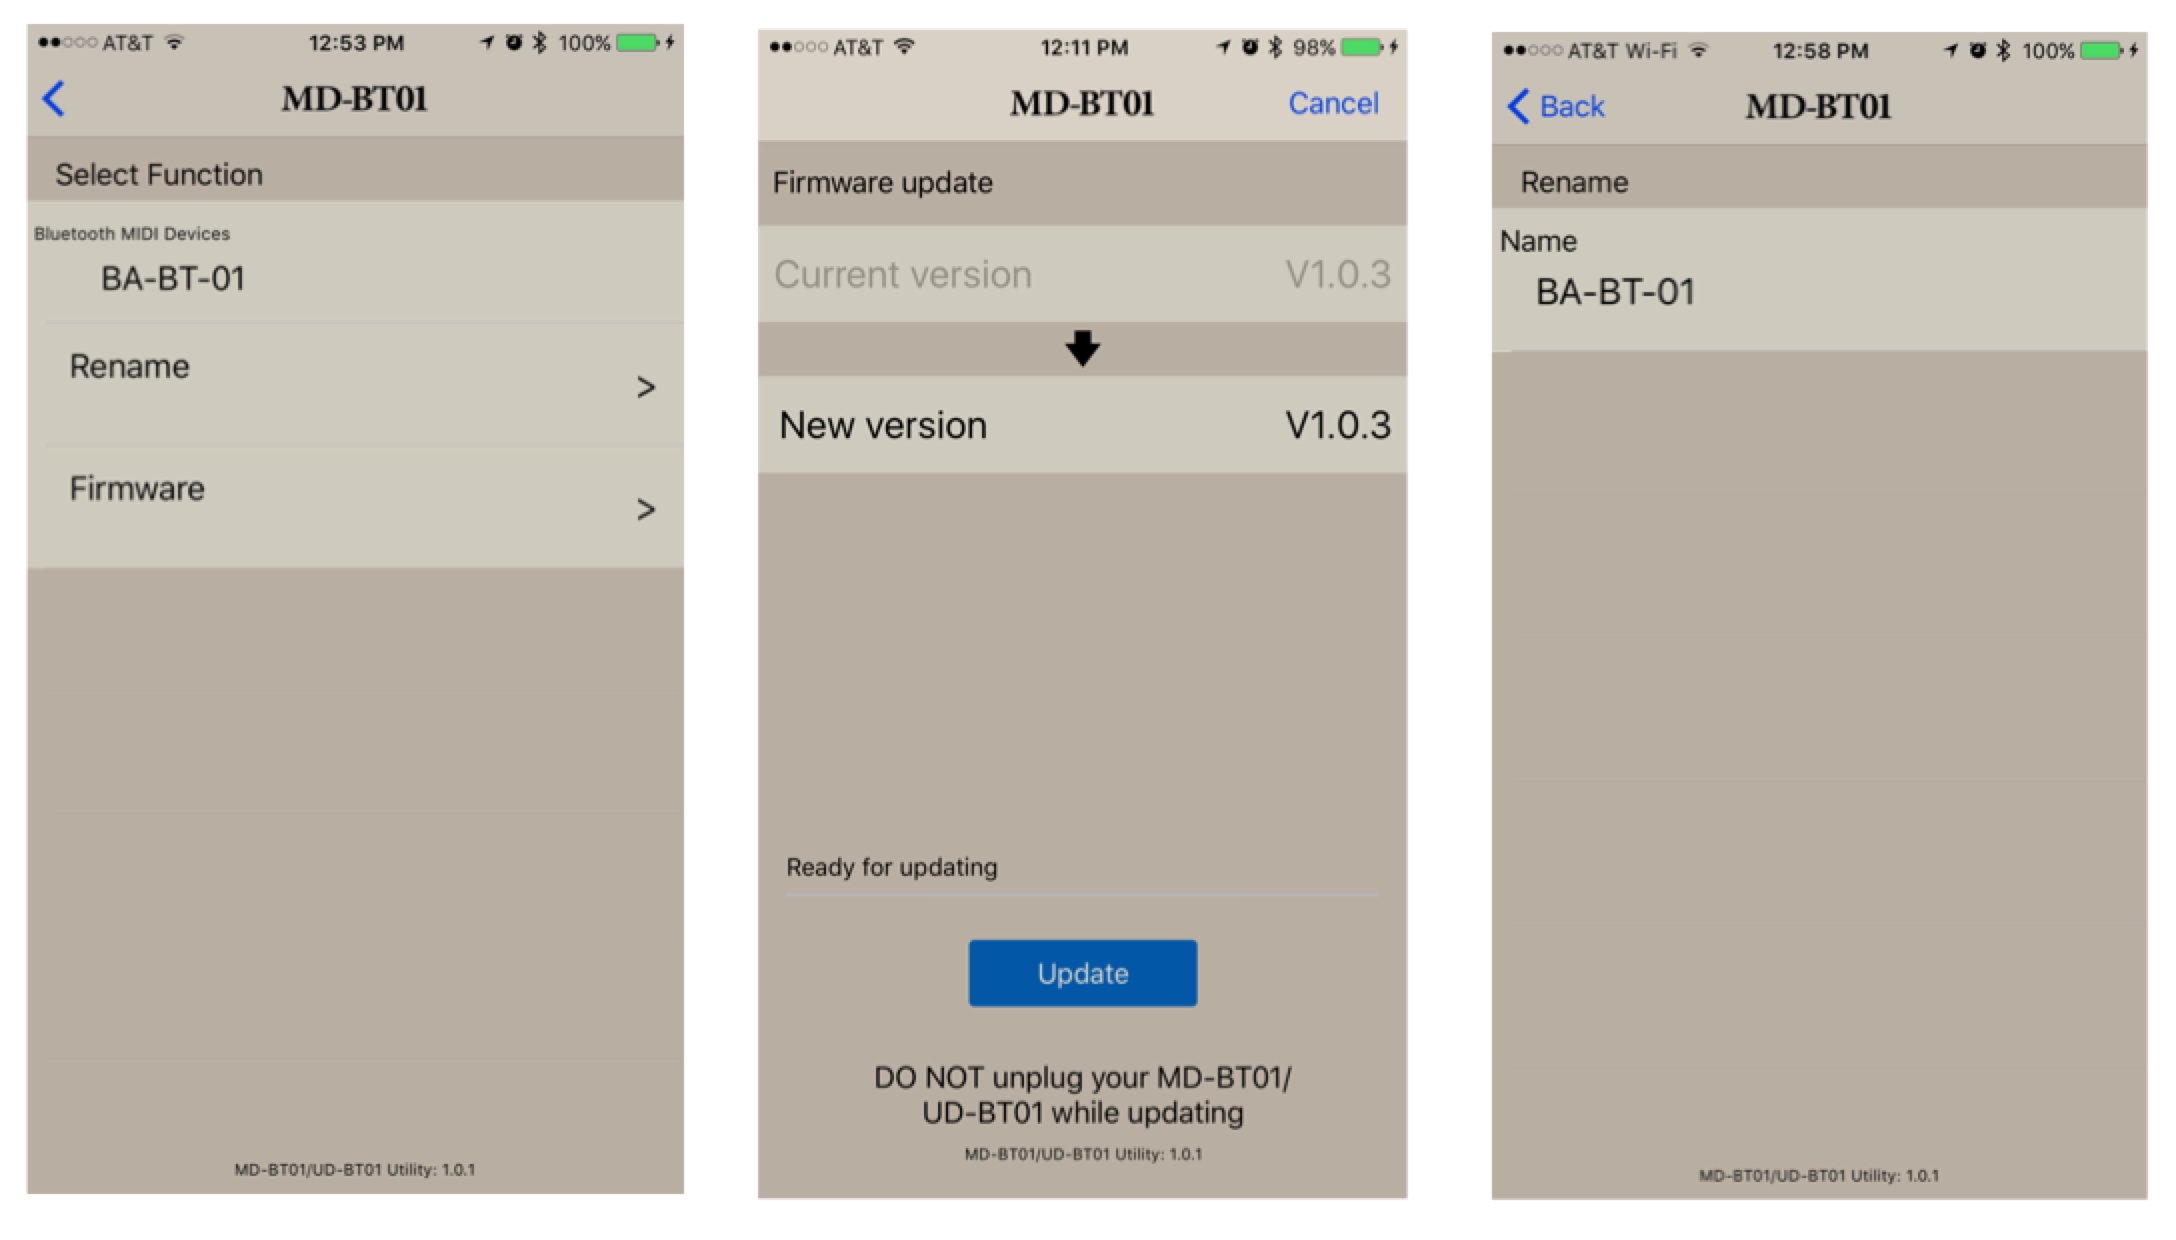
Below are screen shots from the app. Across from left to right is the main app screen, the firmware update screen and the rename screen. If your MD/UD-BT01 requires a firmware update you will see a difference between the current version and the new version. Press update and the new firmware will be loaded into your MD/UD-BT01 over the Bluetooth connection. The screen on the right is where you can enter a unique name up to 8 characters in length. I am using the MD-BT01 and I named mine “BA-BT-01”:
Once connected you can now wirelessly connect to many different iOS apps from Yamaha and others. Let’s take a look at a few scenarios. In all of these, I am using the MD-BT01 but the UD-BT01 works similarly.
Connecting Wirelessly to Yamaha Synth Book AN2015
Yamaha Synth Book is a free iOS app available here. Inside this app is a cool analog modeling synthesizer called AN2015 that you can wirelessly connect to and play using the MD/UD-BT01.
In this case I am going to connect my MIDI instrument with the MD-BT01 attached to an iPhone with Yamaha Synth Book installed. The procedure for connecting to AN2015 is outlined below:
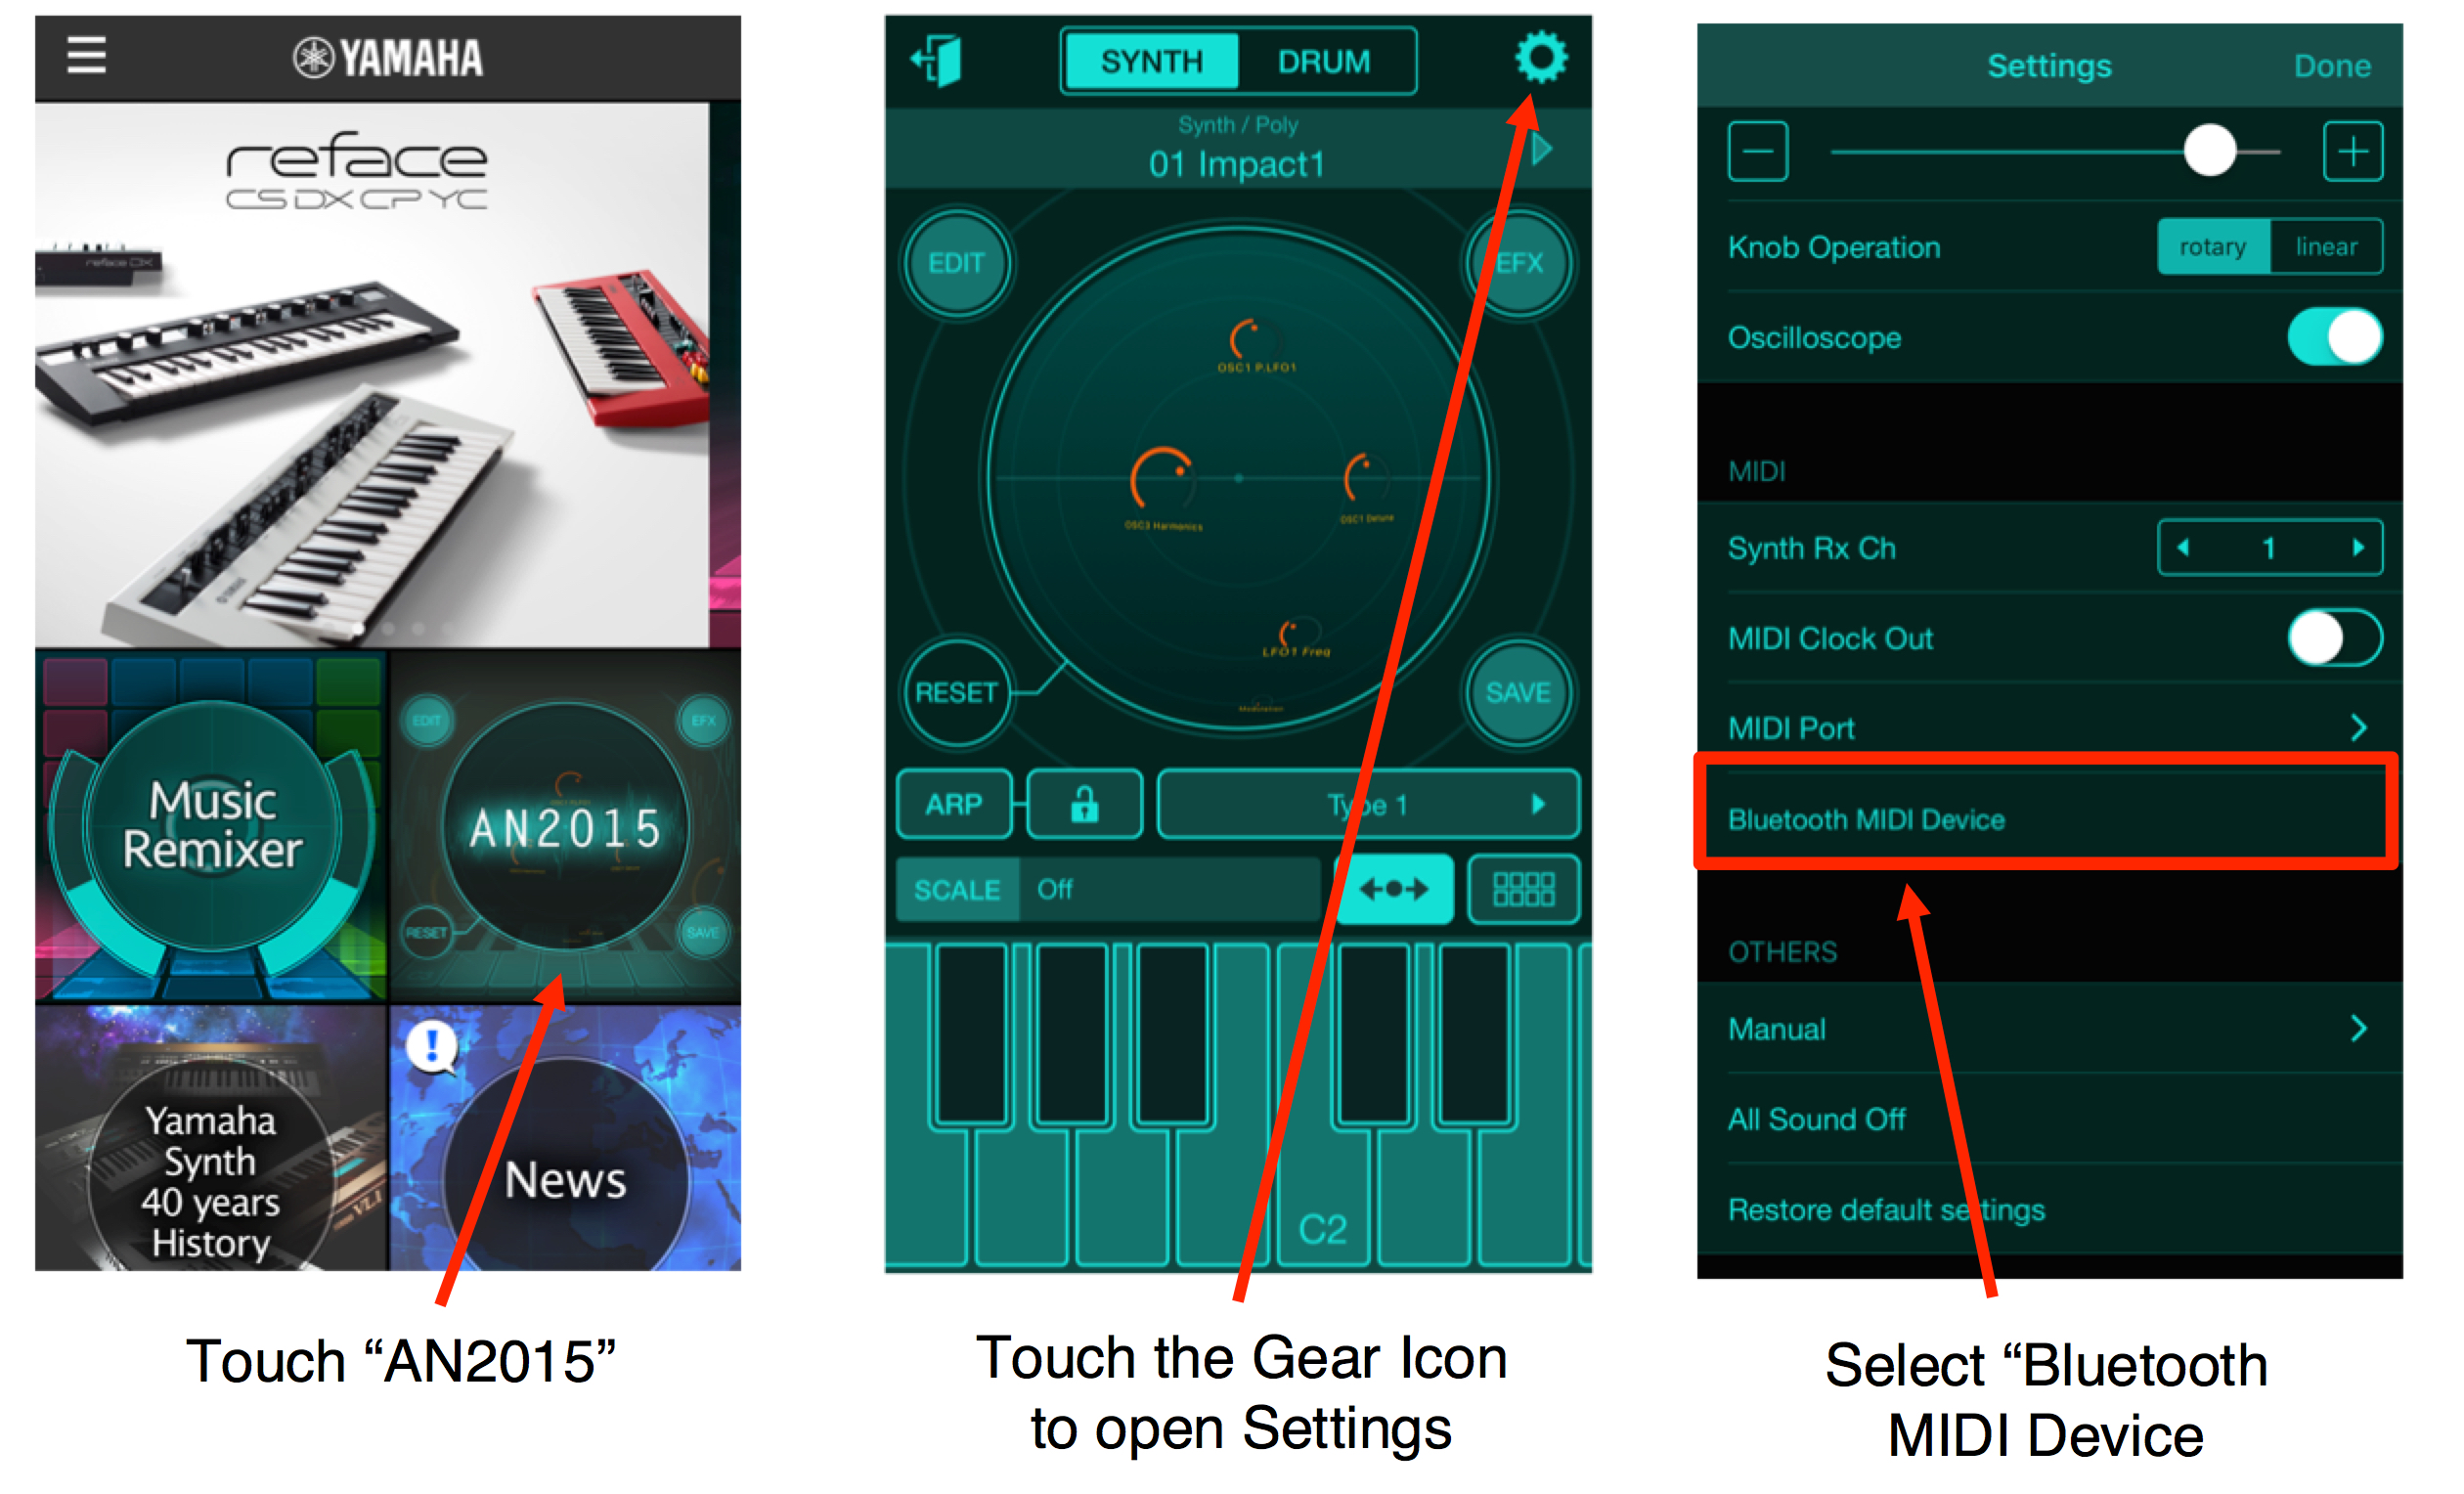
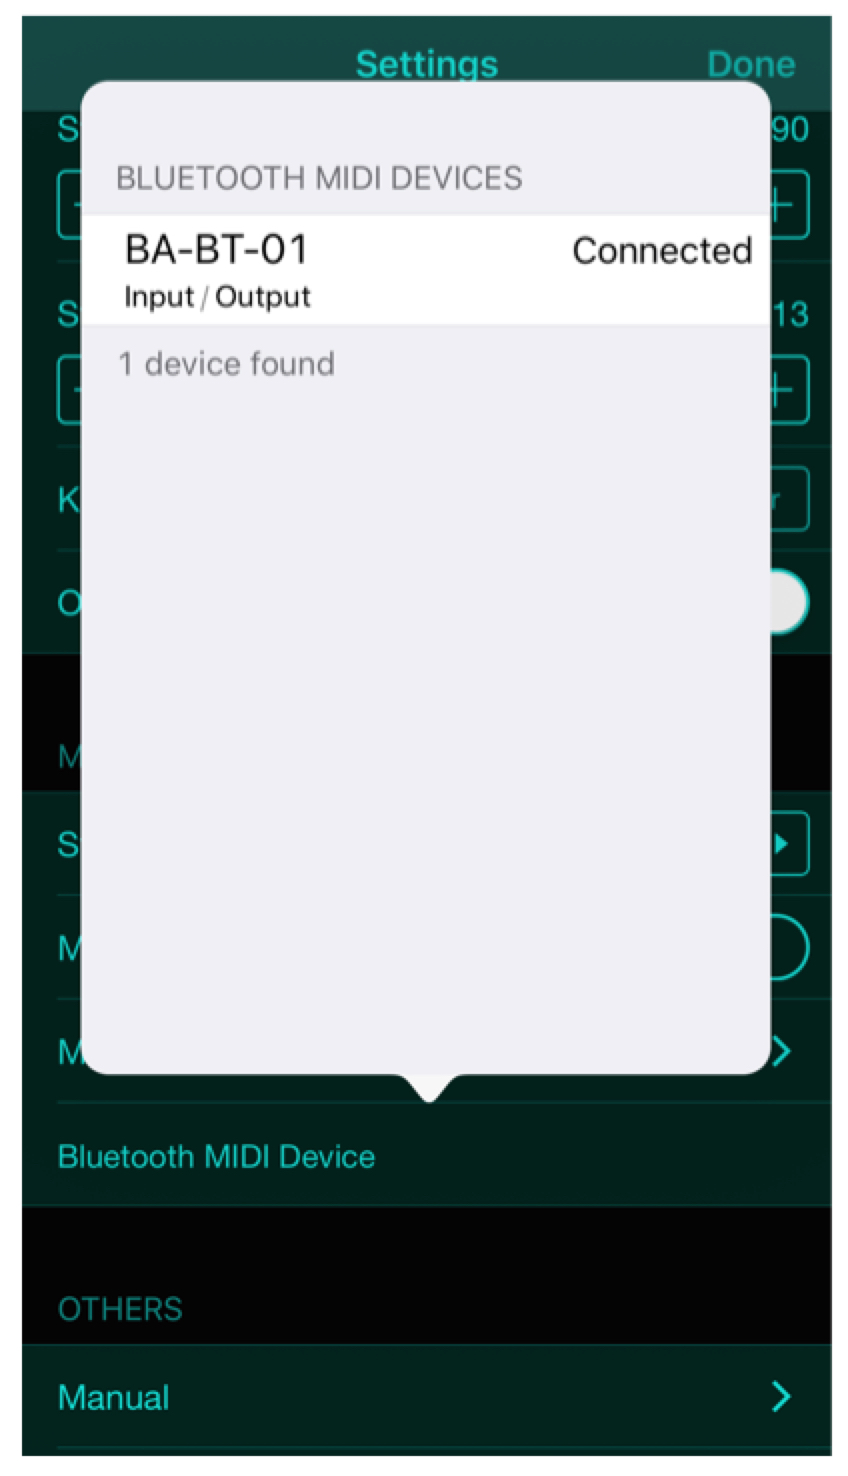
After selecting “Bluetooth MIDI Device” you will see your MD/UD-BT01 appear in the list of available devices. If it says “Not Connected” – touch on the device name and it should switch to “Connected”. Below is how a properly connected MD/UD-BT01 should appear (note that I named mine “BA-BT-01” as described above). If you play a few notes on your MIDI instrument, you should hear the sound of the AN2015 playing from your iOS device:
Now let’stake a look at connecting it to the iPad app Cubasis.
Connecting Wirelessly to Cubasis on an iPad
Cubasis is a powerful MIDI sequencing and audio recording app available here. With the MD/UD-BT01 you can connect your MIDI device wirelessly, create MIDI tracks and play virtual instruments within Cubasis.
First, connect the MD/UD-BT01 to the iPad using the MD-BT01/UD-BT01 Utility app as described above. Once connected open Cubasis and create a new Project. To set up the MD/UD-BT01, follow the procedure below:
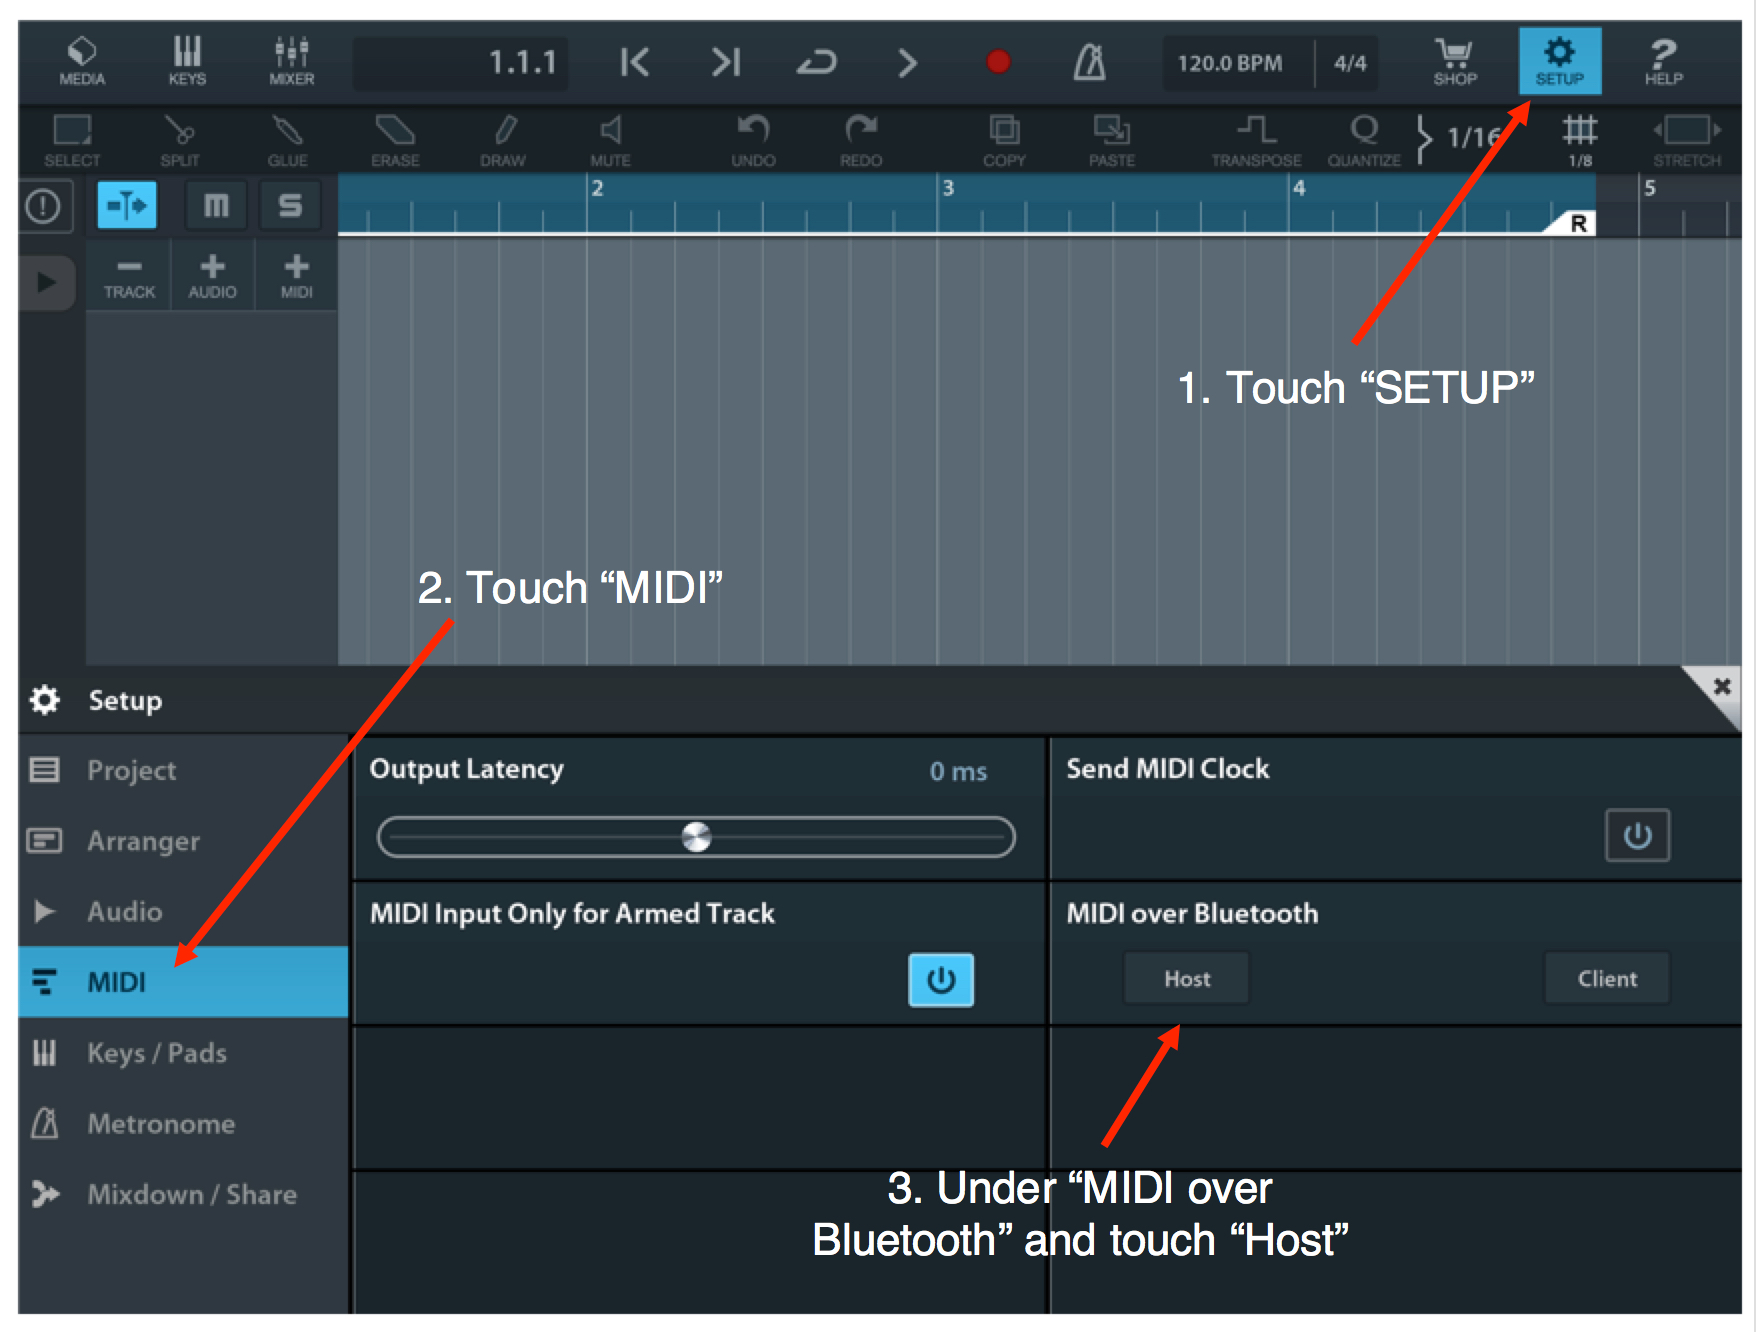
A dialog box will open up showing the MD/UD-BT01 as an available device. If it shows that it is disconnected, touch the name to reconnect:
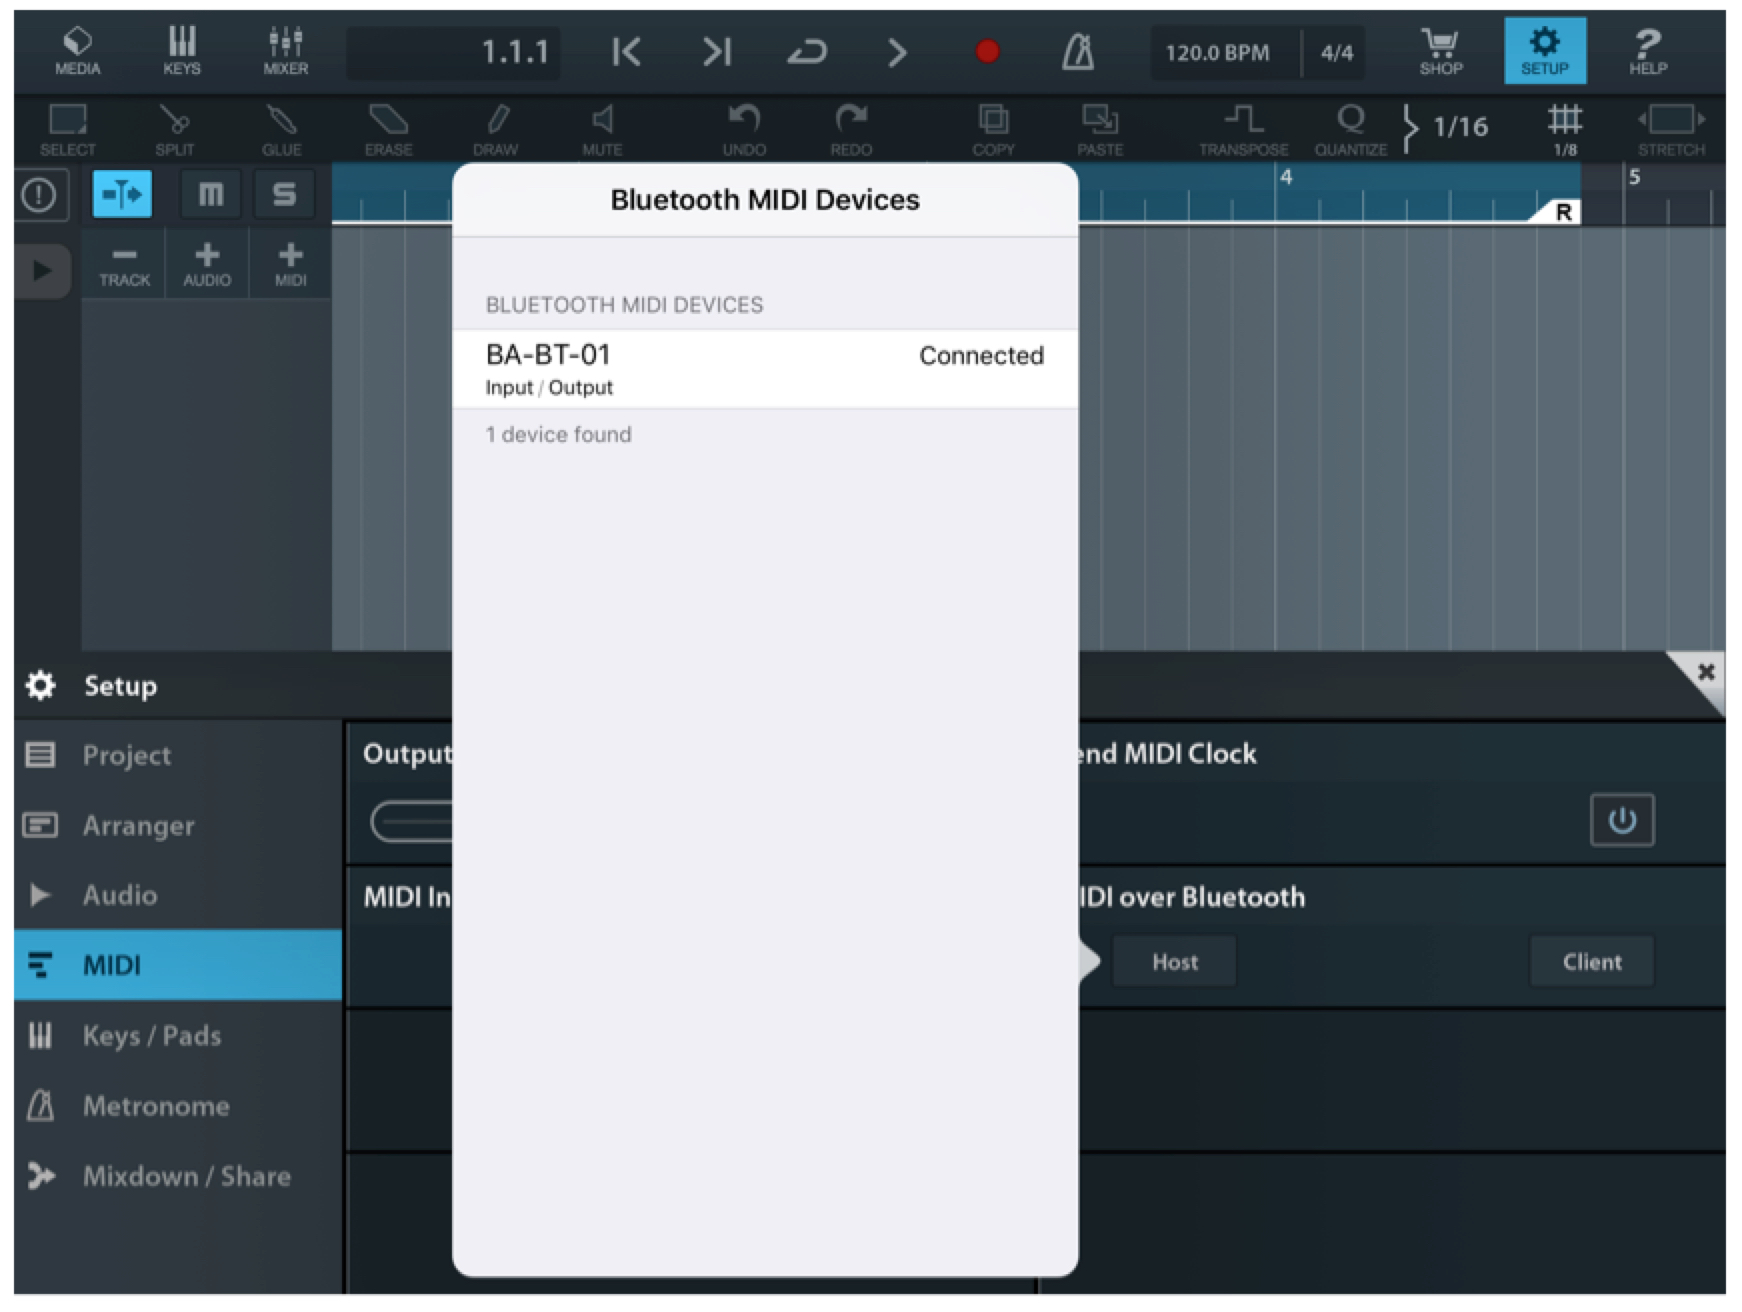
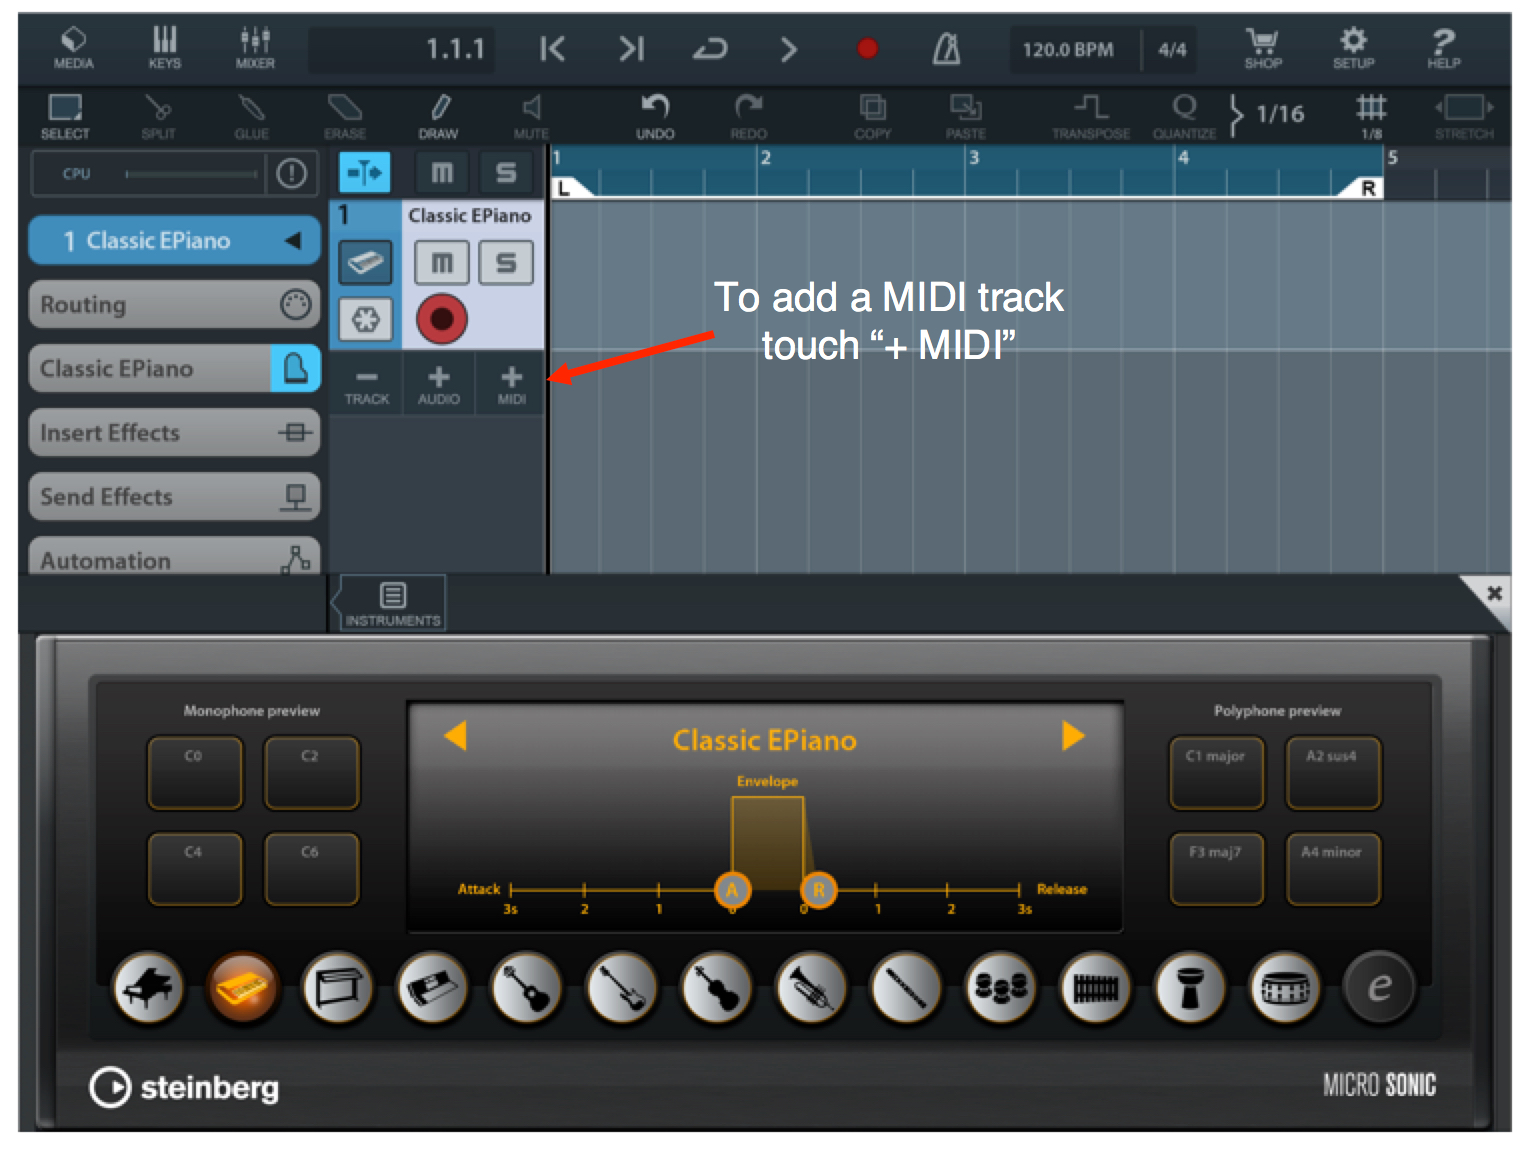
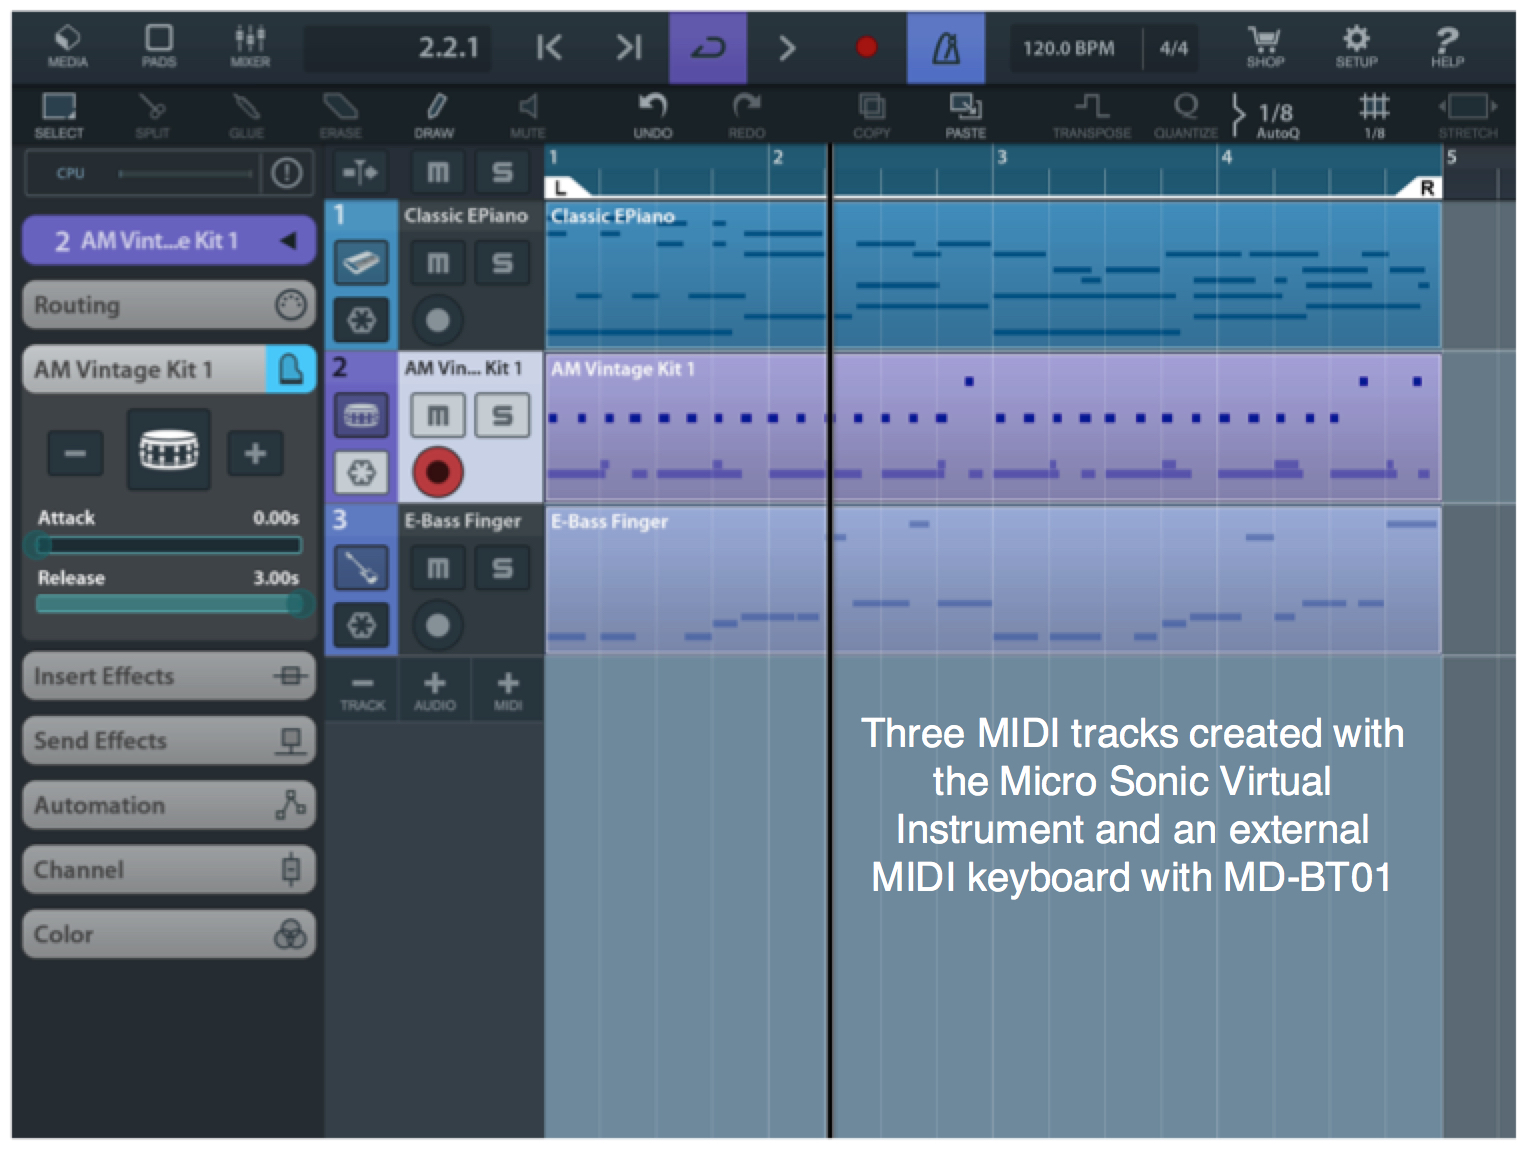
Once connected you can now create and play back external MIDI tracks or use Micro Sonic, the virtual instrument included with Cubasis:
For more information on using Cubasis check out the video
here.
And join the conversation about this article – and more – on the Forum here.
The next lesson with opportunities to connect using the MD/UD-BT01 Wirelss Bluetooth MIDI adaptors is now available
here.