MX Study: More Synth Basics
Quick review: The Sawtooth wave, as we heard, can be used to build string and brass like sounds, as well as mellow to bright synth lead sounds. Technically speaking the Sawtooth wave contains all whole integer multiples of the fundamental pitch… that translated to musician-talk means that all the tones in the harmonic series are represented in the resulting tone. You hear the fundamental tone as the loudest – say you plucked an “A” string on a guitar – you hear the pitch as A110, but also your ear/brain is hearing fx2, fx3, fx4, fx5… where “f” is frequency… each in decreasing volume. So you hear the harmonics at 220, 330, 440, 550Hz… but each is less loud. The proportional volumes of these upper harmonics is one of the things your ear/brain use to recognize, identify and categorize the resulting sound. While the Sawtooth waveform resembles the teeth on a carpenter’s saw, the Pulse wave is a simple ON or OFF situation. Rather than gradually rising and dropping off immediately (Sawtooth Up) or rising immediately and gradually dropping off (Sawtooth Down), the Pulse wave is either maximum or minimum; ON or OFF. The percentage of the time it is ON versus OFF is critical in what we hear.
The Pulse wave, we mentioned last time, is responsible for everything from hollow sounds to nasal sounds and can do some metallic tones as well. When the Pulse wave’s ON status equals the amount of time it is OFF we call this special case a Square Wave. This makes sense because we all went to elementary school where we learned about Squares having equal sides. A square was the one special case of a Rectangle where all sides were equal. You will hear a Square Wave referred to along with the number 50… as in 50% ON, then 50% OFF, repeat. As you “narrow” the pulse toward 10% ON and 90% OFF – the sound moves from what we describe as ‘hollow’ toward ‘nasal’. The quintessential hollow or Square wave sounds very much like the tone of a Clarinet – even without much editing of the “envelopes” you can hear the very Clarinet-ish/ woody tone of the square wave. As you decrease the amount of ON time in the pulse, the sound gets ‘pinched’… as if you were pinching your nose when you speak, the sound becomes decidedly “nasal”. Think Oboe or Clavinet… these are pinched tones we describe as being nasally.
All Squares are Rectangles but only not all Rectangles are Square
So while all Square Waves are Pulse Waves, only one special case of the Pulse can be square. Only when the movement is 50/50 ON to OFF. Pulse waves sound distinctly different to our ears from the Sawtooth wave… technically speaking they only reproduce every other whole integer multiple of the Fundamental (f) pitch. That translated to musician-talk means that only the odd harmonics are represented in the resulting tone. fx1, fx3, fx5… each in decreasing volume as you go higher in frequency. It is the relationships between the volumes of the harmonics that the brain uses to identify any particular sound. The harmonics and their relative volumes create a signature as unique as a fingerprint. The closer you are able to emulate this relationship, the more accurate your result will sound.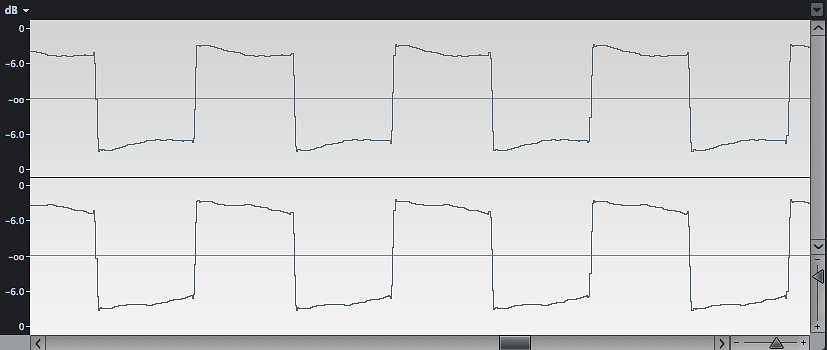
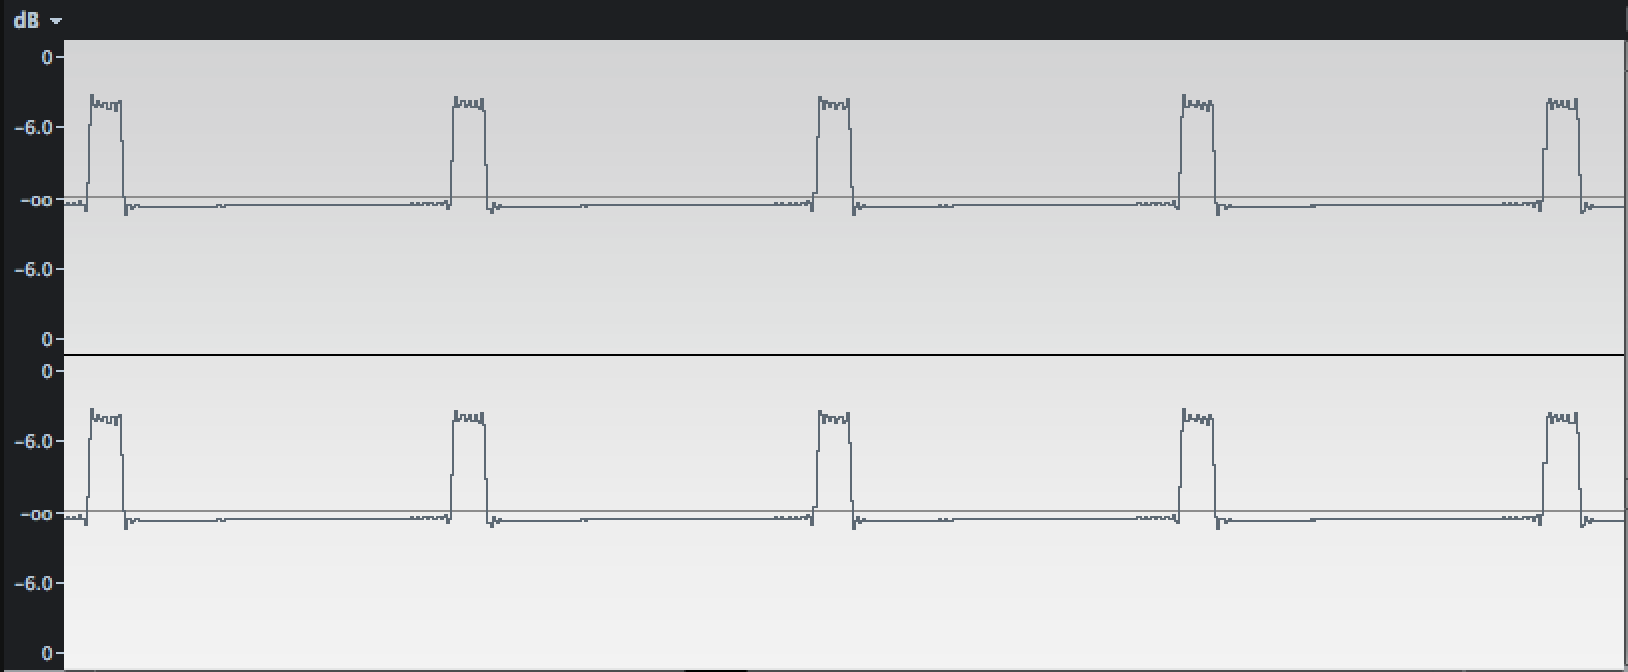
Contrast this with a P10-1 Wave which is a pulse wave with a short ON time and a long OFF time
PMW or Pulse Width Modulation. Imagine a Waveform that was designed to continuously change from 50/50 to 40/60, to 30/70, to 20/80, to 10/90 then move back, 20/80, 30/70, 40/60, 50/50 and repeat. This change in the Pulse Width causes a unique and interesting complex sound.
We will also have an example that combines pulse waves of different widths. By adjusting the tuning/phasing you can emulate metallic tones. It is interesting that hollow, nasal, metallic tones, can all be generated from the same waveform source. It is a matter of the loudness of the upper harmonics relative to each other.
On a sample playback synthesizer – we can “sample” any of the waveforms and build Voices directly from them. The results are not generated in the same way as a Voltage Controlled analog synthesizer. An Voltage Controlled analog synth used a different method to generate the basic tone. Things like PWM and Oscillator Sync (we’ll cover that in a future installment) are some wholly “synthy” things that are really unique to analog (voltage controlled) tone generation. But because we’ve sampled a wave going through this undulating motion we can construct sounds that although not generated in the same way, give us a result that “emulates” the voltage-controlled analog instrument. Sampled waveforms can start from a difference point. Don’t confuse this with the differences in “behavior” – a difference in behavior is more about what happens as you manipulate it by applying change (modulating) Pitch, Timbre, or Loudness.
What we will show you is some of the possibilities when building a Voice that starts with a sampled analog waveform as a source… including some things that simply were not available in the “voltage control” age.
Pulse Waveform Example
Let’s start by exploring a group of very different sounding VOICEs made from the Pulse Wave family
USER:A06 Pulse10 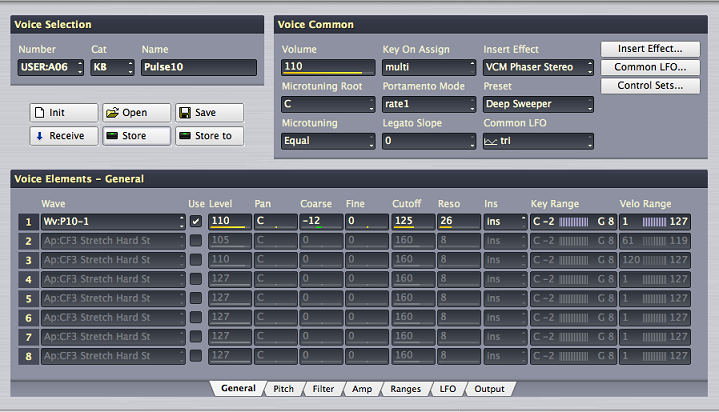
Here is a your basic 10% ON, 90% OFF Pulse wave. This is a very “pinched”, “nasal” tone. The time of the pulse being On is only 10% and visually makes a very narrow profile for the ON time.
USER:A07 PulseSq50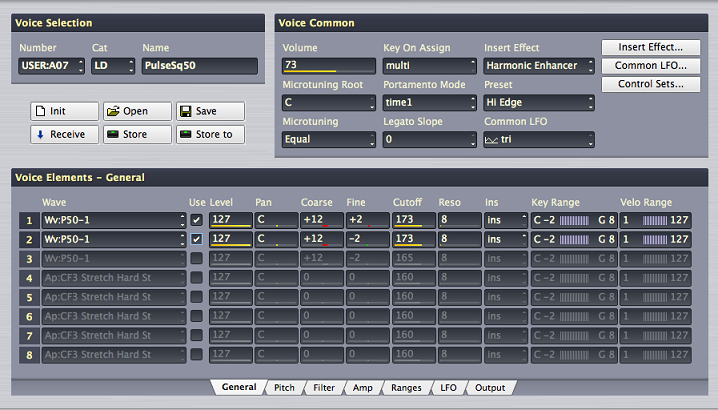
Here is your basic perfect square, 50% ON, 50% OFF. This is described as a “hollow” tone. The time of the pulse being On is 50% and visually makes an equal time on/time off profile.
Using the Editor, click on the checkmark in the USE column to turn OFF and ON Element 2. See how adding a second Waveform, slightly detuned adds dimension and movement to the sound.
Lets combine two pulse waves (a Sqaure 50% and a tighter Pulse 25%) to create a metallic tone
USER:A08 CP SteelPan
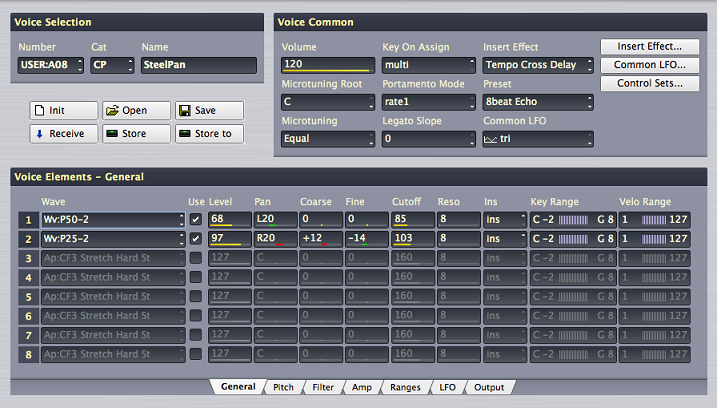
Explore this sound in the Editor. The AEG is creating a very “percussive” envelope – the sound dies away rather quickly even if a note is held. Again two Elements are detuned and are an octave apart. The Filter EG is a quick percussive envelope with the FEG DEPTH providing much of what we consider the metallic ring. The FINE (tune) parameter indicates that the second Element is up and octave and detuned a good deal flat of true pitch, this adds to our perception of a clanging, ringing, metallic tone!
Below find the ZIPPED download _ this file includes the Sawtooth data from the previous article and adds the new examples shown above. New USER VOICES are always added to the end of the list according to their Category. So the “Steel Pan” Voice is in the CP or Chromatic Percussion Category; The “PulseSq50” Voice is in the LD or Lead Synth Category; while the “Pulse10” Voice which resembles a Clavinet, is in the KB or Keyboard Category.
Extra Credit: Even though the examples are geared toward the Motif XS/XF, MOXF, and S90XS/70XS you may find some of the discussion applies to all synthesizers – please see the following overview of SYNTH BASICS in my Blog (Bad Mister’s Blog)


 “The
“The 


