MOTIF to MONTAGE, Part 1
While MONTAGE certainly takes some operational design cues from the MOTIF series, MONTAGE is an exponential improvement over MOTIF in terms of sound, control and workflow. As the saying goes, “some things change, some things remain the same.” Technology has dramatically changed since the original MOTIF launched in 2001, and that reality has greatly changed how musicians utilize and interact with a keyboard instrument. I can illustrate this by sharing a simple question I have asked over the years during presentations: “Do you use a computer-based system to create music?” When I asked that question to a group of 50 back in 2001, less than half of them raised their hands. That says a lot about the state of the market in 2001 when the MOTIF Music Production Synthesizer launched. Sure, many people were creating music with computers (I had been for over 10 years), but at the time there were still many people who exclusively utilized hardware for music creation. Remember, this was before the popularization of smartphones, touch screens, social media and music-sharing websites. Back then, an instrument with great sounds, expandability, sampling and a powerful, built-in sequencer was very attractive to many pe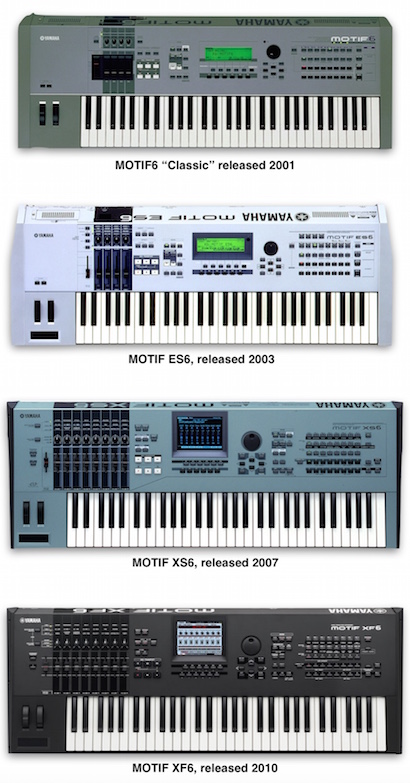 ople.
ople.
Prior to the original MOTIF launch, Yamaha saw the promise of the computer-based world and introduced mLAN in 2000. mLAN was a high bandwidth, multichannel MIDI+Audio networking over FireWire protocol. Although mLAN never became an industry standard, it was offered under a royalty-free license to anyone interested in utilizing and developing the technology. Many manufacturers studied mLAN and implemented parts of the specification relevant to their own products. In 2004, with the acquisition of Steinberg – one of the world’s leading DAW software developers and makers of Cubase and Nuendo – Yamaha realized where things were going and invested a great deal of time, energy and resources to develop computer integrated products. As the MOTIF Series developed, more features were added to underscore the growing and increasing relevance of computer-based music creation. Some examples include:
- mLAN16E: Although mLAN never really took off, the idea of single-cable connectivity for audio and MIDI was an important development initiative.
- MOTIF VST Editors: These editors allowed a user to save the internal sounds, mixes and overall status of the MOTIF XS and XF inside of a Cubase project just like a software-based virtual instrument. Now the MOTIF XS/XF, virtual instruments, audio tracks and effects could all be saved within a single Cubase project for a truly integrated experience.
- Plug-In Boards to Virtual instruments: The MOTIF and MOTIF ES could host up to 3 PLG-100/150 series plug-in boards, each board featuring different synthesis types like AN (Analog Modeling), DX (6 Operator DX style FM synthesis) and VL (Virtual Acoustic synthesis from the VL-1 synthesizer). As computers got faster, these solutions moved toward computer-based virtual instruments. With the MOTIF XS and XF, plug-in board technology evolved into virtual instruments included within Cubase AI.
When the MOTIF XF launched, it was apparent that things had dramatically changed in the market. I can sum up this change by the response I get now when I ask that same question I asked in 2001: “Do you use a computer-based system to create music?” When I ask that question to a group of 50 customers now, almost everyone raises their hand. Computers, smartphones and tablets now offer many products for music production. It’s a new era and with that new era comes MONTAGE. Next time, I’ll expand on the conceptual differences between MOTIF and MONTAGE. To jump directly to that article go here.
To discuss this article series go to the forum here.