 Sine waves have no harmonics – as we’ll learn in future installments – sine waves are what we combine to make more and more complex wave shapes. The basic organ sound is a combination of sine waves to make a composite tone. It is the relative volumes, how loud each of the ascending harmonics are relative to each other, that makes each pipe or drawbar setup unique to our ears. Identifying the relative loudness of harmonics is going to be true throughout all musical instruments and sounds in general. The harmonic fingerprint of a trumpet is slightly different from the harmonic fingerprint of a fluegelhorn… Even when playing the same note, a subtle difference in loudness among the upper harmonics alerts our brain that each is a different instrument. Identification is assured. To recreate the timbre of a complex sound, matching the amplitude (or loudness) of the first few harmonics is critical – if you can accurately reproduce 5 harmonics the listener will begin to identify the sound with a particular sound category. The more of the harmonics you are able to match the more convincing your emulation will sound.
Whether based on tone wheels, transistors or integrated circuits, the designers of electronic organs selected the most consonant (nearest) harmonics for the front panel control. Starting with the fundamental 8′ (A110 in our example), the second harmonic is 4′ (A220), the next would be the fundamental times 3, this yields a note one octave plus a musical fifth above. Approximately, an “E” E330, called the perfect fifth. The Fundamental times 4 is the second octave above at A440. The Fundamental times 5 gives us, approximately, C#550, and times 6 gives us, approximately, E660… We say “approximately” because of Equal Temperament (the division of the octave into 12 equal parts comes into play here). Instead of the mathematics being strictly accurate, we’ve elected a scale that is convenient for all keys. By the time we get to the 7th harmonic our note is enough ‘out of tune’ to be troubling… We’ll see this up close in a future installment. The note closest to 770 cycles per second is the G at 783.99Hz.
“Equal Temperament”, for those interested, is steeped in the deeper mathematics of modern music and will remain (for now) outside the discussion here. The purpose here is to give enough background to begin programming your own sounds with some degree of confidence! Intuitively, rather than the empirical scientific method. It can be done! Let’s just say that a “perfect fifth” is only almost perfect in Equal Temperament.
At any rate the harmonic Drawbars skip the 7th harmonic and just jump to the next useful (supportive) tone, the 8th harmonic at the octave at 880. Much is written about avoiding the 7th harmonic (the seventh wave) and as we get deeper into this, you will understand and hear why. The 7th harmonic is so out of sorts, even in the Just Intonation scale it is out of wack. The hammers of our beloved pianos are usually constructed so that the hammer strikes near a node for this 7th overtone in an attempt to diminish its influence. Seven maybe lucky elsewhere but as a harmonic it is in ill favor!
So holding down the key that naturally produces “A110” you are able to hear the harmonic series by pulling each drawbar individually. How can we gain a working knowledge of the 9 harmonics (drawbars) as laid out on the electronic Tone Wheel organ? Let’s have some fun while we learn what these pitch relationships mean to our ears.
Experiment:
Interesting and fun fact: we will often use the trumpet, and its family of relatives, as an example of an acoustic instrument that wears its mathematics on its size and shape. This family of “lip reed” instruments cannot play the fundamental, they start on the second harmonic. This is true of this family of horns. Ask any trumpet player about the harmonic series and they are likely to know the relationships of the math. We all know that the longer the pipe the lower the pitch that is available, the shorter the pipe the higher the pitch. And we remember that by changing how we blow the instrument we can change the harmonic that is sounding. The valves on a trumpet simply open holes that shorten or length the active pipe length. What about a bugle, it has no valves, how can it play all 12 tones?

Well, if you know anything about a bugle, you know it can’t. Without sophisticated valves dividing the length of the horn’s pipe into 12 equally pitched lengths, all pitch variation is the responsibility of the player’s control over the instrument’s “reed” or vibrating lips (oscillator) and the air forced between them. (In fact, a trumpet with 3 valves cannot finger all twelve tones, trumpet players also must be able to use the harmonic series to reach certain pitches… the fingering for G and for C is exactly the same, you have to “lip” that interval. They need to narrow the slit and increase pressure and intensity to reach the next harmonic in the series. We already mentioned that the trumpet family do not play the fundamental, their lowest pitch is the second harmonic. So they cannot produce the principal tone (fundamental) – the 8′ in our drawbar example…
Using just the 4′, the 2 2/3′, the 2′, the 1 3/5′, the 1 1/3′ Drawbars (the second through sixth harmonics) – hold a single Key, then by pulling them out one at a time – you can “play” the melody to every bugle call there is – using just the single held note and the drawbars… Bugle calls, you say!?! Starting with the 2 2/3 Drawbar – “play” Taps… Simply hold any key and use the 2 2/3 drawbar as the first pitch. As a musician you don’t even know how many of these you actually already know. You probably can’t identify them all by name (unless you were in the Service) but you’ve heard and recognize at least half a dozen… (Google: “Every bugle call”) Taps, Reveille, Charge, Retreat, etc., etc. Long after you think you’ve heard all you know, here comes another familiar refrain.
If you look at the math of these intervals (the distance between harmonics as you go up the scale) you have a fifth, a fourth, a third and a minor third. It doesn’t take a Mensa to guess the next higher harmonic intervals will be smaller, and smaller. And thus is the harmonic series. That first interval, between the fundamental (the one the trumpet cannot do) and 2nd Harmonic is an octave. Octave-fifth-fourth-third-minor third…
In an attempt to recreate different sounds the Drawbars are added together at specific volumes to mimic the loudness of the harmonics in the sound being emulated. Subtle changes to the level of an upper harmonic will change not only the sound, but how we feel about the sound. With Pipe organs there were attempts to emulate Flutes, Reeds, and Strings… the native organ tone was referred to as the Diapason. Whether or not we think a Pipe Organ did a good job of emulation, it was a massive piece of musical engineering and if you find any of this at all intriguing, try getting a hold of any Pipe Organ music (or better, go experience it live) it is well worth the effort!
You notice the 5 1/3′, the 2 2/3′ and the 1 1/3′ are all musical fifths in relation to the principal’s pitch and are themselves an octave apart. 1 1/3 x 2 = 2 2/3 and 2 2/3 x 2 = 5 1/3. Why we don’t as quickly recognize these numbers as related in the same way we see immediately the relationship between the 8′, the 4′, the 2′, and the 1′ probably has to do with our fear of fractions. But pull these fraction Drawbars one at a time and hear their octave relationship to each other.
Lastly, we have one more fraction that stands alone – the 1 3/5′ – the 1 3/5′ is a major third above the second octave up from the fundamental.
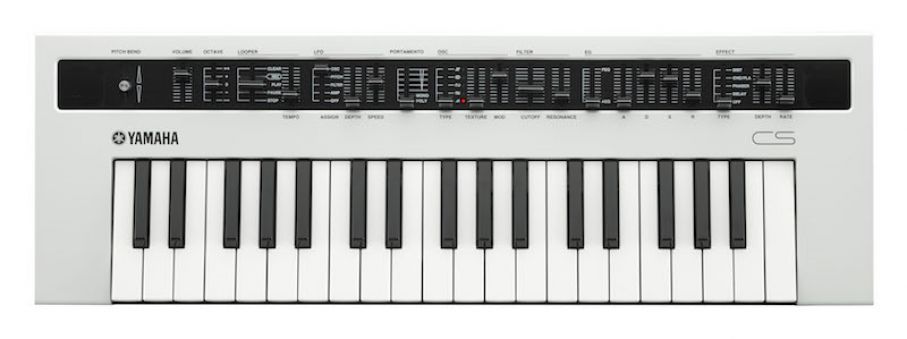
Hey, here’s an ‘audio’ age test: Use the reface YC front panel – push all the Drawbars in
Pull out just the 2′ and the 1 3/5′
This is a major third interval.
Lower the OCT slider -1
Set Percussion and Vibrato/Chorus = Off
No Distortion, no Reverb
Set a Rotary Speed = Off
Play the lowest “F” on the keyboard… Identify that sound? These two harmonics played from the single key-on make a very recognizable sound (if you still have a land line telephone).
If you know what that is, besides two sine waves a major third apart, you were born before the age of the ubiquitous cell phone.
Yes, it’s the good ole North American Ma Bell dial-tone and was the sound you heard most often through your “good” ear (the one you naturally put the telephone up to…) the telephone’s set of sounds was completely made from sine overtones used in combination.
Now tap the “B”, a musical tritone above the dial-tone “F”: for the busy signal. (This was a tone you got when the person you were calling was already on the phone… before the invention of automatic voice mail and call waiting).
The front panel of the reface YC gives you the compelling real time interface with programming your sound as you go. The basic sound you get is built using the positions of your Drawbars. The basic tips you need to know from nature are as follows: It is fundamentally true (pun very much intended) that the lower the harmonic the louder it is within the sound. And while there are certainly exceptions to every rule, in general the higher the harmonic the less loud it is, is something you can understand is the natural order of musical sounds. So avoid being an “all or nothing at all” type user of the Drawbars. A touch of this or that, can make a huge difference in the sound, learn to listen for the contribution of each of your harmonic generators (er, Drawbars).

The Rotary Speed Control is as much apart of these classic organs as anything. The Pipe Organ included an actual room – usually a cathedral to help resonate its sound, the electronic organ’s Rotary Speaker is a part of placing the organ in a lofty space of its own, and it is no mistake that this combination is so very endearing to the overall performance of the electronic organ as an instrument. It is the cathedral, the acoustic environment that enhances the presence of the organ as an instrument. Learn to ‘work’ the Speed as apart of your performing. Just as you must learn to adjust your loudness with an Expression Pedal. What the Sustain pedal is to an acoustic piano, the Expression pedal is to an electronic organ. Not that they perform the same function but they are essential tools. To control loudness on an organ, you use the SWELL pedal, Pianoforte (Italian for soft-loud) was the first keyboard to have dynamic control via the keybed. Organ Volume is all about the Foot Pedal. Playing without one, well, it just isn’t done. It just isn’t!
To feel the full effect of the Rotary Speaker, you should always connect your instrument to a stereo sound system. The movement, the swirling motion is only felt in stereo… stereo is a situation where you have two speakers and the sound in each can be different from moment to moment. To give the illusion of movement stereo is a requirement. You can feel it in the reface YC’s own speaker system, what a difference stereo makes. Switch the Rotary Speed from Fast to Slow, then from Slow to Stop and then from Stop to Off. OFF will put your instrument equally in both speakers (mono). All other settings will send different amonts to the Left then to the Right at any given moment.
Emulative synthesis
The mighty pipe organ with its complicated system of Stops (Stops are combinations of harmonics often grouped to recreate a specific type of sound) is the grand daddy to the electronic organ. While drawbars are individual harmonics that are used together create a complex sound, pipe organ stops are much more timbral groupings designed to emulate flutes, strings, and reeds. When you recreate the relative loudness of the various harmonics to the fundamental, you have effectively mimicked that sound… The more harmonics you are able to match the more you will capture the timbre of the instrument. Of course, there are other factors in addition to matching the harmonic structure (envelope for example). As we move through the backgrounds of the reface instruments, you will see the different approaches in how ‘sound design’ takes place.
An integral part of playing the “tone wheel”, “transistor” and/or “integrated circuit” organs of the electronic organ era was the real time interaction with the drawbars, the rotary speaker speed, and the swell pedal…at minimum. Of course, the real masters of the craft kicked bass (pedals) and walked the left-hand all night long! We’ll be posting programs for reface Capture and on the Soundmondo site that recreate the sound on classic songs from the past.


 Sine waves have no harmonics – as we’ll learn in future installments – sine waves are what we combine to make more and more complex wave shapes. The basic organ sound is a combination of sine waves to make a composite tone. It is the relative volumes, how loud each of the ascending harmonics are relative to each other, that makes each pipe or drawbar setup unique to our ears. Identifying the relative loudness of harmonics is going to be true throughout all musical instruments and sounds in general. The harmonic fingerprint of a trumpet is slightly different from the harmonic fingerprint of a fluegelhorn… Even when playing the same note, a subtle difference in loudness among the upper harmonics alerts our brain that each is a different instrument. Identification is assured. To recreate the timbre of a complex sound, matching the amplitude (or loudness) of the first few harmonics is critical – if you can accurately reproduce 5 harmonics the listener will begin to identify the sound with a particular sound category. The more of the harmonics you are able to match the more convincing your emulation will sound.
