Synth Basics: All Squares are Pulse
Sawtooth waves we described as bright and buzzy. We looked at the types of sounds that lend themselves to this basic wave shape: synth strings and brass sounds, as well as leads, etc. and we took a quick look at the Envelope Generators (Pitch, Filter, Amplitude). This time we’ll take a look/listen to the Pulse wave family. We call Pulse waves a ‘family’ because there are a couple of types of Pulse waves. Sawtooth waves come in the sawtooth up and sawtooth down variety. Pulse waves are either On or Off.
To gain an understanding of these shapes we’ll use the following analogy: If these were lighting fixtures, the Sawtooth wave would be a “dimmer” type switch. You can fade up the lights to full brightness, then push it to turn it off, and repeat; that’s your sawtooth up. Or you can push it to turn it on immediately, then fade the dimmer to darkness, and repeat; that’s your sawtooth down.
Pulse Wave
Pulse waves would be like a simple ordinary On/Off switch, what varies is the length of time On versus the length of time Off. When it’s On 50% and Off 50% this relationship being equal is called a “Square” wave. All other percentage On to Off create narrower pulse waves. You might, for example, have a pulse that is On just 25% of the time (Off the other 75%) or one that is On just 10% of the time, (Off the other 90%) each will have a different tone to our ears. A Square wave is described as sounding hollow and woody. Any pulse wave that is not a 50/50 “square” will sound more and more nasal in nature. A Square wave sounds closest to a Clarinet. An acoustic clarinet has a smooth woody hollowness to its sound. The narrower the pulse the more it approaches the sound of an oboe. Hollow-to-Nasal… As the ratio between the On/Off time changes the tone has a more pinched, tight or nasal tone. Think of a clavinet, it has a nasal, pinched tone and is certainly a candidate for the Pulse wave family.
As we go deeper into the Synth Basic series we’ll hear more about the harmonic series. Briefly, harmonics are overtones – related pitches to the fundamental tone. The sawtooth wave family is rich and bright – it contains all harmonics in the series. A Square wave, by contrast has only the odd numbered harmonics. In a Square wave every other harmonic is missing. As the width of the pulse narrows the spacing of the missing harmonic will change accordingly. Without over analyzing this, you will notice a more nasal, thinner tone as you move farther away from the “square”, 50 on/50 off ratio.
Let’s begin our listening experiments with the quintessential Square wave synth lead sound, called “Lucky”. An obvious tip of the cap to the ELP (Keith Emerson’s) “Lucky Man” lead synth sound. Back in the day, 1970 to be exact (early days of analog synths) this MiniMoog sound captured the ears of every keyboard player – for many, the first time really hearing a synth lead. You either embraced it or not, but you knew something new was afoot. Synths would not be ignored any longer. This is an example of the Square Wave Lead:
Preset 5: 046(C14) “Lucky” – in the Motif XF and MOXF
Preset 5: 051(D1) “Lucky” – in the S90 XS/S70 XS
Navigate to the Oscillator screen.
Click on the number buttons to view Element parameters.
Notice there are two Elements used. This is a common practice to enhance the analog-ness of the result: one Oscillator is detuned (Fine) slightly flat (Element 1 = -6 cent); while the other is detuned slightly sharp (Element 2 = +6 cent). As you will start to see in sound design, this beating “movement” obtained by detuning can add to the perception of thickness, richness. This happens long before it is disturbingly out of tune. Tuning can be very precise but often you can gain something by a small amount of detuning. You really gain nothing by duplicating the same source wave in two Elements, if you keep them in perfect tune. The change in volume, by adding a duplicate would hardly be noticeable. Detuning allows the ear to experience “beating” – the pulsing sound of being slightly out of tune. The faster the “beating” the more you’re out-of-tune… the slower the “beating” the more in-tune you have set them. As we look at other forms of synthesis in this series, we will come back to this very point – detuning. Related to this discussion is Vibrato. Vibrato, as a musical concept, is all about tuning and detuning the instrument in real time. It is a musical gesture that is pitch modulation – changing the pitch in real time. The movement of beating and of vibrato are accomplished by varying the pitch either with another oscillator or manually. We will do an experiment that will illustrate for your ears, the phenomena of detuning and movement/change in the resulting tone.
The Wave used here is “P50-2” – the abbreviation can be understood as a 50% On/Off Pulse wave (square). You are offered two different Square Pulse Waves. Each has a different “phase” – and while changing the phase can indeed sound like detuning, changing the phase can cause a phenomena called cancellation (which is another programming tool).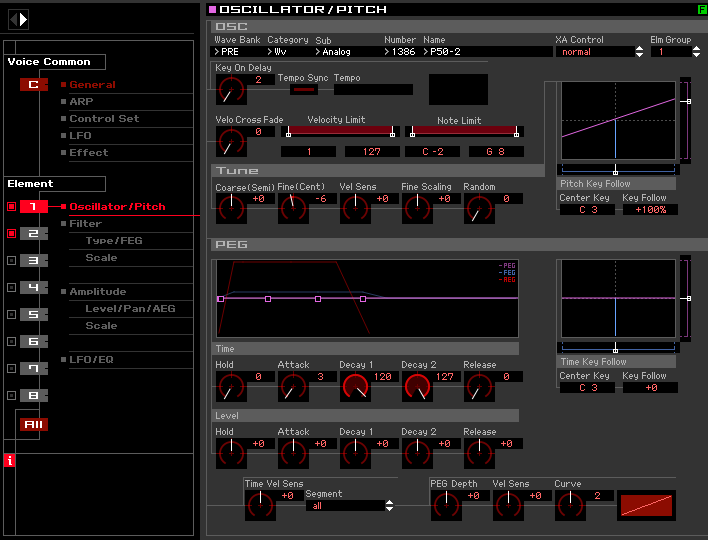
A second Voice that utilizes the special case of the 50/50 Pulse (Square) is the VOICE:
“Dual Square Lead” Preset 5: 041(C09) MOXF/Motif XF
“Dual Square Lead” Preset 5: 046(C14) S90 XS/S70 XS
This Voice uses the “P50-1” in Elements 2 and 3.
Play these two classic “square” wave lead sounds to get a feel for how it plays as a melody sound. It matters not if you find it useful right now, we can listen to it and study it from the standpoint of its historic impact. It is so fundamental an analog synth sound, that we can tend to dismiss it. But without this particular timbre/tone, who knows whether synthesizers would have caught on. It is an essential musical tonality. And while “Lucky” is dressed up with portamento (glide) and effects, the “Dual Square Lead” gives you a good idea of the classic Square wave’s hollow tone… contrast this with the Sawtooth Lead sounds we looked at in the previous installment.
The missing harmonics is the reason we hear these two family of waveforms as different. Sawtooth represents all harmonics, while Square wave is just the odd harmonics. As the time On:Off is changed (narrowed), the spacing between the missing harmonics is increased, and the more edgy and tight the sound gets. The math is helpful, but your ears are all you need to master this.
FINE Tune Experiment
Let’s do a little experiment with the P50-1 Wave.
Duplicate the P50-1 SQUARE Wave in both Elements 1 and 2.
Element 1 Fine tuning is set to +0cent
Detune Element 2 to “Fine = +10cent” (shown below on the Motif XF) 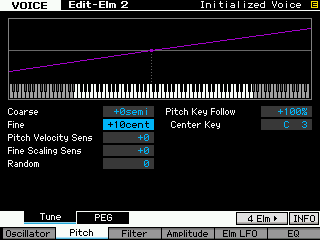 Play middle “C”. You will hear rapid “beating” as the two pitches argue about the true pitch.
As you lower the FINE Detune of Element 2 to +9cent listen closely to the change in the beating. You will notice that the beating is less rapid.
You must re-trigger the note in order for the new pitch setting to take place _ in other words, a sample that is detuned must be started from the beginning for the tuning to take place. This is the nature of sample-playback – the pitch change is noticed upon retriggering the note.
As you approach unity tuning (remembering to retrigger the key at each new setting): When Element 2 FINE = +3cent you will hear a distinct phase cancellation that occurs as the tone almost disappears completely about 2 or 3 times each second.
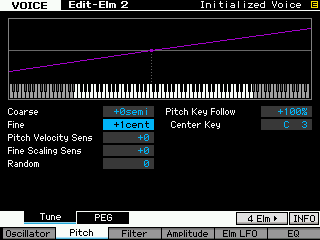 As you decrease the amount of detune, to Element 2 FINE = +1cent that cancellation, now even slower, will occur once every 3 or 4 seconds… a very slow undulation. You hear the harmonics cancelling as the sound almost disappears completely – and this cancellation takes on its own rate, depending on the pitch you are playing. We are using middle “C” as the reference point for this experiment.
What we want you to experience is this cancellation – this change in the timbre of the square waves as the two identical Waveforms approach being exactly in tune.
Finally set Element 2 = +0cent so that it is in perfect tune with Element 1, notice there is no beating, now at all; there is no moving cancellation within the tone; just two waves playing as one.
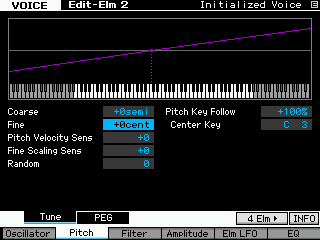 Our musical ears are keenly sensitive to tuning. We detect being out-of-tune by what we refer to as “beating” – once the tones are fairly close you become aware of the rapid “beating” phenomena. As they get closer and closer to being in-tune, they beating slows, and slows and finally stops when tuning is exact. Viewing two Waveforms that are almost in tune can explain why there is this multiplicity of amplitudes that alert our ear to their presence.
When you think about a violinist applying vibrato to a string… The fundamental pitch is determined by the length of string allowed to vibrate freely between the left hand’s position and the bridge. Vibrato is the act of shortening the active length, then lengthening the active length by subtle movement of the finger along the string being bowed. A small rhythmic variation in tuning can feel natural and musical. Vibrato gives the violin a “singing” quality – and this reference should make complete sense because when singing, vibrato is a natural gesture. But exactly when this sounds out-of-tune varies and is subjective to a great degree. The beating of two pitches slows as they approach being in exact tune, until finally the beating stops completely when they reach unity. Vibrato is a musical gesture where we manually move the pitch above and below the true pitch for expressive purposes.
When sound designing – listening at this microscopic level is mandatory. You are often tuning harmonics (overtones) to either be in-tune, slightly-out-of-tune, or even creating inharmonic relationships that function within the overall timbre. In the previous article we heard how detuning can even sound metallic – when we looked at the Steel Pan Voice. We will discover that relationships between frequency of vibrations is very important not only to our sense of pitch, but to our sense of timbre, tone, size, and a myriad of other things we use to describe musical sounds. You will be listening for pitch and phase relationships – and the more you know about these the better you become at programming your own sounds. The subtle detuning of two Oscillators to create an ensemble can be understood when you factor in that perfect tuning is not really possible in any real world ensemble – subtle detuning is very natural and is accepted, even expected (to a point), by the listening ear.
Phase
We mentioned that the phase relationship can also be discussed here, because changing the phase relationship between similar waveforms can also give the feeling of an ensemble, or at least affect its richness. When two or more waveforms are “in phase” it means that they are starting their cycle in sync with each other. If we imagine our ON/OFF light switch – two lights being turned On and Off exactly at the same time would cause alternating light and dark. If one comes on slightly behind the other, they still would individually remain on for the same amount of time, but the light to dark time overall would be affected. If the two light switches were completely “out of phase”, then one of the two would always be lit – the light would be constant as there would be no time when both were OFF – precisely as one went dark the other would illuminate. Phase does not affect pitch but it does affect our perception of the timbre.
A string section is full of musicians with extremely good ears, but even if they are in exact tune with each other – the phase, the point at which the string starts its motion relative to other strings – might be different on each violin. Even the difference of one-thousandth of a second is easily detected by the human ear. Remember we, as humans, use phase (extremely short time differences) to locate sounds. And while we are not as sharp as bats, we are fairly good at it (we did rise to the top of the food chain). The fact that a sound arrives at your right ear ever so slightly before it arrives at your left, causes you to recognize the direction to the source of that sound. And you can pinpoint and identify an incredible variety of sounds, large and small. So a dozen violin players trying to start their strings in-phase is almost guaranteed never to happen – rich, lush, thick, phat, are words we use when attempting to describe this ensemble tone. Detuning and Phase relationships are two very important tools in your sound designing tool kit. And listening in, closely, for the harmonic movement is going to be a skill you need to develop for sound designing.
We’ve started with these basic waveforms shapes that you find as source waves in the standard analog synthesizer. Part of the reason they do certain sounds well and others not so well has to do with the amount and types of controls you have over the waveform shapes as they travel through time. We’ve seen briefly the Pitch Envelope, the Filter Envelope and the Amplitude Envelope – resposible for how the timbre changes as time moves forward. But also we’ve heard how detuning oscillators also causes the sound to change over time on a very subtle level. And while all square waves are pulse waves, only the one special (50/50) incident of pulse wave is called “square”… A pulse wave is either ON or OFF (like a light switch) that keeps going On and Off at the frequency of the note you strike. If you strike A440, it is On and Off precisely 440 times in a second. If the ON time = the OFF time we have a “square” wave. All other balances of On time to Off time are still pulses, they are just not “square” pulses. The narrower the On time of the pulse the more nasal or pinched the timber becomes… don’t believe me, just listen..
NARROW PULSE
As an example of the Pulse being narrow, lets explore some Voices built from a very narrow On:Off ratio.
The Wave used here is “P10-1” – this is a 10% On/Off Pulse wave:
“Pulse Clavi” Preset 1: 080(E16) MOXF/Motif XF
“Pulse Clavi” Preset 1: 085(F05) S90 XS/S70 XS
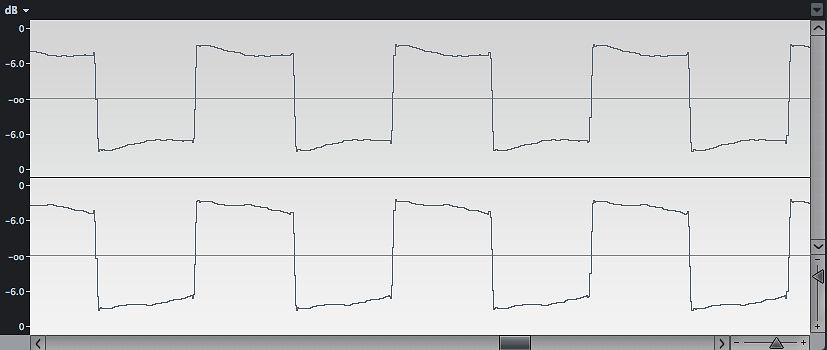
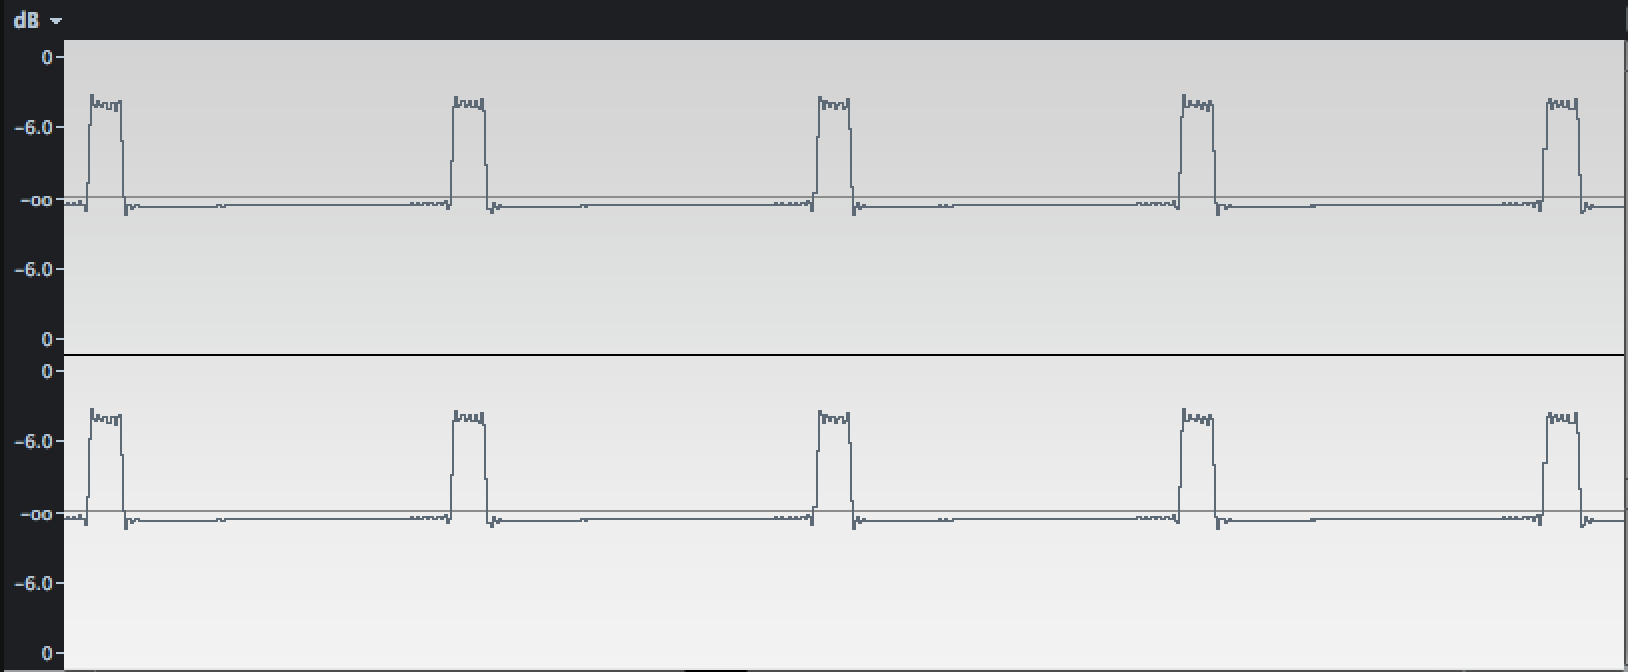
Above you can see a graphic of the P50-1 Wave (top), contrasted to the P10-1 Wave (bottom). Waves shown as recorded to Cubase. The P10-1 Waveform sounds extremely nasal – the Pulse Clavi is the perfect example of a narrow pulse – you can easily see that it is ON for a short period of time and OFF from a long period of time. This is a recording of middle “C” which is 261.xx pulses (complete cycles) in a second.
“Funky Pulse” Preset 5: 052(D04) MOXF/Motif XF
“Funky Pulse” Preset 5: 057(D09) S90 XS/S70 XS
This Voice uses velocity to switch between four different Pulse Waves: two P25 and two P10. As you increase velocity the timbre narrows. In a sample-playback engine like the Motif, MOXF, and S-series you can use velocity to switch between the Waveform that is being triggered. This is how this particular Voice gets more nasal as you increase your velocity. As you can hear – as you increase your intensity (velocity) the sound gets louder (naturally) but it also gets thinner, more nasal, and there is a shift in the timbre. This sound invites dynamic interaction to play with the nature of the timbre. As you begin programming your own sounds, you need to play attention to your own velocity habits. The expression on this Lead Voice “Funky Pulse” comes from varying the velocity with which you strike the keys. There often was no equivalent on early analog synthesizers which did not always feature velocity as a controller. Those that did, did not really address changing the source waveform with velocity. As we go forward you will begin see the different methods of accomplishing ‘expressivity’ with the synthesizer engine and the resulting sound.
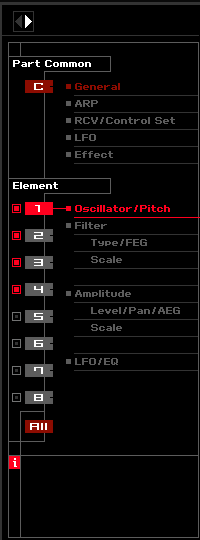 Element 1 “P25-2” velocity = 1-70
Element 2 “P25-1” velocity = 71-90
Element 3 “P10-2” velodity = 91-110
Element 4 “P10-3” velocity = 111-127
To make you aware of how these velocity ranges work, try the following experiment. Limit yourself to playing the keyboard with just a single Velocity Range available. You can isolate an Element in the Editor by unmarking the radio button just to the left of the Element number. For example, MUTE Elements 2, 3 and 4 – attempt to play just Element 1, which means you cannot exceed a velocity of 70. Next Mute Elements 1, 3, and 4 in an attempt to play just Element 2, which means you must trigger a note between 71-90. And so on. This will give you a new appreaciation for just how all over the place your normal playing is – and how difficult it is to play within just a specific region of velocities. This is normal – it takes a great amount of practice to play a C major scale using just velocities 91-110 without missing a note, a great amount of practice.
PWM
Also in the pulse family is a situation where an LFO is used to continuously vary the width of the pulse from 50/50 to 10/90 and back again. This is called PWM Pulse Width Modulation. This is another unique analog category of sound. As you may have guessed the changing pulse width cause our ears to pay attention to this harmonic movement within the wave. It seems to shimmer.
The sawtooth wave (bright and buzzy) contains all the harmonics in the harmonic series. A square wave (hollow and woody) contains every other harmonic – just the odd numbered harmonics. And as the pulse narrows the missing harmonic mathematically shifts, at an ON:OFF of 1:3 every third harmonic will be missing, at 1:4 every fourth harmonic will be missing. This dancing of the harmonics is interesting to our ears. The pulse width modulated wave shape can at times seem as rich in harmonics as a sawtooth wave, and this timbre also lends itself to strings and rich pads. And this is yet another color in your sonic palette… Here are some Voices that utilize principally a PWM sample as the oscillator.
As you begin to see there is some overlap in the type of sounds you can build from the different wave types. Sawtooth can build strings, but so can PWM waves… uses your ears. Sawtooth can be used to build Brass but so can PWM waves. Begin to look for (and when I say “look for” I actually mean: listen for) the harmonic content and movement within the seleted waveform. These selections of waveforms can be totally subjective – but being able to have a general idea about what certain waveforms lend themselves to can help you reach your goal if you have something specific in mind.
PWM VOICE EXAMPLES
Motif XF/MOXF:
“PWM Strings” – Preset 5:037(C05)
“PWM Simple” – Preset 4:040(C08)
“Slow PWM Brass” – Preset 5:001(A01)
“PWM Lead” – Preset 5:069(E05)
S90 XS/S70 XS:
“PWM Strings” – Preset 4:042(C10)
“PWM Simple” – Preset 4:045(C13)
“Slow PWM Brass” – Preset 5:006(A06)
“PWM Lead” – Preset 5:074(E10)
Take your time exploring these Voices – play them, explore the Envelope Generators (Pitch, Filter, Amplitude), experiment by making changes to the envelopes. Find out what the controllers are designed to change… the filter will be tasked with changing the harmonic content (the level and amount of high harmonics is usually filtered out by a LPF, Low Pass Filter, assigned to a control or to velocity).
Next Article: Synth Basics: The ORGAN Father of the Synthesizer

 The first drawbar, (Sub-octave) 16′