Motif XF YSFW Setup Macintosh with Cubase
MOTIF XF YSFW SETUP MAC WITH CUBASE
A quick setup guide to get going with Cubase and your Motif XF via the FW16E (firewire) option:
Download and install the following items:
_ Yamaha Steinberg FW Driver version 1.7.5 for Mac OS X 10.6.8, 10.7.x, 10.8.x, 10.9.x, 10.10.x, 10.11.x, 10.12.x
_ Motif XF Extension version 1.1.1 for Mac OS X
The Motif XF Extension is an addition to Cubase that will allow it to recognize the Motif XF ports by name, and it will automatically do much of the audio and MIDI setup (like assigning Remote Control Device ports, and upon launch you will be asked if you want to use the Yamaha Steinberg FW driver as your ASIO driver, etc).
Important Note for Mac Lion Users Please visit http://www.steinberg.net and update your Cubase to the lastest version – If you are using Cubase (Series 5) 5.5.3 or Cubase AI 5.1.1, and running Macintosh Lion (10.7.x) make sure you get the CoreAudio2ASIO update to ensure compatibility.
When you are using the Motif XF with the Yamaha Steinberg FW driver (YSFW) you need to verify the following MIDI settings in your Motif XF:
Press [UTILITY]
Press [F5] CONTROL
Press [SF2] MIDI
Ensure that the MIDI IN/OUT = FW
Press [STORE] to write this preference to your Flash ROM.
Now, let’s setup your Macintosh computer:
Go to SYSTEM PREFERENCES
Find the Yamaha Steinberg FW icon listed in the “OTHER” category
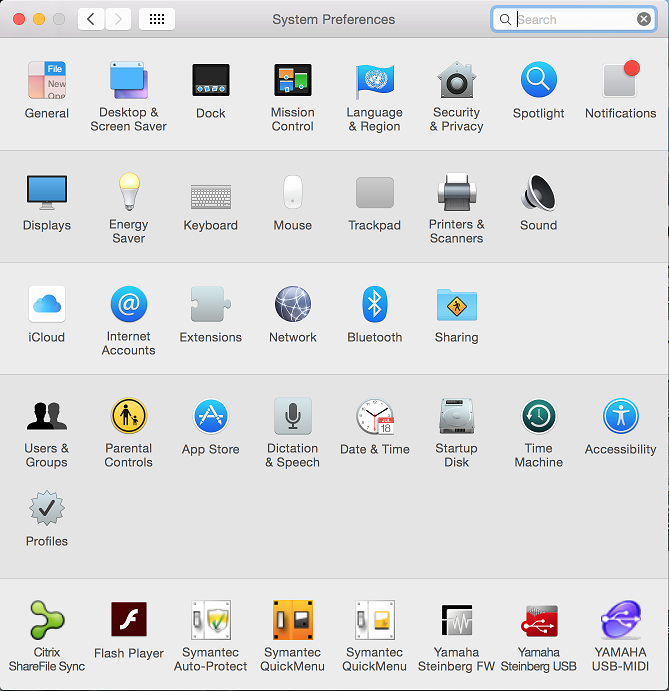
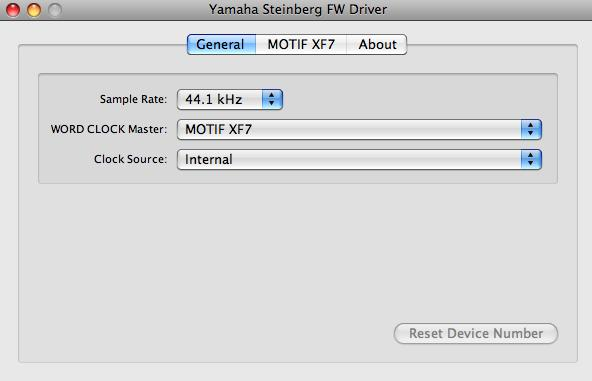
Double click the icon to open the panel.
Here you will be able to set the Sample Rate (44.1kHz, 48kHz, 88.2kHz or 96kHz), the Word Clock Master (Motif XF7), and the Clock Source (Internal)
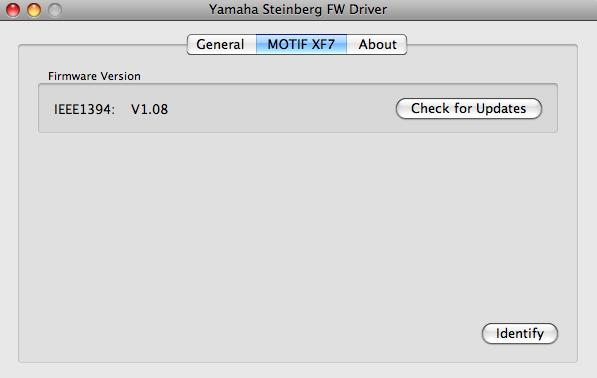
Click on the tab(s) that identifies your connected device(s): Motif XF7
The current IEEE1394 Firmware version of your FW16E will be shown. This should read: V1.08 currently
Now that we have verified that the Yamaha Steinberg Firewire driver is in place, lets make sure your Macintosh is set to use it.
On your Macintosh HD, go to APPLICATIONS > UTILITIES > AUDIO MIDI SETUP
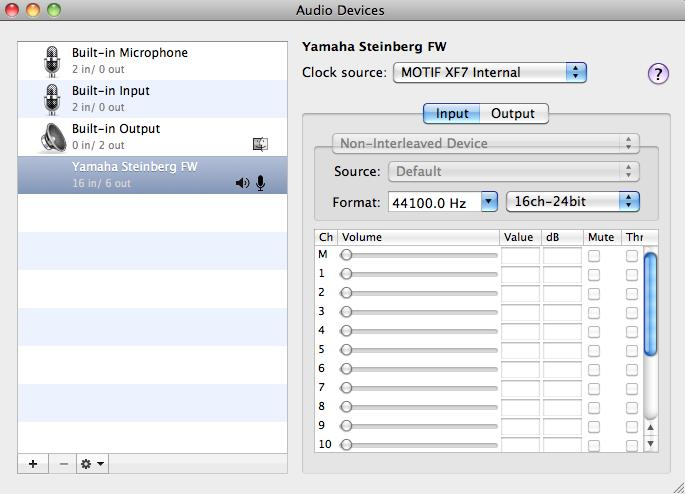
If you have Snow Leopard (or later) your Audio Device configuration is shown in the screen shots below: The Yamaha Steinberg FW Driver has both the Mic (input) and Speaker (output) icons and shows the 16 INPUTS coming from the Motif XF and the 6 OUTPUTS (3 pair of stereo returns to the Motif XF).
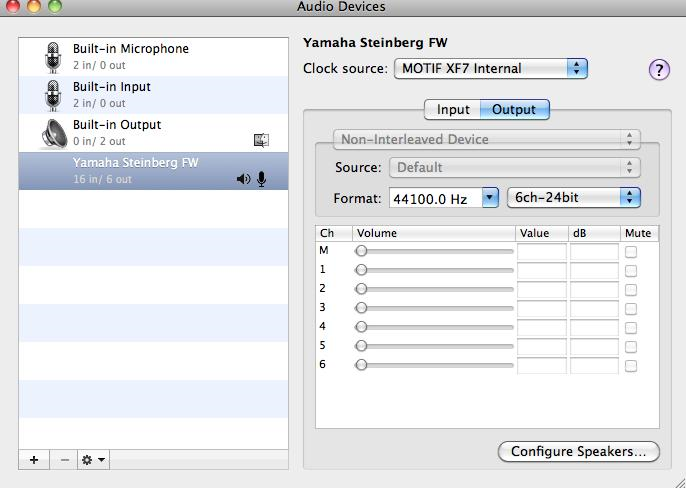
If you wish to use the YSFW Driver for all your computer audio needs you can set that up as follows:
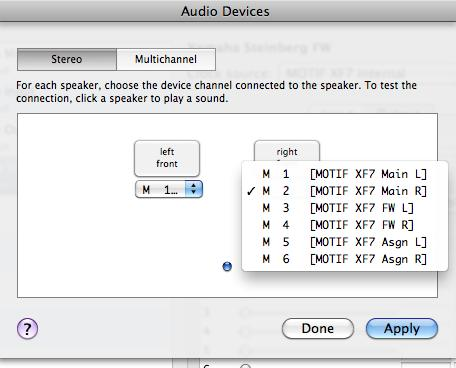
Click on CONFIGURE SPEAKERS (On the OUTPUTS Tab) and select the “Motif XF Main L” for the Left Speaker, and “Motif XF Main R” for the Right Speaker
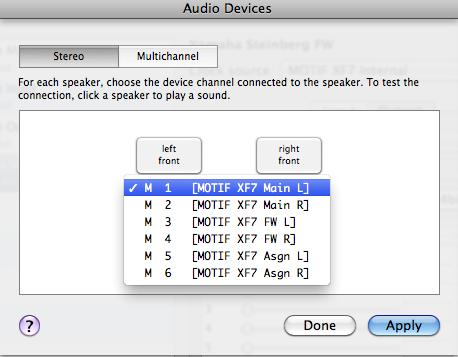
Just FYI: If you ever wish to record signal from the computer to the Motif XF for sampling (for example), you would select the second pair of connections: “Motif XF FW L” and “Motif XF FW R”. This would send signal from your computer to the FW audio Input – this arrives in the Motif XF on the MIXER as a FW AUDIO IN, and can be routed to the XF’s built-in sampler.
Click APPLY
Close Audio Setup.
This sets your Motif XF as your soundcard for your computer. Expect audio output to be sent to the sound system connected to the main LEFT/RIGHT outputs of the Motif XF.
Launch Cubase 
Because you have installed the Motif XF Extension, Cubase will ask you if you want to use the Yamaha Steinberg FW driver as your ASIO driver.
Click “YES”
Go to DEVICES (called “Studio” in Cubase series 9) > DEVICE SETUP… (called “Studio Setup…” in Cubase series 9) > MIDI > MIDI Port Setup
Here you will be able to select the device(s) that will be your MIDI controller. Typically this is either your Motif XF keyboard (Motif XF Main) or any MIDI controller connected to its back panel Motif XF MIDI IN jack.
Make sure that only these devices are marked in the “In ‘All MIDI Inputs’” column

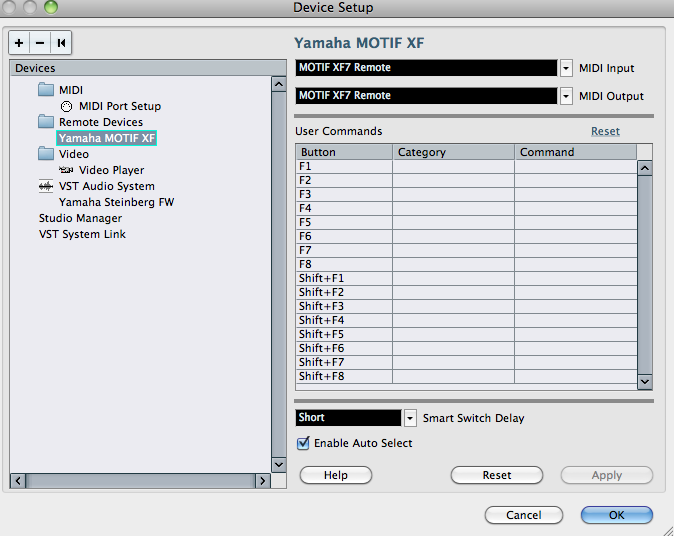
You do not want to mark the Motif XF REMOTE port in the In All MIDI Inputs column. Remote Control commands must be kept discreet, so as not to interfere with normal music performance. In the next folder “REMOTE DEVICES” highlight the Motif XF item. It will be assigned as your Remote Control device and the MIDI IN and MIDI OUT ports will be assigned.
Move down to the VST AUDIO SYSTEM item and verify that the Yamaha Steinberg FW is selected as the ASIO DRIVER.
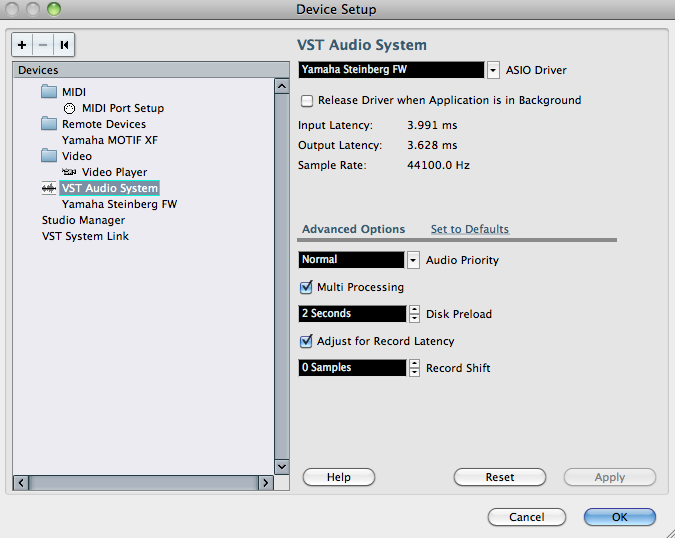
The option just below VST AUDIO SYSTEM will be “Yamaha Steinberg FW”. If you highlight that you will see the CONTROL PANEL where you can set your buffer size. In general, you want to set the buffer size as small as possible without your computer having to sputter and click/pop. Do not panic – single digit INPUT and OUTPUT Latency will be fine for most recording with the Motif XF (because you will monitor yourself “Direct” which is ZERO LATENCY. If you hear clicking and popping – that is an indication that your Buffer Size is too small.
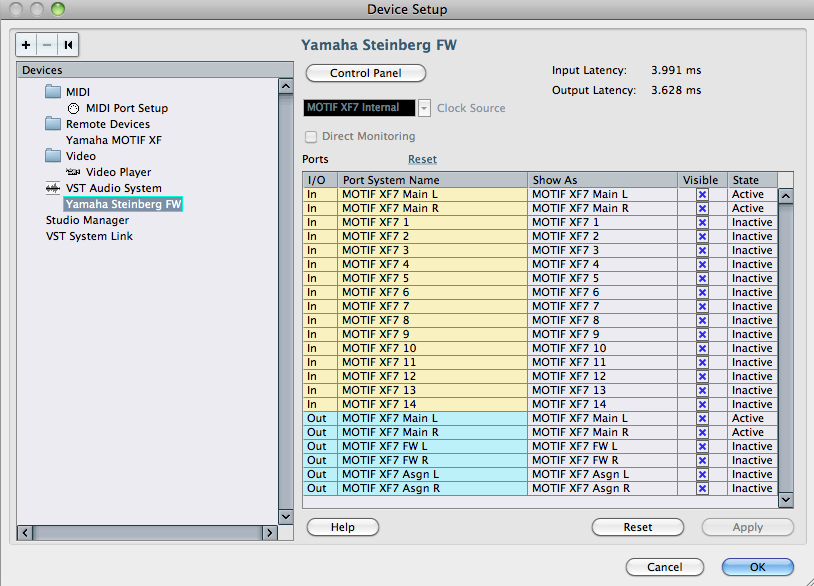
The screen shot above shows the 16 Audio OUTPUT buses available from the Motif XF. They are seen as audio INPUTS to Cubase. You will see the PORTS listed by their names (if you have properly installed the Motif XF Extension). The first are the MAIN Left/Right OUTPUTS of the Motif XF arriving in Cubase as “Motif XF Main L” and “Motif XF Main R”. You will see the word “Active” in the STATE column – this is a status report and indicates that currently these inputs are in use by Cubase. The “Inactive” status on the “Motif XF 1” – “Motif XF 14” simply means that as of yet, nothing is assigned to use those inputs into Cubase. You do not have to worry about changing these to active, they will change, automatically, when you actually assign something to use these inputs into the Cubase program.
For example, if you go to VST CONNECTIONS > INPUTS and create an input (ADD BUS) that was set so that AUDIO DEVICE = Yamaha Steinberg FW ASIO driver, and the DEVICE PORTS = Motif XF 1, and Motif XF 2, then the STATE would change to ‘active’. Once an INPUT Connection is used, it becomes unavailable for use elsewhere. So that status of the INPUT is always reported here. This is not difficult to understand if it were an analog input – you would see the cable protruding from the jack. Once an input is occupied it is occupied! (Don’t make it more difficult than it is because it is virtual – the same rules apply!)
Please note that there are 16 INPUTS to Cubase (16 OUTPUTS from the Motif XF) and that they are labeled “Main Left”, “Main R” followed by “Motif XF 1” through “Motif XF 14”. That is a total of 16. The first two are the main left/right stereo, followed by fourteen individual sends that can be configured as odd/even stereo pairs or as individual mono sends.
Below the 16 INPUTS to Cubase, the 6 AUDIO OUTPUTS from Cubase are shown as three pair of audio outs that return to the Motif XF:
Motif XF Main L / Motif XF Main R = sends signal from Cubase to the main left/right audio outputs of the Motif XF. remember the XF is your computer’s soundcard when you are using the YSFW driver as your ASIO Driver. The Main L/R outputs are the 1/4” outputs found on the back panel of the XF and these should be connected to your main sound system (monitor speakers, mixer, etc).
Motif XF FW L / Motif XF FW R = sends signal from Cubase to the internal Motif XF mixer where you can combine this return with your current internal mix or you can route the return to the XF’s Integrated Sampler. The Firewire return has its own audio channel with access to Volume, Pan, and the SYSTEM EFFECTS.
Motif XF ASGN L / Motif XF ASGN R = sends signal from Cubase to the Assignable left/right audio outputs of the Motif XF. This signal can be sent a second set of monitor speakers or used to create a separate monitor mix. This is very useful when you have additional musicians in a record situation and you require a separate headphone system. You can feed this output mix to an external headphone amplifier system and deliver a separate discreet mix (the full version of Cubase 4, 5 or 6 gives you an opportunity to setup such separate STUDIO SENDS if you require this functionality).

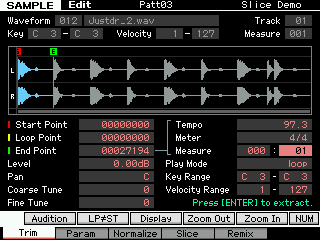
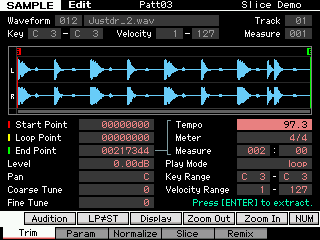
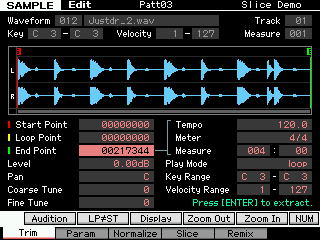 (known) number of measures and beats and the sampler will calculate the tempo.
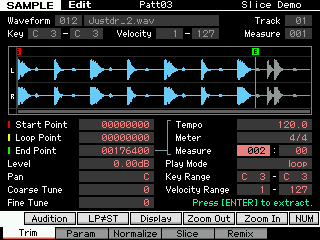
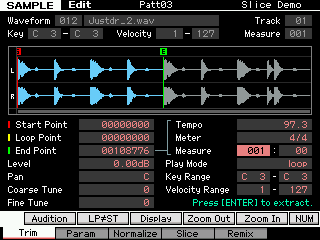 Once you have calculated the precise tempo, you can use the MEASURE parameter to divide your audio clip into any measure and beat region you might desire. For example, say you only want to use the first Measure of this 2-Measure clip: