MOXF Getting Started: Category Search
Getting Started: CATEGORY SEARCH
CATEGORY SEARCH is a basic skill that will serve you well when using other more advanced routines on the MOXF6/MOXF8. With more than one thousand VOICES on-board being able to find them efficiently makes Category Search the first skill you should master. This article goes over this function and applies it to the PERFORMANCE CREATOR feature – which allows the user to assemble multiple Voices into a program for real time play.
Hear the Sounds
• Make sure the MOXF is hooked up and panned out in Stereo to a high quality sound system. We recommend professional Studio monitors like the Yamaha HS8 monitors.
• Push the [VOICE] Button to start in VOICE Mode.
Selecting a Voice using the Category Search
1) Press the [CATEGORY SEARCH] button in the Voice Play display. The Category Search display appears.
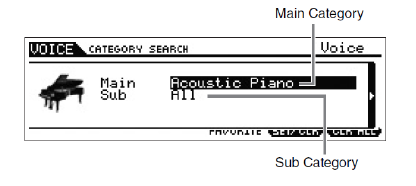
2) Move the cursor position to “Main” (Main Category) with the Cursor UP button, and use the [DATA] dial to select the Main Category.
3) Move the cursor position to “Sub” (Sub Category) with the Cursor DOWN button, and use the [DATA] dial to select the Sub Category.
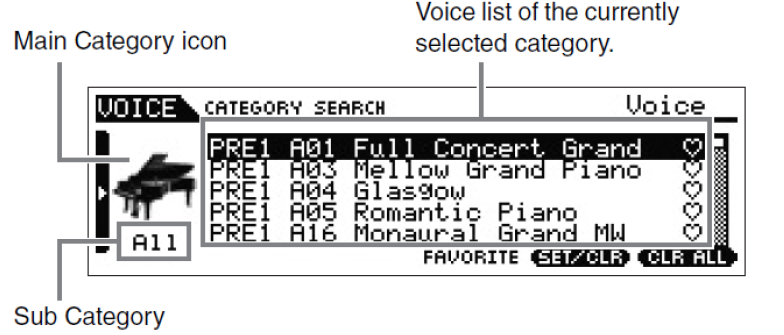
4) Press the [ENTER] button, or Cursor [>] button to actually call up the selected Category.
The Voice List of the selected category is shown.
5) Select the Voice with the Cursor [UP]/[DOWN] buttons or [DATA] dial. If you want to change the Category, press the Cursor [<] button or [EXIT] button and go back to step 2.
6) Press the [ENTER] button to actually call up the Voice. This closes the Category Search display.
The Voices are in a long list according to the selected Main Category; you jump down the list by selecting the Sub Category. On the extreme right side of the screen you will see a “ruler” that indicates just how far you have advanced down the Voice List in this Category.
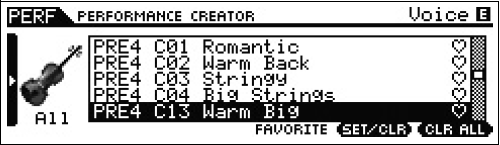
Registering your favorite Voices to the Favorite Category
1) Perform steps 1 through 4 of the “Using the Category Search function” instructions to call up the Voice List of the selected Category.
2) Select the desired Voice with the Cursor UP/DOWN buttons or [DATA] dial.
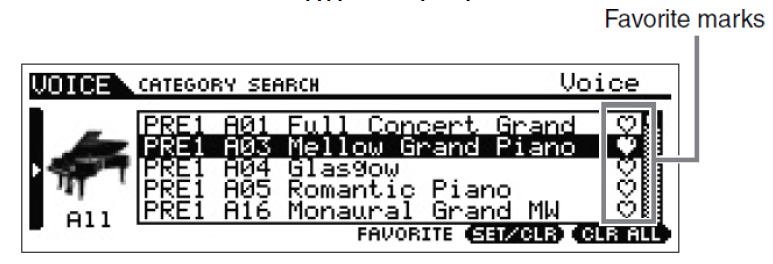
3) Press the [F5] SET/CLR button to turn on the Favorite mark. This operation will turn on the Favorite mark, making it solid ( ), and the selected Voice will be registered to the Favorite Category. Pressing the [F5] SET/CLR button again will turn off or “ghost” the Favorite mark ( ). To register other Voices, repeat steps 2 through 3.
To remove all the Voices from the Favorite Category, press the [F6] CLR ALL button.
4) When you complete registering Voices to the Favorite Category, press the [ENTER] button to return to the Voice Play display. This operation will exit from the Category Search display and store the Favorite Category settings to internal Flash ROM. To register/remove the current Voice to/from the Favorite Category, simply hold the [SHIFT] button then press the [FAVORITE] button.
Alternate Method to register FAVORITE: (QUICK KEYS)
When in VOICE mode:
Select the VOICE
Hold [SHIFT] + [FAVORITE]
The MOXF will write your preference to internal memory.
TIPS and TRICKS: Getting the most out of your MOXF
You would mark a VOICE as a Favorite as a reminder to yourself that this is a sound you enjoy playing. With so many variations on instrument sounds, it can be very important to mark the ones you find interesting to play. You may think you will remember the name of the Voice but marking it as a Favorite will serve to keep you certain about Voices you find inspiring to play. A marked FAVORITE will have a small heart icon on the top line of the main VOICE screen. And all your marked Voices will appear in a custom list when you press the dedicated [FAVORITE] button located just below the [CATEGORY SEARCH] button.
Just FYI: the order in which the Voices appear in the “Favorites list” is a result of their numeric position in the Banks and is not customizable. If you wish to place your Favorite PRESET VOICES in a specific order, that is exactly what the purpose of the [USER 1], [USER 2] and [USER 3] Voice Banks. When you first get your MOXF out of the box, the Voices contained in these USER Voice banks are all “placeholder” Voices – you will find they are all repeats from Voices found in the permanent PRESET 1 – PRESET 9 Banks. Same goes for the 32 USER DRUM Kits, they are simply repeats of Kits found among the 72 permanent PRESET DRUM Kits. You are meant to store your own customized versions of data to the “USER” banks – and thus the name.
Feel free to recall your Favorite Preset Voices, then press [STORE] and direct it to the USER bank and number position you would like to have this VOICE. In this fashion you can create a custom order of VOICES.
Performance Creator: LAYER
This makes it possible, without being a programming guru, to make splits, layers and add drum accompaniment without ever having to push the [EDIT] button. The first key to understanding how to use this powerful tool is to begin in VOICE mode.
VoiceMode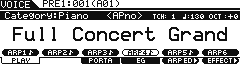
Starting from [VOICE] mode, select the Full Concert Grand piano Voice.
The Performance Creator makes programming Performances a very intuitive process… building up from single sound to completed combination.
First, let’s build a simple Performance Layer.
PERFORMANCE CREATOR Buttons
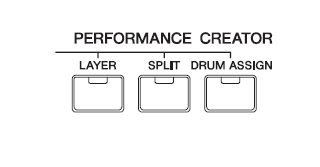
• Press the [LAYER] button
• You have created a Layer
• Immediately, you are seeing the “STRING” Category in the window and you are layered with Piano and Strings across the keyboard.
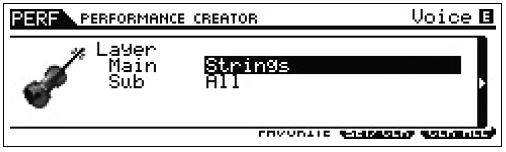
StrgLayer
• The Performance Creator takes you immediately to the Category Search function and now you can easily find the type of Voice that you would like to layer. Press [ENTER] and you will be taken to the NEW PERFORMANCE screen.
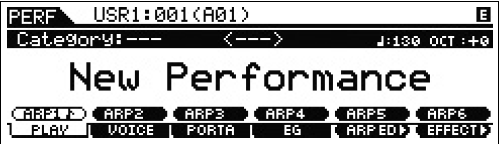
• Later you can tweak parameters, name and store your creation to the USER PERFORMANCE Bank where you will find locations for your own combination programs.
Performance Creator: SPLIT
Now lets build a SPLIT Performance:
• Start over again by repeating the same starting point in VOICE mode (_very important_)
VoiceMode
• Return to [VOICE] mode and recall the “Full Concert Grand” piano VOICE
• Press the [SPLIT] button
• You have created a Split
BassSplit
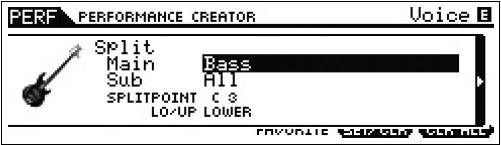
• Immediately you are seeing the “Bass” CATEGORY SEARCH in the screen and you have created a Split Performance with a Bass on the left and Piano on the right. Play the keyboard. You can cursor down and select a KEY for the SPLIT POINT.
• To complete the process, select your bass sound, press [ENTER] you will be taken to the main NEW PERFORMANCE screen.
• The LO/UP (lower/upper) parameter allows to quickly swap the left hand (LO) Voice with the right hand (UP) Voice. If you had started with the Bass sound (the lower sound) when making this SPLIT, this would allow you to conveniently swap them.
The Voice that is automatically selected for the Layer process is customizable and so is the Voice that is automatically selected for the Split process. Yes, you can have the split point at any spot on the keyboard… the SPLIT POINT parameter is immediately in the screen and available for you to set.
And as we will see, it is just as easy to add a Drum kit w/arpeggio to a LAYER or to a SPLIT.
Quick Keys for SPLIT POINT:
Move the Cursor down to highlight the SPLITPOINT parameter
Hold [SHIFT] + [Touch a key]
The Key will become the lowest note for the right hand.
Performance Creator: DRUM ASSIGN
• After creating either a LAYER or SPLIT, or even directly from a single Voice, it is very simple to add a drum arpeggio pattern to your program.
• Press the [DRUM ASSIGN]
DrumAssign

• You will be taken to the Category Search for Drum Kits.
There are over 2300 Drum grooves among the 7981 arpeggios on-board.
When you recall different KITS, you will hear different arpeggio patterns. Later you can customize exactly what drum arpeggio you wish to use. As you call up different Drum Kits, the assigned arpeggios change. This is simply because different kits have different arpeggio patterns associated with them. This is quick and easy.
POWER TIP: Any time you are playing the keyboard in VOICE Mode and would like to add a drum groove, the quickest way would be to press [DRUM ASSIGN] and select a DRUM KIT… it will be immediately assigned to PART 4 of a PERFORMANCE and assigned an ARPEGGIO pattern.
POWER TIP: You can customize which Voice is the default VOICE that is selected when the [LAYER], [SPLIT] and [DRUM ASSIGN] buttons are pressed. This is an option found in [UTILITY] mode > [F1] GENERAL > [SF4] PERF CRE (Performance Creator). Here you can set the default selection for Layer, Split and Drum Assign. Use the [<]/[>] to see multiple pages.
Selecting Arpeggio Types
Press the [PERFORMANCE CONTROL] button on the right front panel the PERFORMANCE PARTS and their current status are shown by the [1]-[16] buttons. The Performance Creator will always place the Drum Kit in PART 4 of the NEW PERFORMANCE program. If you would like to audition different drum arpeggios patterns, the simplest method is to simply choose a different kit. The ROCK Kit has Rock arps assigned, the HIP HOP Kit has HipHop arps assigned, looking to swing, try the Jazz Kit and so on. However, if you would like to find a specific arpeggio pattern you can do so as follows:
• Press [EDIT]
• Press PART SELECT button [4]
• Select “Arpeggio” in the screen Edit Select options
• Cursor to “Arp 1 Type” and press [ENTER]. Here you can see the MAIN Category is Drums and Percussion and you can cursor down to the SUB Category and TYPE options to select from individual Arpeggio Types.
ArpSelectType
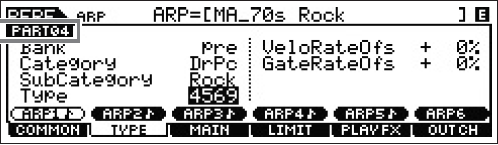
Six different Arpeggio Types can be associated with each program and are accessible via the six [SF1]-[SF6] ARP SELECT buttons.
Just FYI: Additionally, arpeggios can be assigned to as many as four PARTS at a time. The MOXF engine features four full featured, chord intelligent, interactive, customizable, arpeggiators. Take your time, there is much to explore. As you play through some of the PERFORMANCES loaded in the Factory Set, you will discover that in addition to rhythm patterns, arpeggios can be note flourishes, bass lines, guitar strums, horn riffs, trills, even controller data. Each of the six [SF] buttons can contain an arpeggio selection for its associated PART – so it is possible to organize different Sections of a composition for real time access.