UNDERSTANDING MASTER MODE
The Master mode offers the following two main features:
• Up to 128 programs consisting of either a Voice, a Performance, or a Multi can be created, stored and called up.
• For each Master program, four independent keyboard Zones can be set.
You can use the Master mode to memorize the settings you use most often including the information as to which mode is used, and you can call them up instantly anytime you need them with a single button press. Furthermore, you can memorize the settings for controlling external MIDI devices to the Master. You can change external MIDI tone generators connected to this instrument in sequence while performing on the live stage.
The Master programs can be used to organize and memorize your XS programs into one neat bank. It can also function as a place to store your external MIDI Controller setups when using the XS as a 4-Zone Master MIDI controller. Familiarize yourself with basic XS modes and operations before diving in this end of the pool. Save any personal data before following this document.
The principal modes of XS are VOICE, PERFORMANCE, and MULTI. A Master mode program can be used to recall a Voice, a Performance, or a Multi. When on stage, rather than jumping back and forth between modes looking for your programs, you can organize things in one Bank – the MASTER bank. You can then access setups via a Foot Switch (FS). The programmable FS assigned to cc98 will increment you through the Master setups.
A second use for Master setups is to integrate and organize your external MIDI gear, as well. This is when the ZONE Switch is active. You can send a Bank Select and Program Change message on four different MIDI channels simultaneously when you recall a MASTER setup. The Bank Select and Program Change data can be “preset” so that you can address internal XS Voices and/or external device setups from your 4 Zones.
Although Master setups are non-volatile (they do remain in memory between power cycles), often the data they point to is in USER locations – this can present a problem if you are not organized and aware of this fact. For example, if you load new USER VOICE data into a USER bank location that is referenced by a MASTER program, this can cause the Master to not sound properly. In general, if you are going to setup and use MASTERS you will want to save your data in ALL data files (.X2A). This way you restore all of the information that your MASTER programs might be accessing. All data files can be stored to internal Flash ROM (the keyboard comes with 192MB of storage space for data) or to an external USB stick or drive. And it will be critical to gain an understanding of how the associated MODE affects what you are able to do with a ZONE setup.
We will discuss both using MASTERS with internal data, and using MASTERS to control external devices. Read on…
MASTERING MASTER MODE
If you are using an XS alone (that is, with no external MIDI devices), Master Mode can be used to assemble your on-board XS setups (Programs) in one convenient bank. A Master location can point to a Voice, a Performance, or a Multi Mix. You can use a Footswitch to advance through the Master setups during a live session. This means if on the job you need to play a Piano in Voice mode, followed by a layer created in Performance mode that contains multiple arpeggios, and then followed by an Electric Piano back in the VOICE mode, followed by a MULTI setup that will be used for a MIDI file playback, you might find yourself pressing mode buttons and hunting around for your data. MASTER mode’s first function would be to allow you to organize all of your programs into one bank – the MASTER bank. Study the Factory data for examples of this type of usage of the Master setups.
001 – references a PERF “Lay it Down”
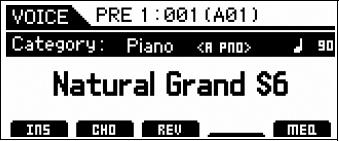
002 – references a Voice “Natural Grand S6”
003 – references a Voice “Vintage’74”
004 – references a PERF “Dream Ballad”
005 – references a PERF “Bop til you Drop”
006 – references a PERF “Piano Boogie Woogie”
007 – references a PERF “Slow and Low”
008 – references a MULTI “MULTI 001”
The MASTER setups are used to recall different Performances, Voices, or Multis. You can set up a Footswitch (FS) assigned to Control Change 98 (PC INC) to advance through the Master setups. If you want to use this function you will need to program it: [UTILITY] > “CONTROLLER” > FS CTRL NO. = PC INC
To learn from these MASTER setups:
• Press [EDIT]
• Select “COMMON” > press [ENTER]
• Select “MEMORY” > press [ENTER]
Here you can see how they are directly associated (linked) with a “MODE”, a “BANK” and Program number.
Master 008 is associated with:
“MODE”: MULTI
“BANK”: USER
“NUMBER”: 001 [Contemporary R&B]
If you play across the keyboard you will find this Master is playing four internal sounds, each ‘zoned’ to a specific region of the keyboard allowing the player access to multiple sounds on the keyboard from different MIDI channels. We’ll have more on this type of use a bit later in the article.

Master mode has this second more complex use – with ZONE control.
• Press [EXIT] to return to the EDIT SELECT screen
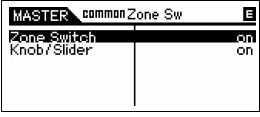
• Select “ZONE SWITCH” > press [ENTER]
You see the “Zone Switch” is set to ON. Master mode can be used to control internal sounds, and/or complex configurations where both internal and external sounds are used together, that is, setups where some “Zones” are controlling Internal XS Voices or an XS Performance while other Zones might be controlling external devices. By the time you reach the level of creating your own Master setups you should have gained a thorough knowledge of the XS and its modes. We will state them here so that you can fully understand what is possible and what is impossible from a Master setup. Then we will look at a few possible scenarios.
Rule 1: A Voice is the fundamental playable entity in the XS. The internal Voices come in two types: Normal and Drum Kits. A Normal Voice is made up of up to eight multi-sampled sounds called Elements. A Drum Kit is made up of as many as 73 different instruments (each drum or percussion sound is an instrument which occupies a single key). Each Voice has a Dual Insertion effect, a reverb and a chorus processor available. The Dual Insertion effect can be real-time controlled via MIDI controllers and has an intricate relationship to the individual Elements of the Voice. The Dual Insertion effect is an important component – and is often the “personality” of the Voice. A Voice occupies a single MIDI channel and in Voice mode. Significantly, when in VOICE mode, only one Voice can be recalled at a time for real time play. There are 1024 Preset Voices in 8 banks of 128. There are 512 User Voice locations in 4 USER banks of 128 each. There are 128 Normal General MIDI Voices and a GM Drum Kit; 64 Preset Drum Kits; and 32 User Drum Kits.
When you associate a MASTER program with VOICE mode, you will be able to play just one internal VOICE (Voice mode rules will apply). Even if you activate the ZONE SWITCH, only one Zone will be able to access an internal sound – because in VOICE mode only one Voice can be recalled and played at a time.
Rule 2: A Performance is a combination of up to four Voices. Each Performance has a reverb, a chorus effect processor that all of the different sounds share (each with its own Send level, however). All four of the assigned Voices can recall their own Dual Insertion effects from Voice mode (including the real-time effect controller assignments). All four Voices can recall their full compliment of arpeggios, as well, because the XS features up to four simultaneous arpeggios. It is important to realize that Performances are made up of sounds found in Voice mode. It places up to four of them into what are called “PARTS”. Through these, PARTS, you can edit the sound behavior of a Voice in the current Performance without changing the original Voice data. This is accomplished by applying “offsets” to the original data. This is a very important feature and really adds to the flexibility you have to customize sounds for your particular requirements. The same Piano sound can be used differently in each PERFORMANCE you reference it. Say you need a piano to be split with a bass, you can create the split by editing the PART parameters without destructively changing the original piano.
All Voices used in a Performance occupy the same basic MIDI channel and only one Performance can be recalled at a time. There are 512 USER Performances in 4 Banks of 128 (3 Banks of 128 (384) are pre-programmed at the factory to give you a starting-point and the USER 4 is Bank is full of Initialized Performances). In fact, all the Performances are USER. A Performance can be copied into a MULTI, as necessary. This actually places the PARTS (up to 4) in a MIX with each one set to the same Basic Receive Channel – this way they can all be played at one time. When you associate a MASTER with PERFORMANCE mode, you will be able to play just one (Performance mode rules will apply). Even if you activate the ZONE SWITCH, only one Zone will be able to access an internal Performance – because in PERFORMANCE mode only one PERFORMANCE can be recalled at a time. All four PARTS of the PERFORMANCE will be addressed together by a single ZONE.
These two modes, Voice and Performance, are the principal playable programs on the XS.
Rule 3: Then there is the SEQUENCER PLAY MODE: MULTI. These are multi-part setups (called MIXING) to hold up to 16 PARTS, typically used when playing back from a sequencer. When you enter [Multi/Seq Play] you can play on one MIDI channel at a time. The Track Select button [1]-[16] will light to indicate which of the 16 MIDI channels you are currently in communication with. Several PARTS, however, can easily be assigned to the same MIDI channel, as necessary, to accomplish very complex setups. Thus it is possible to transmit from a single channel yet play multiple VOICES (PARTS). But typically a MULTI MIXING program is used to place 16 different sounds on 16 different MIDI channels for play from a sequencer. You can use the Master Mode ZONE function to actually play on 4 separate MIDI channels simultaneously.
Typically, you are transmitting on just one MIDI channel at a time unless you use a MASTER “Zone” setup – at which point you can play on up to 4 MIDI channel simultaneously. That is how powerful the combination of MULTI MIXING and MASTER mode can be… as we will see. When you associate a MASTER with a MULTI MIXING setup – the Masters can be routed internally and/or externally as necessary in any number of combinations totaling four Zones. Therefore you can use this to address multiple internal PARTS on discreet MIDI channels (which is not possible in Voice or Performance mode).
128 MASTER Control setups can be created with an XS Voice, Performance, Multi MEMORY location associated (memorized) with it. You have the option of activating the ZONE switch with any of them – which adds communication to both internal and external sounds to create your own Master setups. You can have up to 4 Zones. The XS can transmit to itself and OUT via MIDI on up to 4 Zones. Zones can address internal sounds and/or external sounds.
To understand these rules please take your time with this article. We have all ready seen how MASTER setups can be used to simply recall a Voice, a Performance, or a Multi. Now, we need to understand how a MASTER can work as a “multi-zoned” controller setup, controlling both internal and external tone modules. The architecture of the XS is extremely flexible.
NOTE: Your mileage will vary depending on the external MIDI module you may be using. Please refer to the Owner’s Manuals of your external gear for Bank Select and Program Change numbers. Also find out what information they are capable of receiving in this fashion. Some modules require you store the Volume and Pan information locally in their own setup, which you recall via the unit’s own banks. Some modules can receive Volume and Pan commands directly through MIDI.
Additionally, you can control parameters on each ZONE ‘live’ from within a Master program, if you wish.
When a Master Zone Switched Setup is recalled you can have it send a Bank Select and Program Change both to the internal tone generator and OUT via MIDI or, if you wish, to one or the other, as is necessary to setup your rig. The key thing to know is that you can control up to 4 individual ZONES.
That said you might find some unique uses for the Master setups as you get to know them better.
Learning About Bank Select and Program Change information
Although you do not need to use MSB and LSB Bank Select commands to “associate” a MASTER program with an internal sound, we will learn about these here so that you can see how they can be used to select programs via MIDI. This is the type of information you will need to find about for any of your external MIDI modules, keyboards, etc.
Bank Select messages are actually MIDI Control Change messages (cc). MSB (Most Significant Byte) is Control Change message 000, and LSB (Least Significant Byte) is Control Change message 032. In spite of the name, both are significant/important. They are used together to allow MIDI devices to have 128 x 128 banks (That’s 16,384 banks for you math majors). Not that you or any one would need all of these banks but they are there in theory. Each will have 128 places, 000-127, to store program data.
The Bank Select messages for the XS are shown below.
Bank MSB LSB PC range
Pre1 063 000 1-128
Pre2 063 001 1-128
Pre3 063 002 1-128
Pre4 063 003 1-128
Pre5 063 004 1-128
Pre6 063 005 1-128
Pre7 063 006 1-128
Pre8 063 007 1-128
Usr1 063 008 1-128
Usr2 063 009 1-128
Usr3 063 010 1-128
Usr4 063 011 1-128
PreDrm 063 032 1-64
UsrDrm 063 040 1-32
Mix Vce 063 060 1-16 ~
GM Nrml 000 000 1-128
GM Drum 127 000 1
~ (63/60) A Mix Voice can be recalled if you are within the Multi Mixing for which it was created … There are 16 per Multi but a maximum of 256 MIX VOICES total.
XS Performances can be recalled via the same type of Bank Select messages. You can use a Performance, only when a Performance Memory location is associated with the Master setup.
Bank MSB LSB PC range
Perf. User 1 063 064 1-128
Perf. User 2 063 065 1-128
Perf. User 3 063 066 1-128
Perf. User 4 063 067 1-128
I will reiterate this important point – you do not need to use MSB/LSB number to associate a Voice, or Performance with a MASTER.
If, for example, you want a MASTER to recall the E. Piano Voice: Pre1: 027 (B11) Vintage’74
You could simply associate the MASTER with the VOICE mode and recall the VOICE directly without activating the ZONE Switch and without using MSB/LSB numbers. Try this example:
Associate a MASTER to an internal VOICE:
• Go to MASTER mode and initialize a MASTER location: Press [JOB] > select “Initialize” > press [ENTER]
• Press [EDIT]
• Select “COMMON” > press [ENTER]
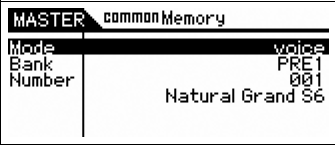
• Select “MEMORY” > press [ENTER]
“MODE”: Voice
“BANK”: PRE1
“NUMBER”: 027
Vintage’74
This is all you need to recall the Voice “Vinatage’74” internally for the S90XS/S70XS to play. Let’s say you have a Motif-Rack XS connected as a MIDI module and you wanted to send it a Bank Select and Program Change from this same MASTER setup. To do this you activate the ZONE SWITCH (because you are going to be addressing an external devices, as well).
Activate the ZONE SWITCH when additionally addressing external devices:
From MASTER mode:
Press [EDIT] > select “COMMON” > press [ENTER] > select “Zone Sw” > press [ENTER]
• Set ZONE SWITCH = ON
• Set the Knob/Slider = ON
• Press Track [1]
This will select ZONE 1 for editing. You will see the “EDIT SELECT” screen with options to select: Transmit, Note, Preset, or Knob/Slider.
You can use a separate ZONE for your external module or you can opt to use the same ZONE. A Zone can address both an internal program and an external module simultaneously. Let’s see how you can create an internal/external layer from a single ZONE.
Adding an external layer to ZONE 1:
Say you would like to recall a String Pad sound to layer with the Vintage’74 that you are playing internally. Using the DATA LIST booklet for your external device you determine that the sound you want is called: “PWM Strings” and is located with MSB/LSB = 063/003
Program Change = 037
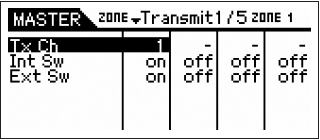
On the “Transmit” Edit option, you will find 5 screens of parameters. You will want to select the following items on pages 1 and 2:
• Tx Ch: (transmit channel) = 1
• Int Sw: (internal switch) = on
• Ext Sw: (external switch) = on

Cursor down to Page 2/5:
• Int Bank Sel = off
• Ext Bank Sel = on
• Int PC = off
• Ext PC = on
The MASTER’s MEMORY association with VOICE mode will recall the “Vintage’74” electric piano sound internally, and by activating the ZONE SWITCH, and setting ZONE 1’s TRANSMIT screen so that BANK SELECT and PROGRAM CHANGE data was routed to the External device, this one ZONE can be used to create an internal/external Layer.
On the “Preset” Edit option screen, you will be able to input the Bank Select MSB and LSB, along with the Program Change number to make the selection on the external device.
Press [EXIT] to return to the ZONE Edit Select screen > select “Preset” > press [ENTER]
Input the following:
• Bank MSB = 063
• Bank LSB = 003
• PC = 037
Now, obviously if you want to create a split, a separate ZONE must be used. As you scroll through the screens of parameters available to edit while in ZONE Edit, you start to realize the types of control you have over internal and external devices. To make a split you simply use the EDIT SELECT “NOTE” screen options to set NOTE LIMITS for each ZONE, and you also will see that you can transpose by both Octaves and semi-tones as required.
Question: Can the Zone Edit’s “PRESET” function be used to select an internal VOICE?
Answer: Yes. If you do, this will override what you have stored in the associated MEMORY option.
Question: Is it necessary to use complicated MSB/LSB messages in order to recall an internal Voice?
Answer: No. It is not necessary for internal sounds, only for external sounds.
Question: So why is this function provided?
Answer: On the “Preset” screen you will find an option for a MIDI SEND SWITCH. When this is set to ON, selections you make while in MASTER mode will be sent out via MIDI, live. If you require it, you can use the MASTER Preset screen to increment through a bunch of sounds you have setup for recall.
Question: Can I recall an entire Performance internally using the MSB/LSB function within a MASTER setup?
Answer: To recall an entire internal Performance you would have to, first, associate the MASTER with PERFORMANCE mode and then send MSB = 063/ LSB = 064 followed by the Program Change number to recall the desired Performance.
Reason: the XS will not change modes via Channel Control Change messages. It is an oxymoron. A channel message cannot be used to switch the entire mode. Mode changes can only be done remotely via a PARAMETER CHANGE (System Exclusive) message.
Question: Can I use MSB/LSB to address a single PART of a PERFORMANCE – say I need to switch the lead sound?
Answer: You cannot use Bank Select commands to address a single Voice within a Performance. The PARTS of a Performance are all on the same MIDI channel. Again, Channel messages cannot be used to selectively change one Voice on the channel.
A Performance must be recalled as a unit. The reason should be obvious but let’s state it again anyway: A Performance addresses all of its component PARTS (Voices) on the same (Basic) MIDI channel and only one Performance can be recalled at a time. There would be no way to recall, with a Program Change event, different Voices within the PERFORMANCE – it is a unit.
Notice that when you activate the MASTER mode the Voice, Performance, or Multi/Seq Play mode LED is also illuminated signifying that you are actually in that mode… Its rules will apply! Don’t fight this – this is a rule.
When Zone is ON and the associated Memory mode is “Voice”, you will be able to address one internal Voice via the Zones. The other Zones are available for external communication, only. Technically speaking, you are in Voice mode. Voice mode rules apply: i.e., In Voice mode only one internal Voice can be recalled at a time.
When a Master Zone is associated with a “Performance” mode Memory, you will be able to address up to 4 internal Voices via a single Zone (i.e., one internal Performance). The other Zones at that point will be available for external communication, only. Depending on how you have configured your Performance, you can have complex split/layers. Technically speaking, you are in Performance mode. Performance mode rules apply. In Performance mode only one Performance can be recalled at a time.
When a Zone is associated with a “MULTI Mix”, however, you will be able to address up to 4 separate MIDI channels, simultaneously and you can transmit to any combination of internal and/or external ZONES. This is because this is the multi-timbral/multi-MIDI channel mode on the S90XS/S70XS. This can be very flexible depending on how you have configured your MIX. Now you can address individually four separate PARTS of a MIX. That said, if you have copied a Performance into the MIX of your Song or Pattern, it can have multiple PARTS assigned to the same MIDI channel. Then you can still address the XS internally with the other available Zones. Go crazy. But know the rules!
Combining internal and external:
–Tips and Tricks–
The Basic Receive Channel and the Keyboard Transmit Channel are global for when the XS is in Voice or Performance mode. When you are in a multi-timbral MIX your transmit channel will be determined by the TRACK button 1-16 you select. However, when in MASTER Mode your transmit channel will depend on what Zones are active in the current Master program.
• Press [UTILITY]
• Select “MIDI” > press [ENTER]
• Set the Keyboard Transmit Channel = OFF
• Set the Basic Receive Channel = 1
• Press [STORE]
This will write the changes in the UTLITY mode settings to FLASH ROM. Setting the keyboard transmit channel OFF is typical when you are going to use the XS as a MASTER Mode MIDI CONTROLLER in a large setup. Now all of your settings will be determined by your MASTER configurations. Setting the MIDI channel transmit to OFF will mean that you will play only the internal XS sounds when you are in [VOICE] mode or [PERFORMANCE] mode, however, when you activate the MASTER MODE you can be transmitting on the MIDI channels as defined by the current Master settings.
This is a useful when you want to break the fulltime MIDI connection between the XS and the external modules in your rig. When you recall a MASTER that is associated with either Voice or Performance mode (without the ZONE SWITCH active) you will communicate with the internal Voice and Performance as normal. If you activate the Zone Switch for a MASTER with a Voice or Performance Memory associated, as we’ll see, it then will receive according to the Basic Receive Channel selected in [UTILITY] mode. You will address any external modules only when you activate the MASTER Zone control function – giving you complete control over MIDI transmit via your MASTER setups.2 When a MASTER ZONE setup is associated with a Multi MIX you can address the MIX on four independent channels via the four ZONES.
Let’s create a MASTER program. First let’s associate it with an internal MODE and MEMORY location:
• Recall [MASTER] and Initialize MASTER 001. Press [JOB] > Select “INITIALIZE” > press [ENTER].
• Check the ALL box. Press [ENTER] to execute.
• From the main MASTER 001 screen press [EDIT] > select “COMMON” > select “MEMORY” – associate this memory location select “VOICE” as the MODE, and BANK: “PRE1”, NUMBER: 001, “Natural Grand S6”.

• Press [EXIT] to return to the EDIT SELECT screen.
• Select “NAME” and highlight “Get name from memory” > press [ENTER] (if you wish to capture the name of the associated program). Handy.
• Press [STORE] / [ENTER] to store this Master setup to location 001 (A01).
This is how a Master is associated with a particular Program location. You have 3 different Mode choices, as we have been speaking about: Voice, Performance, and Multi. Each MASTER will always be associated with one of these 3 Modes. Now let’s use the knowledge of MASTER mode to get creative – a real world application:
Summary: A Master setup can be activated (associated) with a single XS Voice, or a single XS Performance. Basically, a MASTER memorizes the MODE and the selection (Voice or Performance). If the Zone Switch is active, a MASTER can additionally include all the setup parameters for communication, internally to the memorized mode, and externally to your connected MIDI modules. Yes, you could attempt to create a setting where you were simultaneously attempting to communicate with the XS TG via 4 different channels while in association with a Voice or Performance. Nothing in the parameter page prevents you from setting this up…however you would be deluding yourself. It ain’t gonna happen! Although you can make these settings, they will be illogical and ignored. By definition, Rules 1 and 2, the XS Voices and Performances occupy a single MIDI channel and only one can be active at a time. If you wish to address four XS Voices simultaneously, then you need to create a XS Performance. (Again, by definition, this is what a Performance is). If you want to address the XS on four separate MIDI channels via four discreet Zones you would have to associate the MASTER with a MULTI MIX and setup a 4-ZONE program. Then you can address multiple PARTS of the MIX, independently.
ZONE Templates
The XS gives you several templates for setting up ZONE configurations. To use these templates from MASTER mode, you would press [JOB]/select INITIALIZE. Uncheck the box that says “ALL” and highlight the box that says, for example, ZONE. Press [YES] to check it. You can select SPLIT, ZONE or LAYER.
SPLIT – 2 Zones will be activated with a default split point at C3
ZONE – four zones will be activated, each mapped to a specific region of the keyboard on Channel 1
LAYER – 2 Zones will be activated across the MIDI key range.
Select a template, set MIDI channels (for Split or Layer) and press [ENTER]/ [YES] to execute.
Initializing with the 4-Zone routine will create a Note Limit arrangement dividing the keyboard into 4 discreet Zones. You can, however, divide it in any manner that you need including overlapping Zones.
KNOBS and SLIDERS
In a MASTER you can set up how the Knobs and Sliders behave per Master setup. You can select which row of Knob Control functions will be lit and active for your Master Program.
If your Master program is simply associated with an internal program you can select between TONE, EG, EQ, EFFECT and MIC as the active KNOB functions. The Sliders will be programmed to do whatever they are assigned to do in the associated mode.
If you select TONE, for example, the LED at the top of the Knob Control Function will illuminate and you will have access to:
• Knob1 = Cutoff
• Knob2 = Resonance
• Knob3 = Assign 1
• Knob4 = Assign 2
If you select EG then the four knobs will be:
• Attack
• Decay
• Sustain
• Release
If you select EQ the four knobs will be:
• EQ LOW (gain)
• EQ MID Frequency
• EQ MID (gain)
• EQ HI (gain)
If you select EFFECT
• Chorus Preset
• Chorus Return
• Reverb Preset
• Reverb Return
If MIC is selected you will have control over the A/D Microphone input channel:
• Volume
• Pan
• Chorus Send
• Reverb Send
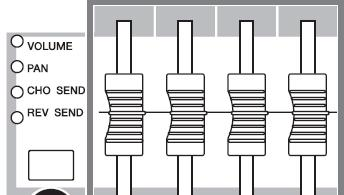
The SLIDERS will function according the lit parameter next to them. You can select VOLUME, PAN, CHORUS SEND or REVERB SEND.
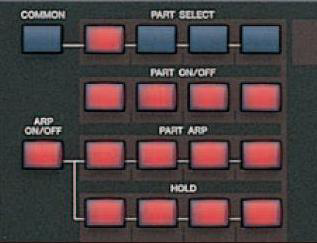
In a MASTER associated with VOICE mode, you will see both the PART SELECT button 1 and the PART 1 ON/OFF button are illuminated. If the Voice has an arpeggio, the PART ARP 1 and ARP HOLD 1 buttons may additionally be illuminated. If the light is ON next to the sliders then CS1 will control the selected function of the associated Voice.

In a MASTER associated with a PERFORMANCE or MULTI, you will see the illuminated buttons indicating the active PARTS and functions.

CS1~CS4 will correspond to the selected PART. In PERFORMANCE mode these are simply PARTS 1 through 4, however, in a MULTI, they could be PARTS 1-4, 5-8, 9-12 or 13-16 depending on what PART button, 1-16, is lit in the right front panel. That is, if the PART 10 button is illuminated on the right front panel, then the CS1-CS4 will correspond to PARTS 9, 10, 11 and 12 respectively. If PART 16 is illuminated, then the CS1-CS4 will correspond to PARTS 13, 14, 15 and 16.
If your MASTER program is a “Zoned” setup, that is, the ZONE SWITCH is set to ON you can opt to activate the ‘Knob/Slider’ parameter, as well, to ZONE control. You do so by setting KNOB/SLIDER = ON (directly below the ZONE SWITCH). This will make the settings you make per each Zone, active. Use PART buttons [1]-[4] to view individual Zone parameters.

You will notice the green LED lights next to the row of knobs and sliders go out (indicating that you are now using the Knobs and Sliders as programmed within the MASTER zone setup.
The default assignment when you select Knob/Slider = ON for a ZONE setup is for PAN (10) for the KNOBS and Volume (7) for the CONTROL SLIDERS.
You can set the KNOBS per Zone to any MIDI control change message from 1-95, per MASTER setup. Likewise, the Sliders can be programmed per MASTER setup, per Zone to any control change number from 1-95 when “ZONE” is selected as the Control Function option.
Designing your own setups
How complex can these setups get? This is unknown. If you have a need, you’ll figure it out, necessity being the mother of invention. The thing is; if you understand the fundamental rules, you will know the difference between what is and what is not possible. For example, if you play in a live scenario, you may need to play more than one keyboard at sometime during the madness of an evening’s set. Can you recall a Master setup on the XS that sends setup data to your other devices and play an internal/external combination when you are playing on the XS keybed and play a different sound from the XS’s tone engine when you move to a second external keybed? Well, yes, that is possible. If you have a Master Zone setup that is associated with a MULTI MIXING program, you can certainly play a Zone setup with as many as four internal/external sounds and still access the XS sound set, independently, via the MIDI IN jack. Because the XS is multi-timbral and capable of receiving on multiple MIDI channels when in a MULTI, you will be able to control a PART or PARTS of that MIX via MIDI IN. Imagine that your second keyboard when set to transmit on MIDI channel #16 communicates with PART 16 of the XS MIX. At the same time you can independently be transmitting via a ZONE MASTER to four separate PARTS when you play the XS keyboard (let’s say on channels 1-4). If you send Program Changes from your external keyboard on any unused MIDI channel (5-16) you can select and change the sounds in the XS MULTI remotely. If that external keyboard can send Bank Select and Program Changes you can select VOICES from the entire XS palette.
No one article can outline all the possibilities. But if you understand MIDI and you understand how the XS behaves in response to your MIDI settings you will be able to design some pretty complex but thoroughly useful setups. This article can only hope to get you started.
You cannot, however, ‘slave’ MASTER mode. You can when using an external controller to control the XS Voice mode, Performance mode, or Multi mode. In other words, your external controller can address the Motif XS in these modes… but there are no commands that you can send in via MIDI to manipulate Master mode… it is after all, MASTER mode (short of system exclusive messages)
Trickier Stuff
When you are using the XS as your Master keyboard controller, that is, meaning that the ZONE Switch is ON, we stated that the rules of the associated mode will apply. For example, say you have a Master program associated with an internal VOICE, but you only want the external Zone to play. Many of the physical controllers are designed to be routed to the internal tone engine (such as the [AF1], [AF2] buttons, and the AS1 and AS2 knobs) The Assignable Function buttons are used mainly to activate and deactivate the Xpanded Articulation function or to switch certain targeted internal parameters, like jumping to a particular send amount for effect sends or envelope settings; while the Assignable Knobs are tasked with being continuous controls for smoothly adjusting internal parameters. These can be used as controllers for external devices as well because they can be made to send specific Control Change messages. For example, [AF1] and [AF2] by default send cc086 and cc087, but can be programmed in VOICE/Utility mode to send different Control Change messages and in a PERFORMANCE or MULTI setup can be customized on a per PERFORMANCE, per MULTI basis. So you can get very flexible with these. The AS1 and AS2 knobs send cc016 and cc017, by default, when you are in VOICE mode, and likewise can be customized. If you want to use these physical controls on an external device but not have an internal program respond – you must make the internal ZONE active and make the physical controller active. However, you can prevent the internal program from sounding by note limiting its range off the keyboard (for example, set the low note limit to G8 and set the high note limit to C-2).
Storage issues
Your MASTER setups will be saved as part of an “ALL” data FILE type (.X2A). Master setups will remain in memory after power down but will be cleared if you perform a Factory Reset or you load in another ALL data file (.X2A). Backup all data by saving an “ALL” file type to an optional USB drive or to internal Flash ROM. The data that they “point” to must be returned to its appropriate place, i.e., User Voice data, Performance data, Multi setups. If you change or replace any of the target data, then the MASTER setups will be altered. The MASTER actually stores ‘pointers’, not the actual data. A MASTER setup may be there but the user sound program that it is referencing may not. For example, if your MASTER setup targets a USER bank Voice, if you do not have that USER Voice in the proper location, the data for the MASTER will be incorrect. It will simply ‘target’ the Voice currently in that User location. For this reason Master’s cannot logically be loaded individually – they depend on all the components being in the proper places, because all a Master is, is a collection of pointers. To restore your MASTER setups you would need to restore ALL data. It is simply a matter of logic.

