Mix Templates

The Mix Templates are customizable tone generator setup “starting points” – useful when you want to access multiple VOICES and processing resources together in a single program. They store the entire MIXING program, all parameters and settings. This includes the sixteen Voices selected for the 16 internal Parts, their Volume, Pan, Reverb Send, Chorus Send, Insert Effect Switch status, 3-band EQ per Part, etc., plus two Audio Inputs (Analog AD Input, Digital FW Input). Among the resources in a single MIXING Program are 8 PARTS each recalling two Insertion Effects, a System Reverberation Chamber (Reverb), a System Time Delay Effect (Chorus), a Master Effect and a 5-band fully parametric Master EQ.

You can customize the assignment of Insertion Effects, you can change and store just about every resource of the sounds you are using. A MIXING program combines the power of 16 Voices – but importantly certain of the resources are now shared. The SYSTEM Effects represent those that work like a mixing console with two Auxiliary Send buses. One feeds a Reverb chamber and the other is usually programmable to a particular Time Delay Effect (Chorus processor). Every PART has a send amount control. These are different from the INSERTION EFFECTS which are technically apart of the Voice itself.

MIXING programs are, for example, where you would make your selection of sounds when creating a SONG or PATTERN. When you are working with the Motif XS/XF in a multi-timbral/multi-MIDI channel capacity, you can access any of 16 PARTS and any of 16 MIDI channels. The two SEQUENCER modes (SONG and PATTERN) are, of course, designed to work for recording MIDI performances. You store all the synthesizer’s tone generator settings in a program called a “MIXING”. One MIXING is associated with each of the 64 SONG locations and 64 PATTERN locations. The Motif XS/XF can be addressed using multiple PARTS and on multiple MIDI channels, simultaneously. Obviously, this is ideal for
working with a MIDI sequencer but is also ideal when you need to access multiple PARTS from a separate external keyboard controllers. And for when you are performing “live” and need quick, seamless transitions with access to several different sounds or complex split/layer combinations that can include all 16 PARTS and all the Effect processing resources.

The MIXING mode is where you can program and store how the tone engine is being used. This includes all the effects, the levels, key mapping, etc. Each of the 16 PARTS has individually programmable parameters that control how the VOICE selected for that PART will be addressed by the keyboard and/or the track transmitting on the associated MIDI channel. You can also allocate your Effect processing resources as you require for your musical performance. In this mode, you have access to the full complement of processing available in the XS/XF.

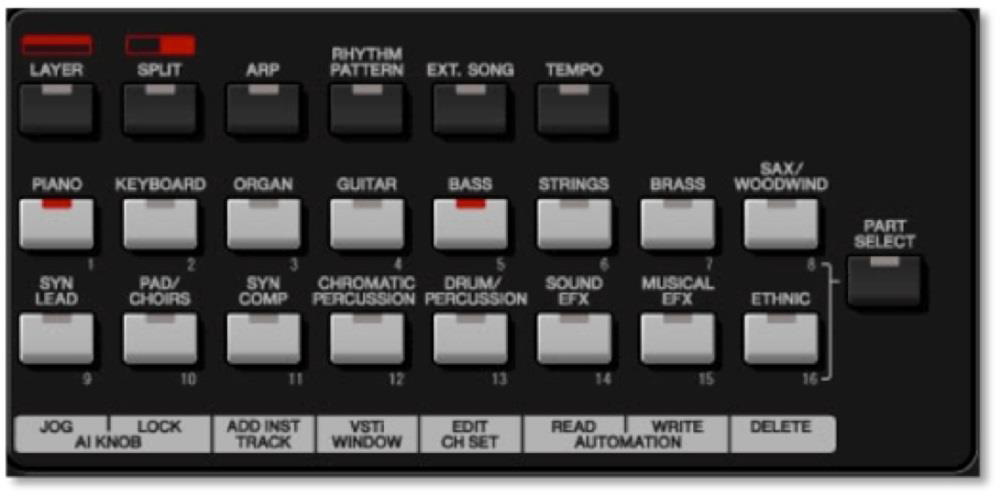
You access this deeper level of parameter by pressing [EDIT] while the [MIXING] button is lit, then press a numbered [PART SELECT] button [1]-[16].

The Mix Templates are customizable starting points when you want to create a SONG or PATTERN but have very useful applications for those performing “live”. The 32 Mix Templates that come pre-programmed in the Motif XS/XF are simply “placeholders”. You are supposed to rename them and overwrite them with your own favorite default Mixing setups. Your 32 Templates can select VOICES from any PRESET or USER VOICE bank location.

  •  Press [EDIT]

There are two different areas of EDIT functions (as in all the main modes): The overall parameters that affect the entire program, called [COMMON EDIT] and then there is the individual PART parameters for each of the 16 Voice Parts. These are accessed while in EDIT via the numbered buttons [1]-[16]. The upper left corner of the screen will always inform you of exactly where you are, “PERF Common”, or “PERF Part 07”, etc.

  • Press [COMMON EDIT]

To view and access the parameters that will affect the entire MIX such as the Master Effect, the Master EQ, and the Controller settings. You will also find the AUDIO IN parameters here (for the A/D Part and the FW Return Part)

  • Press numbered PART select buttons [1]-[16]

To view and access the parameters that will affect each individual assigned VOICE, in turn. These include parameters for the individual voice. By setting multiple PARTS on the same MIDI channel, you can address them simultaneously with the keyboard. The NOTE LIMIT parameters and VELOCITY LIMIT parameters give you all the flexibility of programming any kind of split, layer or split/layer combination that you can dream up. Each PART has its own MIDI channel setting, EQ, controller assignments, etc. etc.

And you can be as detailed as you like – assigning favorite Voices, effects, panning, etc. As mentioned previously, in a MIXING setup you have access to the full complement of XS/XF resources: 16 Voices, an A/D input, a stereo FireWire audio return, 4 Arpeggiators, 16 3-band PART EQ, 16 powerful Insertion Effects available in 8 pairs, System Reverb, System Time-delay (chorus), Master Effect, 5-band Master EQ, etc. – Because all the resources are recalled when the program is recalled you are free to move about the program seamlessly changing sounds and combinations of sounds as you might require. Need a super-Performance that has 7 Parts (split and layered across the keyboard) that builds to a crescendo chord that is held while you seamlessly switch to the “Sweet Flute” split with a synth bass? … no problem. Use a MIXING setup to store your mega-Program. The MIX TEMPLATES are stored as a part of your instrument’s SYSTEM settings and get backed up when you SAVE an ALL data file (.X0A-for XS; .X3A-forXF). They are written to the synthesizer’s internal FLASH ROM (same as User Voices, Performances).
This is something you need to know because when you load an ALL data file, recognize that it may contain different System settings from your own. This is why the LOAD TYPE option “ALL WITHOUT SYSTEM” exists. It allows you to load the ALL data file without changing your SYSTEM Settings. System Settings include all your UTILITY mode settings and your MIX TEMPLATES.

Therefore, when you don’t want to change your current System settings, use the ALL WITHOUT SYSTEM load type, then once the data load in immediately OVERWRITE the file. This will update that file with your preferences.
The MIX TEMPLATES are found:

  • Press [MIXING] from either SONG mode or PATTERN mode
  • Press [JOB]
  • Press [F5] TEMPLATE

You can store the current Mix (called “PUT”).
Press [SF5] PUT
You are putting the current Mix into Flash ROM

MyDefaultMix
– – or – –
You can recall a Template to the current Mix (called “GET”).
Press [SF4] GET
You are getting the Mix Template and restoring it to the current Song or Pattern Mixing location.

And the cool thing is they are in internal FLASH ROM and remain between power cycles (they cannot store user samples, however. Unless you have an XF expanded with optional FL boards). And Mix Templates can be recalled to either SONG mode or PATTERN mode – it does not matter. You can store 32 of these MIX TEMPLATES in memory for recall at any time.

Phil Clendeninn
Technical Sales Specialist
Pro Audio & Combo Division
©Yamaha Corporation of America

ADVANCED: EXTERNAL INSTRUMENT using Cubase 7

The External Instrument function is a VST CONNECTIONS feature found in the top-of-the-line version of Cubase series (Cubase 5, Cubase 6, and/or Cubase 7, 7.5) that allows you to route MIDI tracks played back from Cubase to an external hardware synthesizer, and then create a MIDI Device routing so that the returning audio of that external device can be captured in Cubase via the Virtual Studio Technology. (Of course, this all takes place with Cubase’s advanced delay compensation, automatically). This is covered in the Steinberg documentation – I have included it below updated with specifics to help you setup for the Motif XF. (And although this article and it screen shots show the Motif XF (keyboard), the same can be used to configure the Motif-Rack XS or the Motif XS, using its dedicated Editor and/or the MIDI DEVICE MANAGER .XML (Voice List).

The source MIDI tracks for the External Instrument must be in CUBASE. That is, if you originally recorded the data in the Motif XF sequencer, you will want to transfer that data so that the MIDI tracks are in Cubase. Cubase can import SONG data from within an ALL data file)… see separate article (“IMPORT > Motif XF SONG”.

EXTERNAL INSTRUMENT
The full version of Cubase has the ability to setup your hardware synthesizer as an “EXTERNAL INSTRUMENT”. This is found in DEVICES > VST CONNECTIONS as one of the tabs. It allows you to create an audio pathway in the DAW so that you can address your external hardware with the same ease and flexibility you do VSTi within the computer environment. This means you can use track automation, Audio Mixdown and the FREEZE function (although it takes place in real time) that until now were just available for VSTi soft-synths created within the computer or by using the Motif XF’s EDITOR VST. Why I, personally, like this External Instrument function is when it is combined with the FW16E (FireWire option) it gives you the most flexibility when it comes to audio routing/recording decisions.

The Motif XF Editor VST allows you to configure the 16 audio bus outputs in eight stereo pairs (only). As you will see in this article, by using the MIDI DEVICE MANAGER and the EXTERNAL INSTRUMENT function of Cubase, we will be able to route PARTS, not only in the odd/even stereo pairings but also as individual MONO sends when necessary, as well. This will facilitate routing individual drums, for example. If I need to route the kick drum to its own audio track, why route it in stereo? You might want to separate drums in a case where you have additional effects (VST EFFECTS) processing that you might want to do prior to mixing down. While some sounds will actually benefit from being recorded in stereo (those that are originally stereo), it makes no sense to record some other things in stereo and this External Instrument function will allow you to take advantage of the mono buses where and when you need/want them.

The 16 bus audio outputs provided by the FW16E can be put to use in those projects where you are going to do very microscopic production work on your drums, for example. The flexibility to be able to go from a single MIDI Track of Drums to a separate audio track on each drum is what we are talking about here. I like to perfect the basic tracks as MIDI data, then at my leisure, I start to transfer, render, print the data as audio tracks and I can decide how I want to divide it. In a single pass with 16 audio buses available, I can route the Kick on FW1, the Snare on FW2, the Hihats on FW3, the Ride on FW4, the Toms to FW5&6, the Crash to FW7, the Cowbell to FW8, the percussion to FW9&10… I can print these as discreet audio tracks. Even though they all exist as one MIDI Track, when I RETURN audio from the hardware, I can selectively route each DRUM to its own audio bus – or I can combine multiple drums to a pair of audio buses (as with the Tom-toms).

Basically, MIDI is going to travel from your Cubase MIDI Tracks to the Motif XF tone generator, the audio created by the XF in response to this data will be returned to Cubase on multiple VST CONNECTION audio lanes that we will create. There are 16 simultaneous audio buses available to each Motif XF PART (and to each individual Drum within a Drum Kit Voice) on which we can route this returning audio. And unlike the Motif XF Editor VST, you will not be limited to just 8 stereo pairs of RETURNS. You can create various combinations of mono and/or stereo buses, as required by your particular session’s requirements. If your project requires individual outputs on drums, you will need to work with this method.

_ You’ll need to set the Motif XF up as an External Instrument Plug-in (VSTi) within Cubase (Again: this will only work in the full version of the Cubase program) – we will step you through this process. Translation: We are going to setup the MIDI > Tone Generator > AUDIO routing in the same way it works for any soft synth, even though the Motif XF is an external device!

_ Then you can associate it with a “MIDI DEVICE”, in this case you can use the MIDI DEVICE MANAGER (Voice List) as the target MIDI Device.

…Doing this will allow the re-routing of the MIDI data to the external device. By routing the MIDI track’s data in the manner described below we are, in effect, routing it to the Motif XF.

_ Next we will setup the Motif XF an external VSTi (which creates an “audio lane” for each RETURN you create). When working with any multi-timbral VSTi, you will have a MIDI Track for each PART – it will receive the MIDI data that you perform; that MIDI data triggers the tone engine and you have a so-called audio lane for the audio output (called the RETURN) of the VSTi.

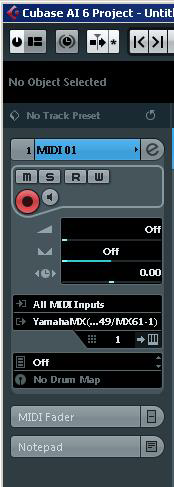
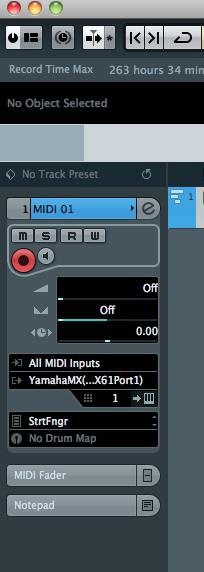
_ Routing for your Cubase MIDI tracks is done via the Track Inspector… Instead of routing the MIDI OUT to the normal “Motif XF Main” port, you will see another Motif XF (VSTi) port that will represent the External Instrument routing). See screen shot

Note: In the Motif XF Editor, you will want to set the FW MONITOR function to “with PC”. When your routing is setup properly this will allow you to listen to your Motif XF through Cubase and prevent doubling of audio signal.

Start with an EMPTY Project. When learning about how to set this up, it is always best to understand the routing of one item before you tackle many.

FILE > New Project > EMPTY
The following is taken from the detailed descriptions for the External Instrument features in the Cubase documentation PDFs and has been updated (by me) for use with a Motif XF with (FW16E) FireWire.

Setting up External Instruments
1. Open the “VST Connections” window from the Devices menu.
2. Open the External Instrument tab and click “Add External Instrument”.
3. In the dialog that appears, specify the number of required mono and/or stereo returns. (You need not create a NAME, it will be named automatically)

A specific number of mono and/or stereo return channels is required. You will have to determine how many mono and/or stereo returns you want to have from your Motif XF. You can create a simple stereo mix or you can get elaborate and route individual MIDI tracks each on their own path – this allows you to process each audio path with Cubase automation, and VST Effects, etc.

If you have an optional FW16E FireWire Expansion board installed, you can have any combination you require (my setup Template, for example, has 14 mono, 7 stereo). Your setup could be a mix of mono and stereo buses as you determine you require, or simply just a stereo return. The number and nature of the RETURNS is up to you… and is customizable on a per Project basis. For example, there is hardly ever a need to record every audio track as stereo, or for that matter, there is hardly ever a cause to record each track as mono, so I find that I have several setups that I store as Favorites and I adjust this as necessary on a per Project basis. Once you understand it, it is, like everything, fairly easy and straightforward to customize.

When you want to record a VOICE in stereo, you can setup a STEREO RETURN which must always be an ODD/EVEN pair of buses. (ODD/EVEN as in 1&2, 3&4, 5&6, never 2&3 or 8&9, etc.)

Why would you want to record a VOICE’s audio as stereo as opposed to mono? Let’s say you are recording a Motif XF Organ Voice. Typically the organs are sampled in mono. There is no need to record the organ in stereo, unless the organ Voice is using a stereo Effect, like the Rotary Speaker algorithm. This Effect Type simulates the stereo mic setup used on a Leslie-type rotating speaker cabinet. So to capture the movement of the B3, you will want, route the Voice on an ODD/EVEN pair of FW output (FW1&2, for example)… you then would create a stereo routing path in Cubase, to a stereo track. Make sense?

For each PART you would decide how you want to render it as you “print” the data as audio. That is what we are doing here, making production decisions about each PART (mono track or stereo track – as audio). The FireWire option allows you the utmost flexibility – but you don’t always need to use it. You can for example route all parts to one stereo mix. The key is – you have a choice and it is customizable at any time.

Say you may want to record everything to a single stereo mix.

You would setup the VST CONNECTIONS > External Instrument tabs as follows:

For example, this would be if you have pre-mixed your Motif XF tracks and only require a stereo mix of the entire Motif XF. In this case, all PARTS of your MIX would be set to OUTPUT SELECT = L&R. The point is you can do a simple stereo mix, or you can create an audio path for each track… this is up to you.

4. Click OK. This adds a new external instrument bus.
5. Click in the Device Port column for the Return Bus “Left” and “Right” ports and select the inputs on your audio hardware to which you connected the external instrument.

Here you are assigning the appropriate AUDIO DEVICE and DEVICE PORTS to accommodate your particular setup. The Audio Device is the audio interface driver, and the Device Port is the buses you are using controlled by the driver.

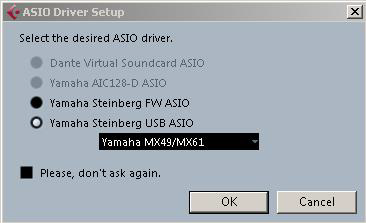
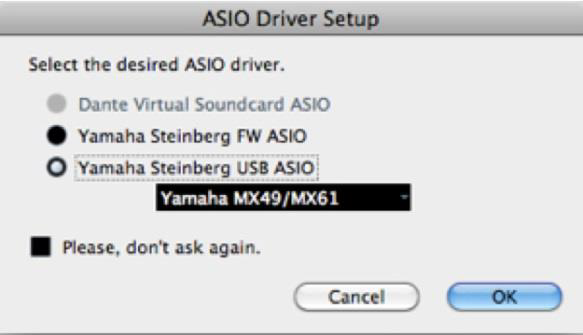
(Note: If you have installed the “Yamaha Motif XF Extensions” the Motif XF ports will be conveniently identified by name). If you are using the Yamaha Steinberg FW Driver the AUDIO DEVICE would be identified as “Yamaha Steinberg FW”.

6. If you like, make additional settings for the bus.

These are found in the columns to the right. Note however that you can adjust these while actually using the external instrument – which may be easier as you can hear the result.

In the column called “MIDI Device” where it currently says “NO LINK” – set it to LINK to the Motif XF via the MIDI DEVICE MANAGER (.XML Voice List) within Cubase.

___ MIDI DEVICE MANAGER ___

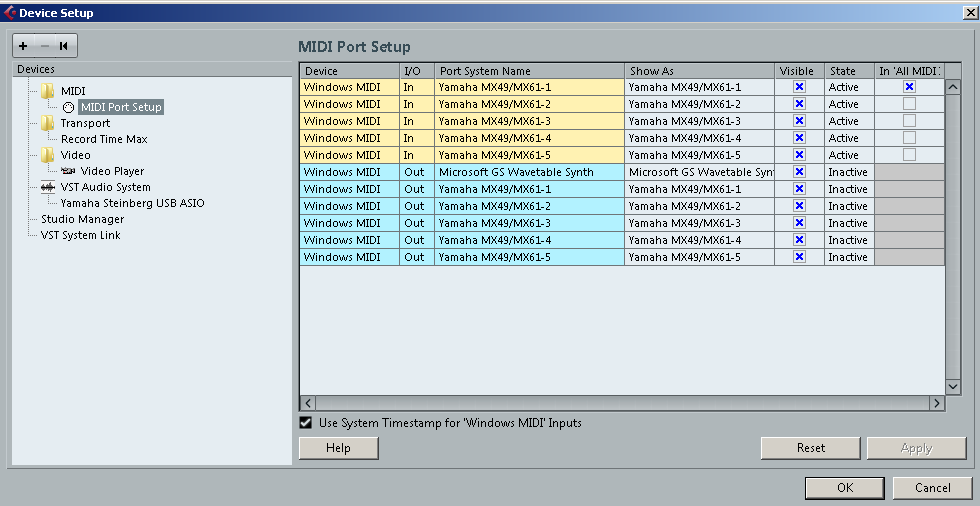
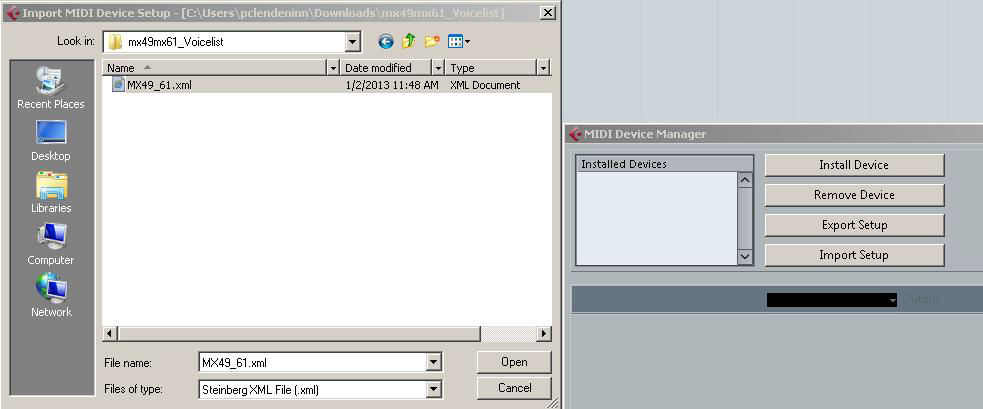
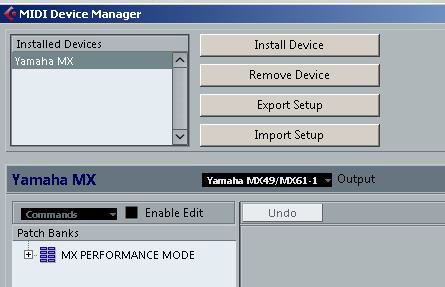
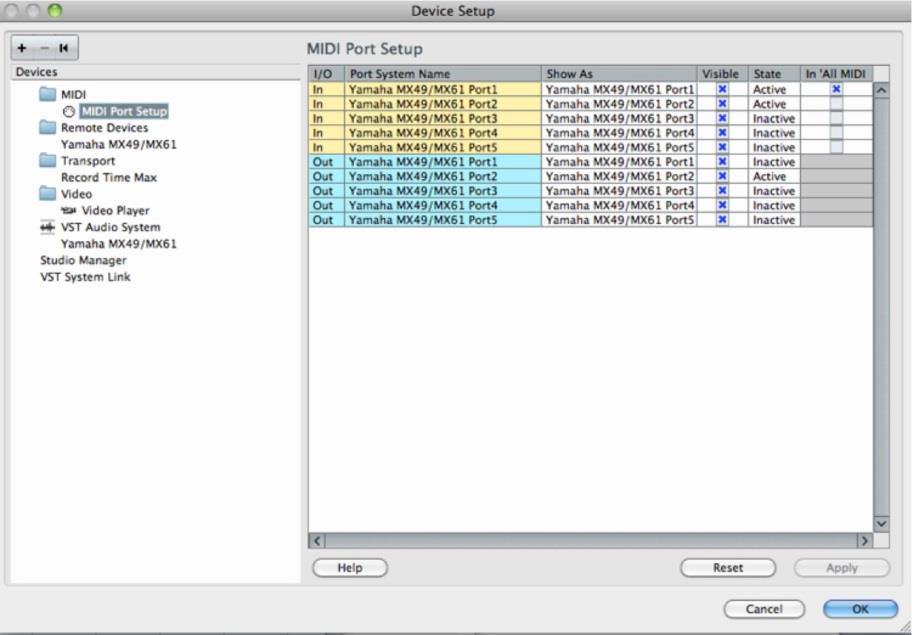
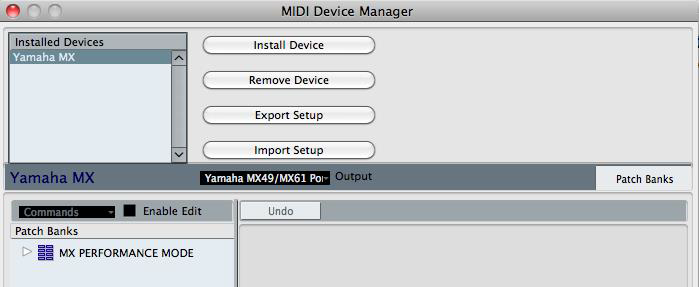
You can access the advanced routing by using the MIDI DEVICE MANAGER. Go to DEVICES > MIDI DEVICE MANAGER > INSTALL DEVICE > Select “Yamaha Motif XF” > Connect to the Motif XF via “Motif XF Main” (Port 1)

This will allow you to select Voices by name in the Cubase Track Inspector.

7. When you are done, close the VST Connections window.

If a port is unavailable for assignment (that is, it does not appear on your list), this is because you are using it somewhere else in your setup. Check the VST INPUT tab and release it (i.e., set it to Not Connected), if you require it for your External Instrument. This is an important point to understand: If you setup to use a VST CONNECTION INPUT within the External Instrument, it will no longer appear as available on the VST CONNECTIONS INPUT tab, and vice versa. When you setup a VST CONNECTION INPUT on that screen it will be unavailable to the External Instrument.

How to use the External Instrument
Once you have set up the External Instrument in the VST Connections window, you can use it as a VST Instrument (that is, the same as you would any other VSTi).

Open the VST Instruments window and click on an empty instrument slot. This is found under DEVICES > VST INSTRUMENT (F11)

In the instrument pop-up menu, your external instrument is listed on the External Instruments

Sub menu: X-External Plug-ins “Motif XF”

You will be asked if you want to create a MIDI track assigned to the device you are creating. Create that MIDI track. Now when you setup a Cubase MIDI Track, the Track Inspector will be setup with the normal MIDI IN = “ALL MIDI INPUT”, but the MIDI OUT will be routed to new “Motif XF(Motif XF Main)” device — which is now listed where your VST instruments would be listed. Make sure each track you create for this devices is assigned the MIDI OUT to this new External VSTi listing of the “Motif XF(Motif XF Main)” for each MIDI OUT Track.

To send MIDI notes to the external instrument, open the Output Routing pop-up menu in the Inspector for the corresponding MIDI track and select the MIDI device to which the external instrument is connected. This ensures use of delay compensation. The instrument will now play any MIDI notes it receives from this track and return them to Cubase through the return channel(s) you have set up.

The external instrument will behave like any other VST instrument in Cubase.

All of this will be saved in your .CPR when save your Cubase Project. When you re-open the session, you will be asked if you want to RECALL this setup.

Shown below (the External Instrument screen) is an example with 7 stereo returns and 14 mono returns coming from the Motif XF. This covers every possible configuration possible from a Motif XF with an FW16E installed. I use this because I can configure whatever possibility I need to accomplish my goal per Project. The setup will remain as part of my Cubase setup. The External Instrument “Motif XF” is linked to the Motif XF via the “MIDI Device”.

This can be stored as a setup and recalled and reconfigured as necessary, for any Project. You will discover that on different Projects you may need a particular number of stereo bus returns, and a particular number of mono bus returns. With this setup I can assign “Yamaha Steinberg FW” as the Audio Device, and then assign the Motif XF Port number, as necessary. Shown is, Return Bus 1 is set to receive audio via “FW1&2” from the Motif XF.

The individual OUTPUT SELECT assignments are made in the Motif XF. When you assign a PART to FW1&2 you are assign it to audio output buses “Motif XF 1” and “Motif XF 2”

Actually assigning XF PARTS to output buses can be carried out with the Motif XF Editor “OUTPUT SELECT” or from the front panel of the XF itself, where it is a PART Edit parameter.

Set the OUTPUT SELECT, as necessary.

Press [MIXING]
Press [EDIT]
Press Track Select [1]-[16]
Press [F1] VOICE
Press [SF2] OUTPUT

OUTPUT SELECT = L&R (main outs), FW1&2 FW13&14 (stereo pairs), FW1 FW14 (individual mono), drum (from Drum Voice setup).

You can route individual drums from within a Drum Kit Voice to various assignable outputs. This can be accomplished via the Motif XF Editor without leaving the MIXING mode. Routing individual drums can be very powerful for those sessions where you are going all out. The kick drum to its own MONO track, the snare to its own MONO track, etc. This is accommodated from within a single kit by setting the PART containing the DRUM KIT so that OUTPUT SELECT = “drum”. This allows the XF to route each individual drum instrument to its own output bus. Very Cool!

ActivateOutputsXFYou can route any PART as a stereo or mono output, as you require to accomplish your goal. Multiple outputs can be used simultaneously and multiple PARTS can be routed to the same bus. On the VST INSTRUMENT tab you can activate any combination of Returns, as necessary. Find the Activate Outputs icon: [–>.
Shown at left are the view in Cubase 7, 7.5 and Pro 8 and below the same VST Instrument Rack in earlier versions of Cubase:

Click on the ACTIVATE OUTPUT icon to see a list of your created External Instrument Device Ports. 

 Click here to ACTIVATE OUTPUT combination that you need from the List.

ActivateOutputsXF1

Go to FILE > EXPORT > AUDIO MIXDOWN

You can now use the EXPORT Audio Mixdown function in Cubase. The Motif XF is being treated like any multi-timbral VSTi at this point. The MIDI is routed OUT to the XF, and the audio RETURN path has been established. Because the XF is a Hardware synthesizer and external to the computer, you will notice that rendering will be processed in real time. You can have Cubase add the stereo mixdown to the Audio Pool and as an Audio Track within the Project.

See Cubase documentation for all the new Export Audio Mixdown options available via the Channel Batch Export feature!!!

Launch the Yamaha Motif XF Editor Standalone:
You can launch and run the Yamaha Motif XF Editor in Standalone mode. That is, launch the Editor separately from Cubase – it will run along side of Cubase. 


© 2024 Yamaha Corporation of America and Yamaha Corporation. All rights reserved.    Terms of Use | Privacy Policy | Contact Us