Hi to all,
I have been using cakewalk for a while now and do not wish to learn another DAW. My issue is this...
I have a collection of midi files that I would like to assign each track to a voice on the Montage as I love the quality of the voices on the keyboard. I can only seem to get channel 1 to work.
How should the montage be set up as a starting point. ie: single, or multi mode, Zone control on or off?
I have a Roland Integra that I have no issues with, but I am getting frustrated with my Montage. I never had this issue with my Motif.
Does anyone have a step by step method that works?
Thanks to all
As you probably know the Montage is not a Motif (and certainly not an Integra). It sounds different and works different. If you are familiar with the Motif series, the learning curve will be short, if you are willing to learn/accept a few of the very important differences and how to go about setting up.
If your goal is multi-track, multi-timbal MIDI recording, you will want Multi Mode. The Zone Master function, is mainly for communicating via standard 5-pin MIDI to external devices, is not necessary for basic MIDI recording to a DAW in most instances when recording to computer via USB. The driver will let you communicate MIDI and 32 bus audio outputs from the Montage to your DAW, and 3 Stereo Audio Returns from your DAW back to Montage. It can act as both audio and MIDI Interfaces for your computer.
Let's get you started with the basic Knowledge you have about Motif.
There is no "Voice mode" in Montage. First important difference. In Motif you had Voices stored in their own Mode, you selected them and placed them into one of 16 Parts when you wanted to create a multi-timbal recording. This was either in SONG MIXING or PATTERN MIXING mode, whether you were recording internally or with an external DAW, like Cakewalk.
To accomplish this workflow:
From the PERFORMANCE (Home) screen
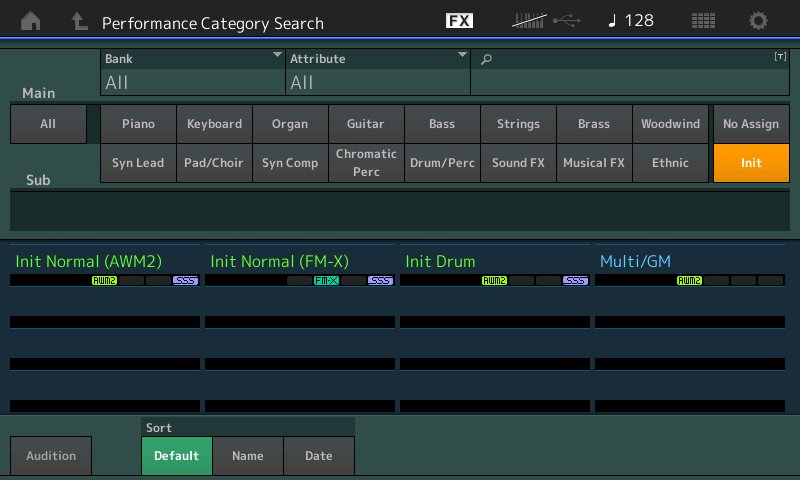
Press [CATEGORY SEARCH]
Select "INIT"

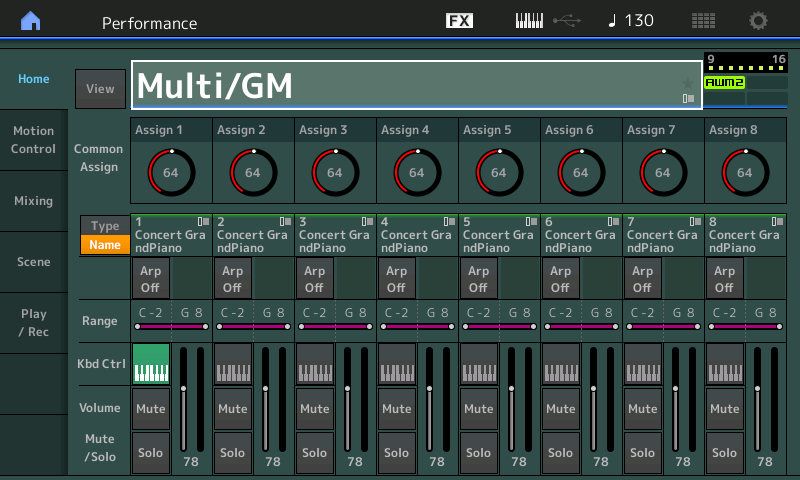
Select "Multi/GM"

The above routine would be the equivalent on the Motif series of recalling a blank Song Mixing or Pattern Mixing program.
A sound (now called "Part" ) is placed in each of the 16 slots of the multi-timbal setup. Each Part is set to receive on its corresponding Channel number.
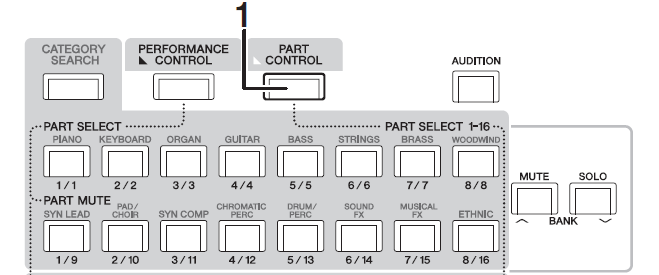
POWER TIP: When working in a Multi/GM setup where there is a PART in each slot, turn the "KBD CTRL" icon OFF for each Part - this will allow you to address just the currently selected Montage Part. You can press the [PART CONTROL] button (right side top row).
When [PART CONTROL] is lit on the front panel, the first two rows of eight buttons become PART SELECT [1]-[16]. You will use these to select the PART you are communicating with currently.

Populating the Band
You can now use the PART-Category Search to select an instrument for each slot
Press [PART SELECT 1]
You can activate a Part Search by either:
_ [SHIFT] + [CATEGORY SEARCH]
or
_ touch the "Type/Name" box in the screen; a pop-in menu with "Search" appears
"Part 1 Category Search" will appear on the top line of the screen and you can begin to populate your ensemble in this fashion.
Select an instrument for each Part - in a similar fashion to how you setup and recorded with Motif.

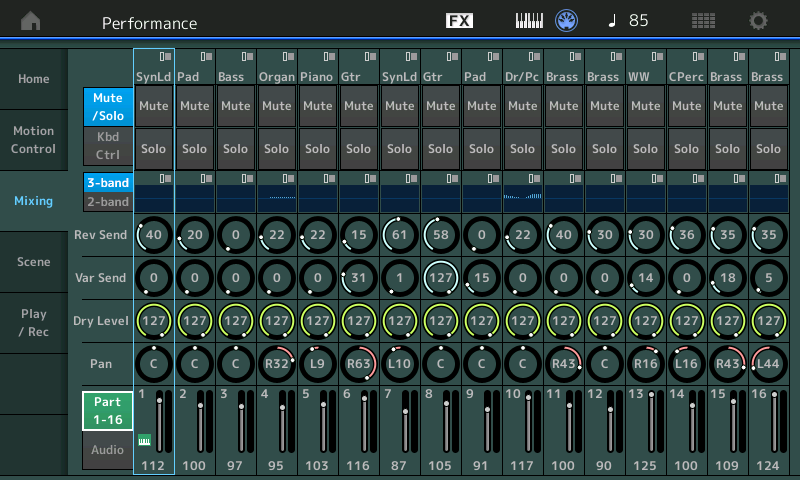
Above is the Montage digital mixer giving an overview of a typical 16-Part multi setup. When you collect your 16 instrument Parts, you can full edit and customize them for this Performance program. If you remember MIX VOICE in the Motif series... imagine its advantages are always available. You can edit and customize each instrument and it gets stored rightness in place. When you store this Performance your edits to each of the 16 Parts are stored in this Performance.
Each Part has a 3-band EQ (pre the Insert Effects) each Part has two Insert Effects, including the AD Input Part, each Part has a 2-band EQ (post the Insert Effects), each Part has two Sends to the System Effects (Reverb, Variation)
In [UTILITY]
Touch "Settings" > "Quick Setup"
Touch "MIDI Rec on DAW"
This will take care of the critical settings for when you are recording MIDI to Cakewalk: Local Control = OFF, Arp Out = OFF, Clock, etc
(The three Quick Setups are customizable, but the default configuration will get you started)
Send MIDI CLOCK from your DAW to "Montage Port 1" (we assume you have the "Yamaha Steinberg USB Driver" appropriate for your computer type and operating system) if not let us know... the MIDI Record on DAW "Quick Setup" template sets the Montage to slave to standard MIDI clock.
You did not give us much information, hopefully the above will get you started. If you have other specific questions about setup or configuring your specific system, please post back here with details (while I'm not a Cakewalk expert, I have worked with it enough to know the fundamental settings)... Montage has some capabilities that extend farther than you may have been used to; Montage can be configured to control and perform (and I should stress "really perform") as many as eight separate Parts simultaneously, for example.
If your idea is to capture Montage really performing multiple Parts - it is going to be a different workflow. That is what we ask you to accept. But the above should get you going with how you are undoubtedly used to working.
By "really perform" I'm trying to make the difference between simply layering eight synth sounds and what Montage allows... with Montage's massive Controller matrix you can simultaneously control each Part with a unique response to a single control gesture... you could turn one sound up, another down, yet another by a lot, and a fourth just a little, while panning Parts each with their own pan movement paths, etc., etc., etc., it's different, it's multi dimensional. And does go beyond simply moving a controller and having all layered Parts do the same thing.
It is also completely recordable via MIDI.... or via Audio!
