
Thanks for purchasing MONTAGE M, the next-generation flagship synthesizer from Yamaha. This guide is designed to help get you up and making music ASAP!
WHAT’S IN THE BOX?
- Quick Guide
- Get PDF versions of the Quick Guide, Reference Manual and Data List here
- Power cable
QUICK CONNECTIONS
POWER
Connect the supplied power cord to the [AC IN] jack on the rear panel. Connect the other end of the power cord to an AC outlet. MONTAGE M voltage matches to the incoming current in your region.
AUDIO
To connect the audio output there are a few options.
You can use two standard 1/4″ instrument cables and connect directly to a set of studio monitors or powered speakers. Additionally, MONTAGE M features balanced outputs. In situations where you’d like the signal to be balanced, you’ll need two 1/4” TRS to 1/4” TRS or XLR.
MONTAGE M sounds best in stereo, but you can connect a single output too. When using mono output, connect only to the [L/MONO].
MONTAGE M features ultra-high-fidelity sound and we recommend connecting to a mixer, audio interface or powered speakers in stereo. Most of the instrument sounds are sampled/programmed in stereo and many of the effects are stereo effects as well. All these elements sound acceptable in MONO but are best if amplified in STEREO. We don’t recommend connecting to guitar or keyboard amps unless you’re going for a special effect.
Set the appropriate input gain on your mixer, audio interface or powered speakers. Then adjust the output level to the optimal level for your playing and listening environment. For more information on input gain and gain staging go here.
AUDIO INPUT
MONTAGE M features a stereo A/D input. You can route external audio through two Insertion Effects and an EQ block. When using the A/D input you’ll need to choose the input type. To do this:
- Press [UTILITY].
- Touch “Settings” in the first column on the left, then “Audio I/O” in the adjacent column to the right adjacent column.
- In the Input area choose “Mic” for a mic input or “Line” for a standard instrument level input.
Connecting a mic to MONTAGE M requires a dynamic microphone and XLR female to ¼” TS (tip sleeve) male cable. Connect the dynamic microphone to the L/Mono input on MONTAGE M.
USB/MIDI
MONTAGE M features three USB connections, one TO HOST and two TO DEVICE ports. The TO HOST connection is for connecting MONTAGE M to a computer or iOS device with a single USB cable.
The twin TO DEVICE USB ports allows two different types of connections:
- USB flash drives for storing and recalling internal content
- USB MIDI controllers such as keyboards or drum pads. You can connect these directly to the one of the USB TO DEVICE ports and play MONTAGE M sounds.
ADJUST TOUCH AND AFTERTOUCH CURVE
For best results, do this after setting optimizing your gain staging above.
Velocity scale varies widely from player to player. You can customize velocity sensitivity on the MONTAGE M keyboard to how hard or soft you play. There are multiple options for Velocity and AT (Aftertouch) Curves. To access these settings:
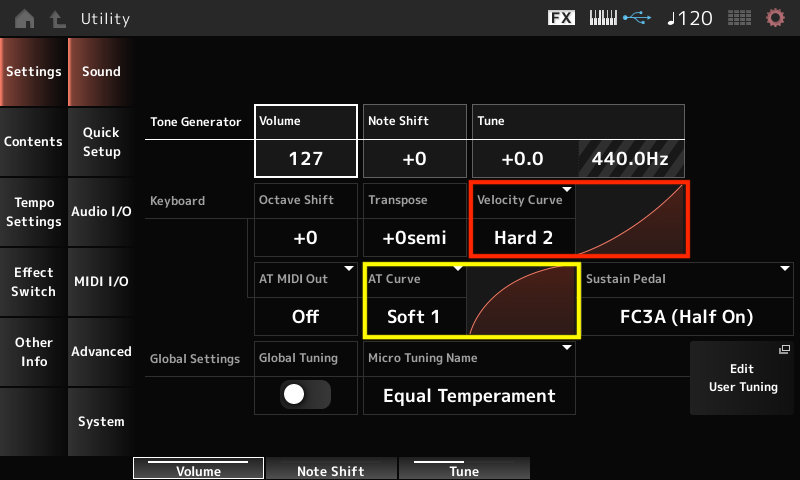
- Press [UTILITY]
- Touch “Sound”
- Touch “Velocity Curve” in the center of the screen to set (outlined in red below). Choose from Normal, Soft 1/2, Hard 1/2, Wide and Fixed.
- To set the Aftertouch Curve, touch “AT Curve” in the center of the screen (outlined in yellow below). Choose from Normal, Soft 1/2, or Hard 1/2:
EXPLORING SOUNDS
Playable sounds in MONTAGE M are called Performances. Want to explore Performances in your MONTAGE M? Press the [CATEGORY] button (outlined in green below):
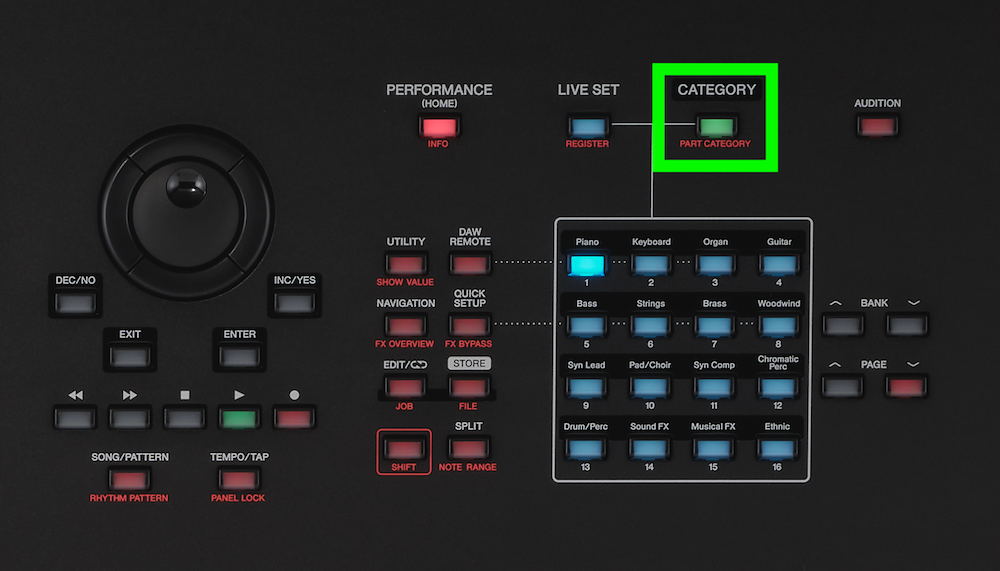
Notice the 16 buttons change to the same green color as the CATEGORY button with the Performance Categories listed above each button (outlined in Green above). In the touchscreen you’ll see this:
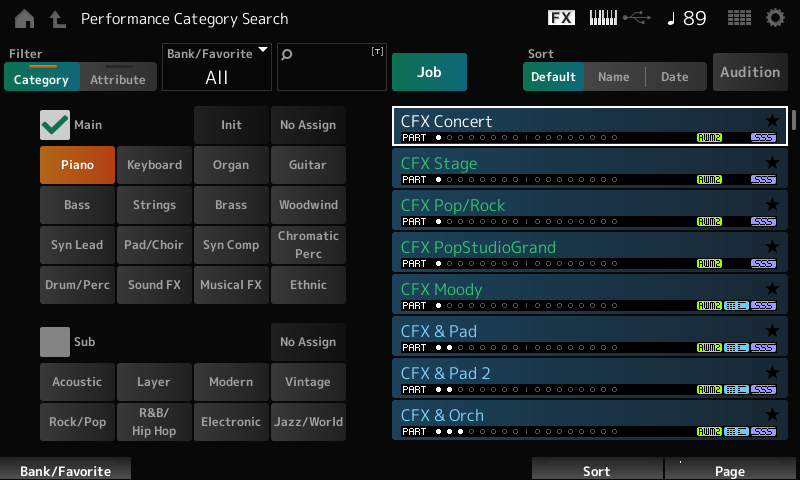
You can select different Categories in two ways:
- Touch “Category” in the touchscreen. Use the Page Knob (directly below the word “Page” in the screen above) to search sounds within the selected Category.
- Press the front panel Category buttons to select a specific Category (The buttons located directly below the [CATEGORY] button on the right.
Note “Sub” category below “Main” main category in the screenshot above. Here you can further refine your search in two ways. Say you are looking for layered pianos:
- You can use the touchscreen by first searching the main Category, “Piano”, then “layered pianos” by selecting the Subcategory “Layer” in the touchscreen.
- You can use the front panel Category buttons to select the Subcategories by pressing and holding the [SHIFT] button while pressing buttons 1-8.
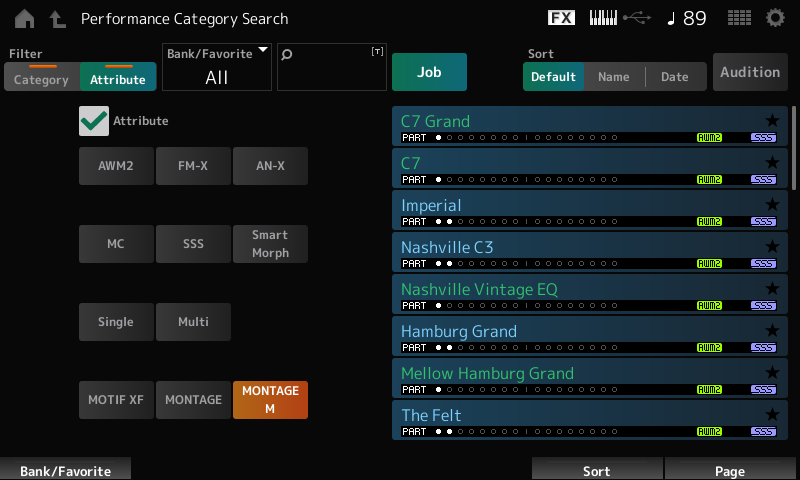
Want to search for MONTAGE M specific sounds? Touch “Attribute” in the touchscreen.
The Attribute tab allows you to search in a few different ways:
- You can search by synth engine type (AWM2, FM-X or AN-X).
- You can search by different control and behavior type (MC or “Motion Control”, SSS or “Seamless Sound Switching” or Smart Morph).
- You can search only Single Part Performances (Single) or Multi Part Performances (Multi). Note that Single Part Performances appear in green, and Multi Part Performances appear in Blue, and directly below the Performance name is a graphic showing the number of active Parts in a Performance.
- MONTAGE M includes all the Preset Performances and Voices from MOTIF XF and MONTAGE as well as new MONTAGE M Performances. You can refine you search by models: MOTIF XF, MONTAGE and MONTAGE M.
MONTAGE M ADDITIONAL INFORMATION
The [AUDITION] button (circled in red in the panel view below): Want to hear a demonstration of a specific Performance? Press the [AUDITON] button.
The [LIVE SET] button (circled in blue in the panel view below): Live Sets are Performance collections arranged in a single screen of 16 Performance slots. Pressing the [LIVE SET] button light turns the LED color blue along with the buttons directly below.
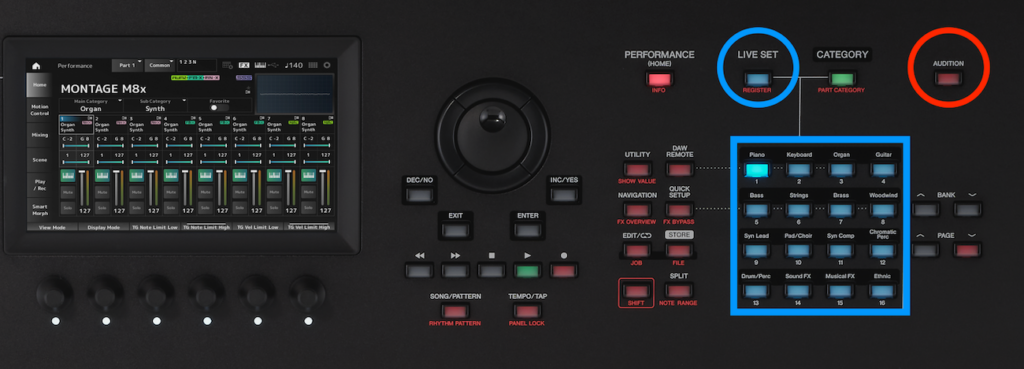
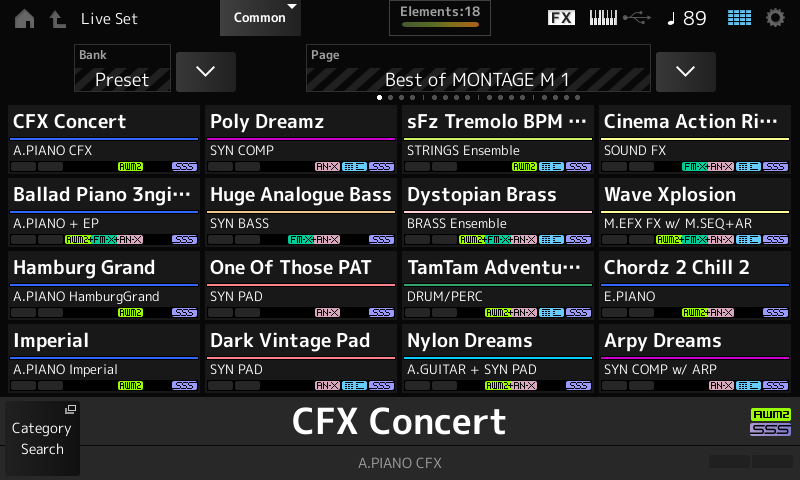
To select Performances within a Live Set you can use the blue illuminated panel buttons or you can select in the touchscreen. There is a single Preset Live Set Bank with 15 Pages of 16 Performance slots. You can create your own Live Set Pages in the User Live Set Bank. There you have 8 User Live Set Banks each with 16 Pages of 16 Performance slots. The screenshot below shows the Preset Bank, Live Set Page 1 “Best of MONTAGE M 1”:
Want to learn more about connecting MONTAGE M to a computer? Go here!