

The CP73/88 one-to-one interface makes it easy set up, store and recall Splits and Layers. It’s all right there in front of you and with the LIVE SET you can store them for instant recall. This article will both show you how it works and give you a few tips and ideas on creative ways to set them up.
For reference, let’s take a look at the CP front panel:
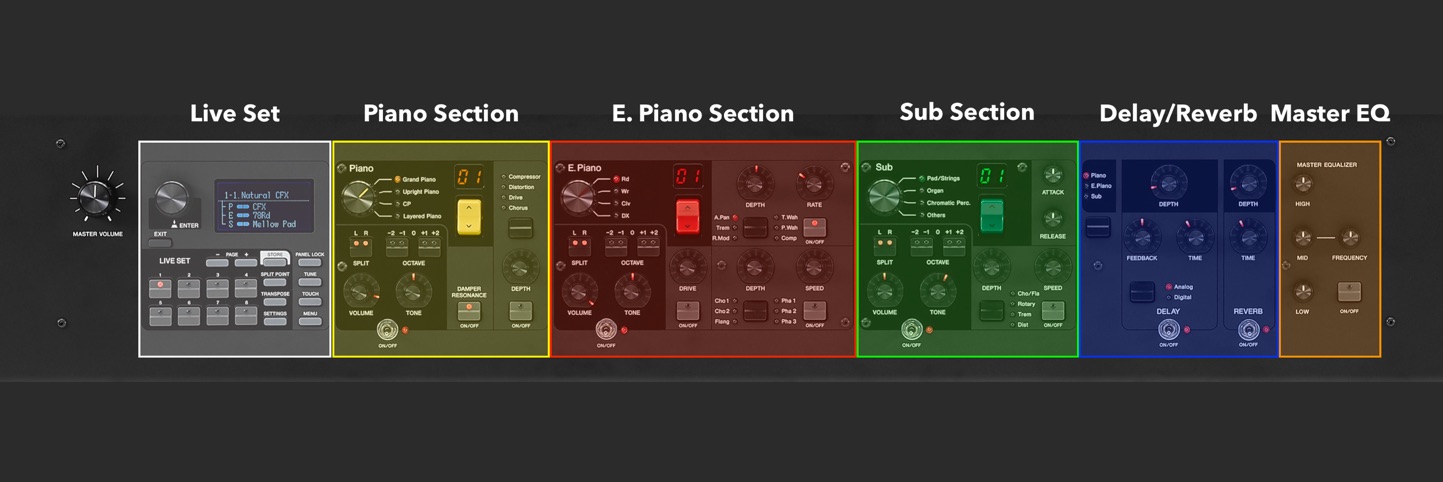
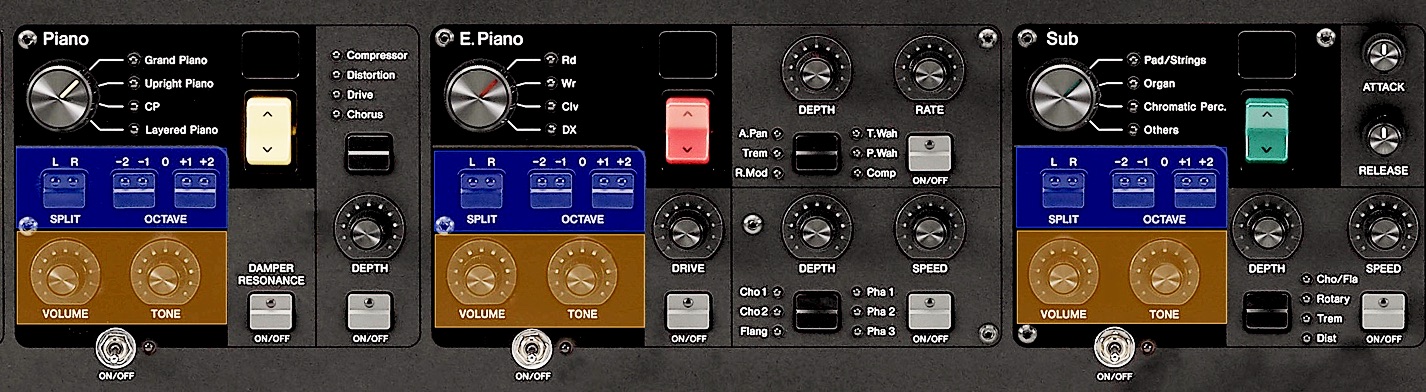
I’ll be moving around through all these sections throughout the article but most of the time I’ll be working with the Piano, E.Piano and Sub Sections. Below are just those three sections. Notice that area in dark black is the same in each Section and I’ve highlighted the [SPLIT] and [OCTAVE +/-] buttons in blue and the [VOLUME] and [TONE] knobs in orange. These are important settings when creating splits and layers:
Let start with splits. There are a few ways to use splits and I’ll cover three in this article.
The Basic Bass Split
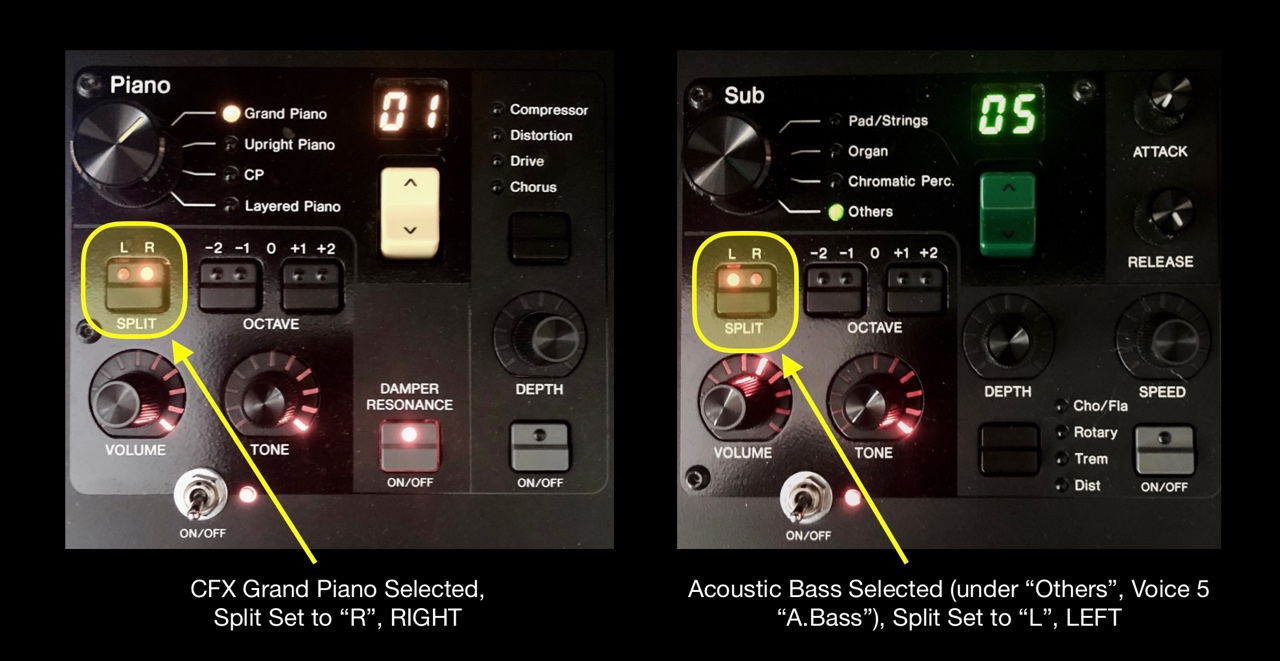
This is probably the most common way to split the keyboard with a bass sound in the left and a piano or keyboard sound in the right. For the Basic Bass Split I’ll use the CFX Concert Grand on the right and the Acoustic Bass on the left. I will also adjust the effects so my piano will have reverb, but my bass will be dry. This is a common way to set up a bass split because reverb can make the bass less present and overly “muddy”.
For this setup I turn the Piano and Sub Sections ON and select “CFX” in the Grand Piano Category. In the Sub Section I’ll select Voice 5 in the Others Category, “A.Bass”. Next, I’ll press the SPLIT button in the Piano Section so only “R” is illuminated and in the Sub Section I’ll press the SPLIT button so only “L” is illuminated. Check it out:
Now I have my two Sections split with CFX Concert Grand in the right and Acoustic Bass in the Left. The next thing I need to do is set the split point, adjust the Reverb send for each Section and Save the set up to a LIVE SET for instant recall. In the image below I have identified where each task is accomplished:
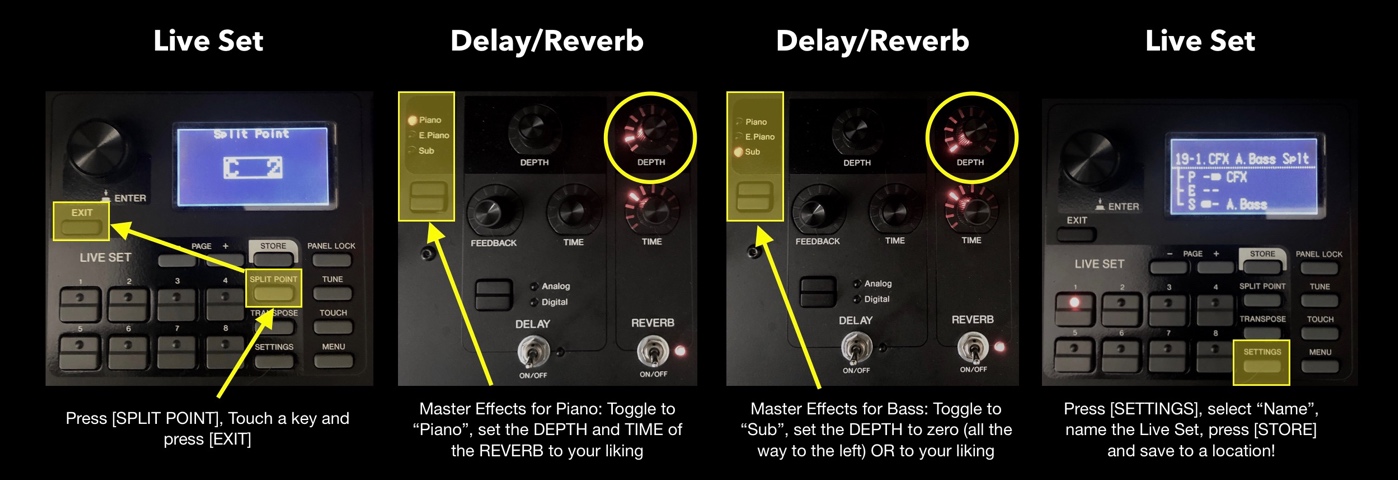
1. Split Point: This button is located in LIVE SET. Press the [SPLIT POINT] button and touch a key on the keyboard to set the split (I chose C2, the C below middle C) and press [EXIT] button to confirm!
2. Reverb: The Master Delay and Reverb are located to the right and in this set up I don’t have Delay engaged. To set the send for each Section press the button indicated to toggle through the parts the LED will illuminate next to the selected Section (If all the LEDs are on you are selecting ALL Sections). In this set up I have a little Reverb on the CFX Piano and None on the Acoustic Bass.
3. LIVE SET: Press [SETTINGS] and use the knob (referred to as the “Encoder dial/[ENTER] button” in the manual) next to the LED to navigate to “Name” and press down on the dial to select. You use the LIVE SET buttons to navigate and name the LIVE SET…I named this “CFX A. Bass Splt” and you can download it from Soundmondo here.
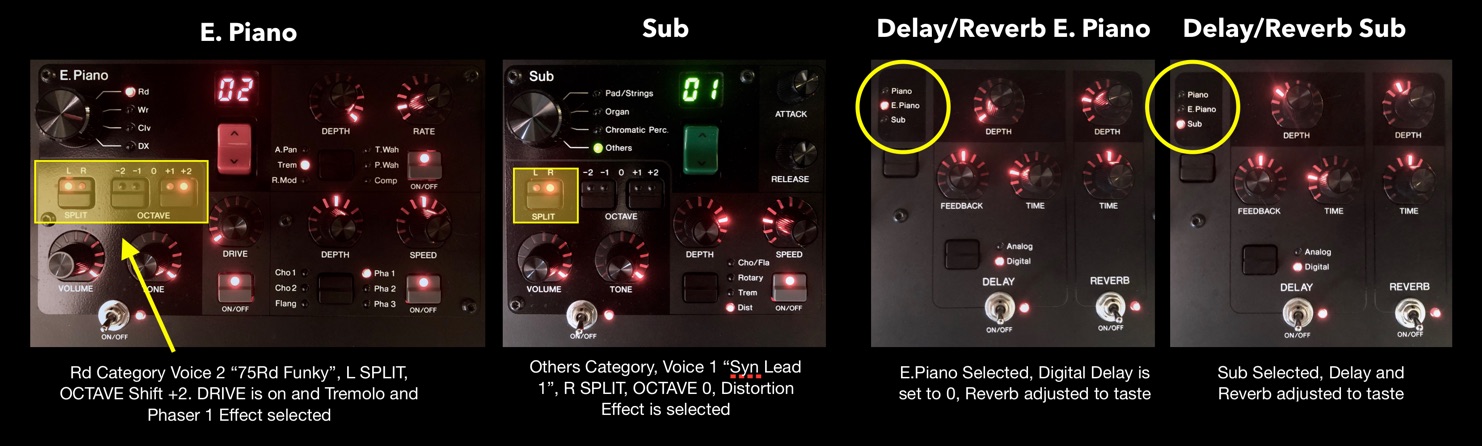
Building on what we’ve learned creating a bass and piano split, let’s create a left-hand accompaniment/right hand lead split. For this one I’ll shift the left-hand comp Section up a few octaves, engage a right-hand synth lead from the Sub Section and engage a few more effects.
The Left-Hand Comp/Right-Hand Lead Split
With this setup, I’ll set E.Piano to “75Rd Funky” as the left-hand comp shifted up two octaves (one octave will work as well…I just preferred the higher octave). I also engaged both of the Section Effects with Tremolo and Phaser, and I have DRIVE on but set to zero…this gives the 75Rd Funky voice a nice presence and bite.
Now I’ll switch ON the Sub Section and choose “Syn Lead 1”, adding Distortion for the Section Effect. Finally both Delay and Reverb are ON, but I have delay depth set to zero for the E.Piano and both Sections with different Reverb Depth settings. I wanted the lead to have more effect than the accompaniment. Check it out below:
Let’s take a look at layers. Layers are easy to set up and manage, but I’ll take it one step further and show you what you can do using what’s called “Advanced Mode”. I’ll delve more into this setting in the next article but really wanted to introduce it here because it’s pretty cool how it can be used with both splits and layers.
A Basic Piano and String Two- Section Layer
For this layer, I’m using “Imperial” (the big resonant Bosendorfer Imperial 290 Concert Grand) in the A. Piano Section. I have the Section Volume and Tone set high and switched the Section Effect ON using the stereo compressor. I like this sound with the DEPTH only slightly turned up: A little bit adds just the right amount of presence and punch to the piano. It is a “produced” sound that I love for Pop and R&B, sounds great behind singers and sits nicely in a mix.
Next, I switched the Sub Section ON and selected “Natural Str” as my layer. This is a nice and full natural string section. I set the Volume rather low, but I like the richness that the Tone adds so that is set high. This sound is meant to add a nice light pad to the Piano, but I wanted a lot of Reverb and Digital Delay to give it an airy, ephemeral quality. Take a look at the panel settings below:
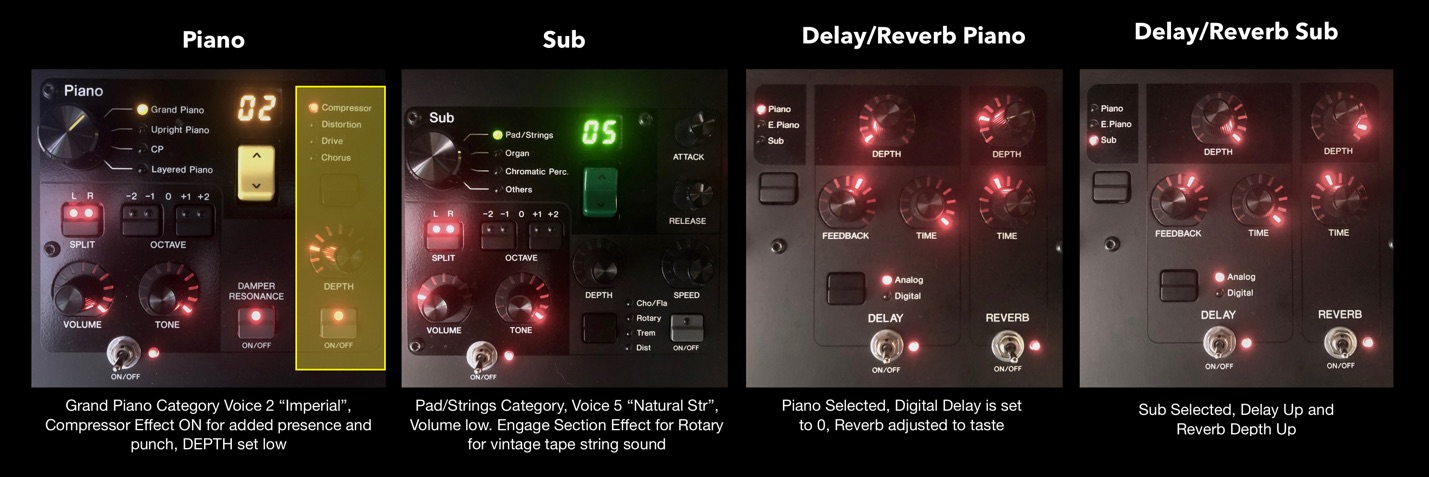
The Sub Section Effect is OFF but turning it on will give you the rotary speaker effect. With it OFF you get the natural string ensemble but as soon as you turn it ON the rotary speaker effect gives it an interesting vintage tape string vibe. Check it out and go to Soundmondo here to download this LIVE SET example.
Stay tuned for more articles and splits and layers!
Have thoughts/comments? Join the conversation on the Forum here.