

Tagged Under
The videos below are great accompaniments to this article. Check them out:
Let’s start with a basic MIDI example where you are recording Drum, Bass, Keyboards, Guitar, etc., to Cubase one after the other (traditional). This workflow will be most familiar to those used to working in the Motif/MOXF series, and will work very much like working in PATTERN Record mode. We will use the ability of Cubase to Cycle record (Loop while recording) to build as many as sixteen tracks of MIDI data. In this workflow we will be selecting SINGLE PART programs (only): MIDI RECORD ON DAW
Workflow Example #1: PATTERN Mode like Recording
_ Setup the Left/Right Markers in Cubase to define an eight measure region.
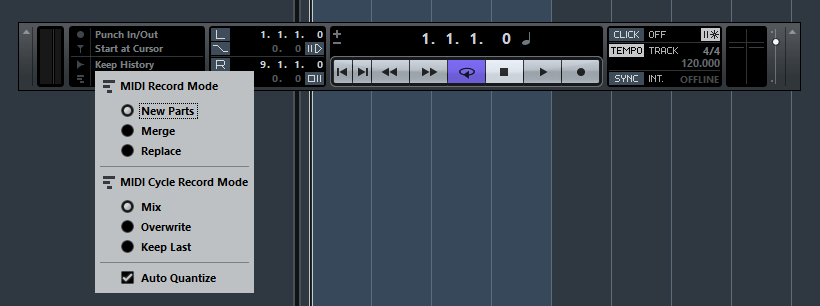
_ Set the CYCLE icon to activate loop recording.
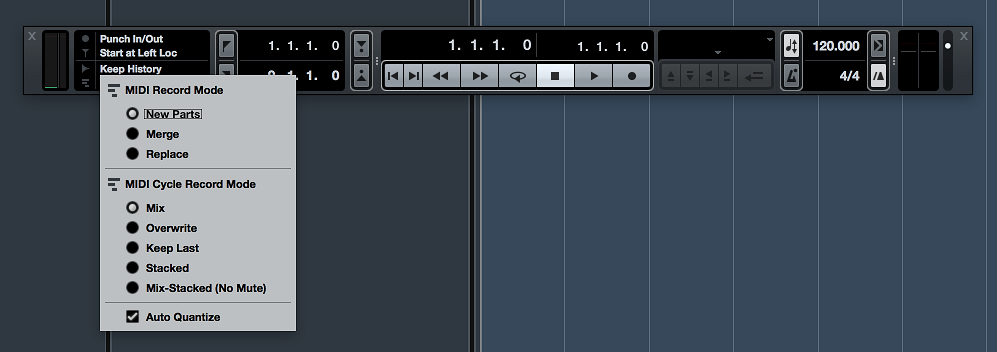
_ Set Record attributes on the TRANSPORT to MIX and set Auto Quantize, if desired.
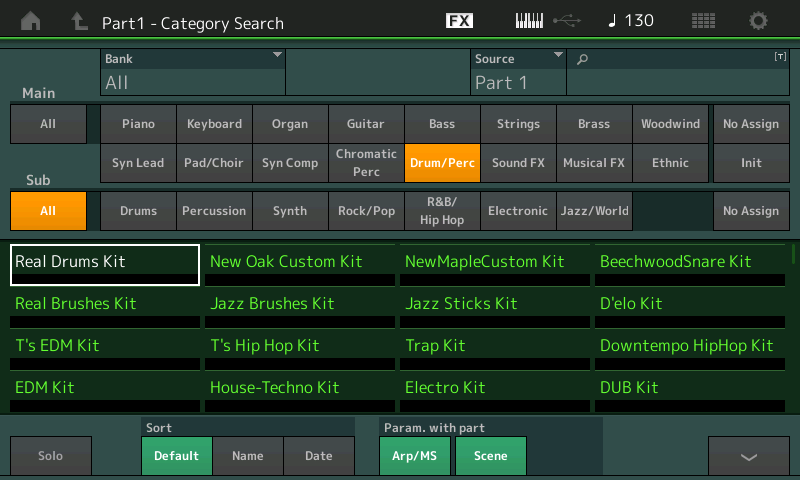
Press [CATEGORY SEARCH]
Select “Init”
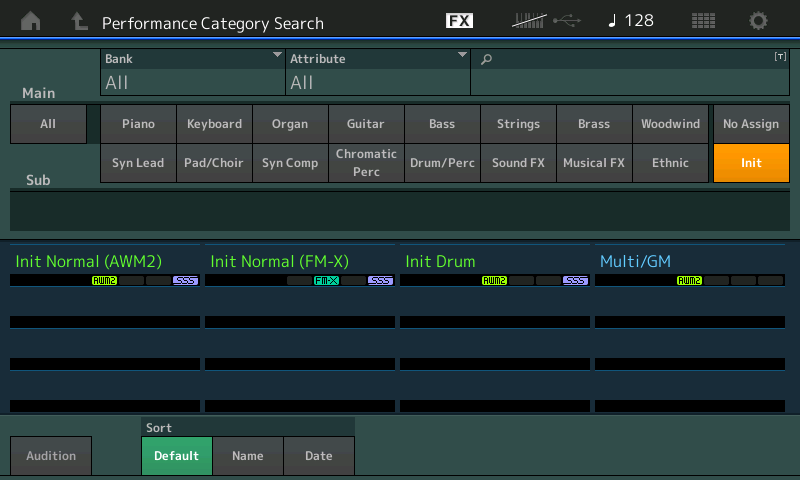
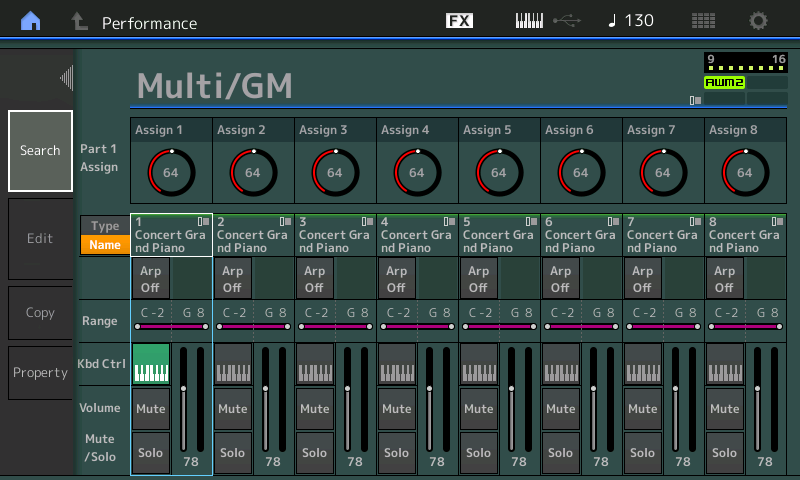
Select “Multi/GM”
This Performance has sixteen Parts, each on a separate MIDI channel. You can see Parts 1-8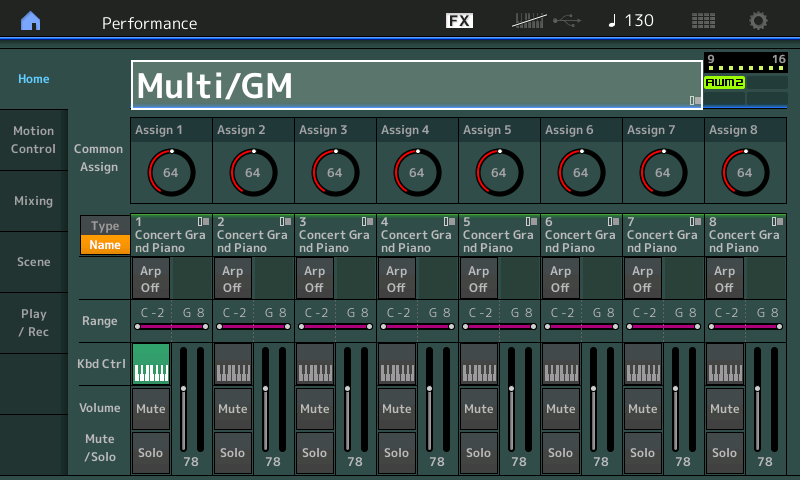
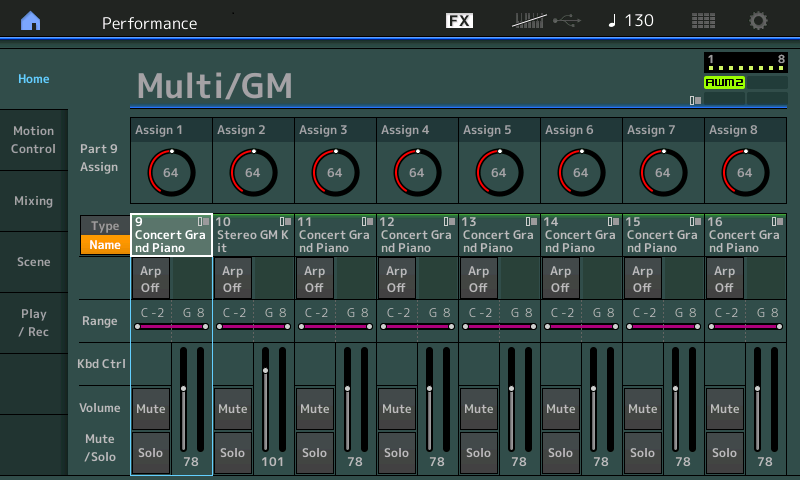
To view PARTS 9-16 press [SHIFT] + [PERFORMANCE CONTROL]
POWER TIP: When working in a Multi/GM setup where there is a PART in each slot, turn the KBD CTRL icon OFF for each Part – this will allow you to address just the currently selected Montage Part. You can press the [PART CONTROL] button (right side top row).
When [PART CONTROL] is lit on the front panel, the first two rows of eight buttons become PART SELECT [1]-[16]. You will use these to select the PART you are communicating with currently.
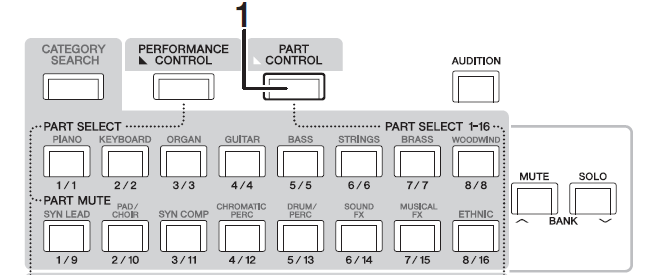
You will be triggering just one at a time. The screen will automatically update to Parts 9-16 when you select a PART in that range. Notice on the far right you have [MUTE] and [SOLO] functions that will work with the PARTs [1]-[16].
Set your Markers in Cubase to outline the number of measures you would like to Cycle (loop) your recording. Let’s say you want to do 8 measures. This would mean you have a left Marker at measure 1 and the right Marker at measure 9. Click on the CYCLE icon (purple) on the Cubase Transport.
Set the attributes for your MIDI recording on the Cubase Transport bar… Set “Auto Quantize” if that is what you desire, and set it so each cycle allows you to “Mix” new data with existing data as it loops around.
I suggest that you select several instruments first before you ever hit record, this way you don’t have to break your concentration to pick sounds. Besides you can always change your mind and substitute for anything later (it’s MIDI, after all).
For example, in the MULTI/GM Performance I select the following four Parts:
Real Drums
Velocity Bass
Clavi Stuff
Mega 60s Clean
Touch the TYPE/NAME box on PART 1
An overlay pops in from the left with an option to SEARCH
The SEARCH field allows you to search for any PART that occupies a single Part (thus they are all green). Shown below is the DRUM/PERC Search Results:
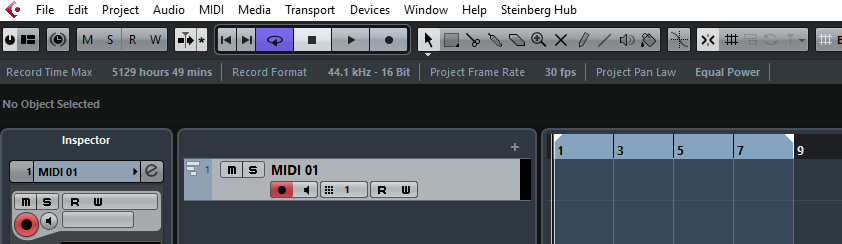
I create one MIDI track in Cubase, set to receive Montage 1, set to output to Montage 1, and set to Channel = ANY
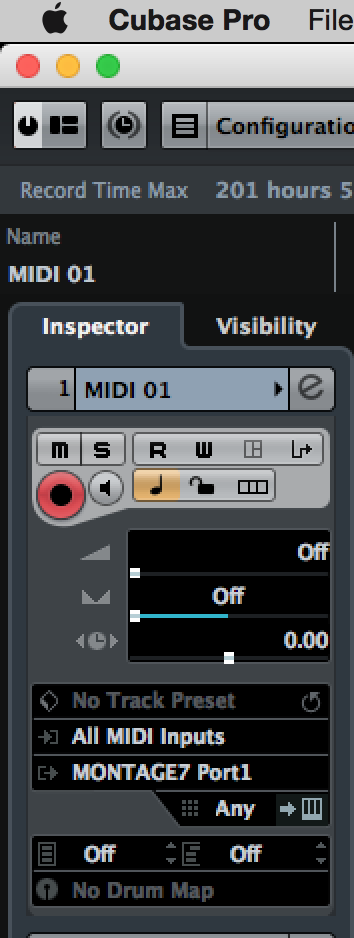
The Track Inspector in Cubase will give you the information about the current track. You can see that the INPUT is set to “All MIDI Inputs” _ we defined the MIDI Inputs in the DEVICE SETUP > MIDI PORT SETUP screen
The MIDI OUTPUT is set to my MONTAGE7 PORT 1
The MIDI OUT CHANNEL is “Any” which determines how Cubase will THRU the data – we have selected “Any” so that incoming MIDI is echoed back OUT on the channel it comes in on. This is because we are determining the Channel in Montage.
This “Any” Channel setting is a key – It allows Cubase to THRU the data back out on the channel on which it comes in. How it will work: the Drums [Part 1], when selected, will trigger data as CH1, the Bass in [Part 2] will trigger data as CH2, the Clav sound [Part 3] will trigger data on CH3, and the Clean Guitar sound [Part 4] will trigger data on CH4. Now, remember, that LOCAL CONTROL is OFF, so in order for the Montage Tone Generator to respond a complete circuit must be maintained. The key presses travel OUT via USB-MIDI arrive at this active MIDI Track, which echoes the data back to the Montage Tone Generator on the MIDI channel that the data was generated on.
Cool thing is: I don’t have to worry about the channel, I just set the instrument sound in the PART and when I select it to play I will be transmitting on that MIDI channel. I don’t have to worry about switching Tracks, I’m using just one initially that will capture all the data, Port 1 represent 16 MIDI channels. Now I can just concentrate on playing.
Later, we can have Cubase split the data to separate tracks for viewing/editing. While I’m recording I don’t even want to deal with creating a track for each Part that I play. Once I select a PART [1]-[16] in the Montage, Cubase is ready to record it.
Dividing data out to separate tracks for MIDI data is a convenience for viewing and editing the data, and we can deal with that when we have data for viewing and editing.
On Montage, I use the Quick Setup #1 = MIDI REC on DAW
Setup the Cubase CLICK and Count-in; Set the Tempo*… And go.
*Both can be set on the Cubase TRANSPORT. You can view the TRANSPORT by pressing [F2] ([Fn] + [F2] on the Mac) on your computer keyboard. See the Cubase documentation (HELP) for details about CLICK options and Tempo Maps.
Recording is exactly like recording to Pattern mode in a Motif XF/MOXF
You can use the front panel PART SELECT [1]-[16] buttons to directly select the Part you want to play… And you don’t have to hit STOP to switch to the next instrument, or even setup or arm another track, or route via a MIDI channel or any of that. Just continue playing. Get your idea down while you’ve got your musician hat on.
Basically, this is how I build my rhythm section tracks – or the basic core ensemble that will play throughout the composition. For the next “section”, set the left Marker at 9 and the right Marker at 17… and so on.
Extra Credit: Splitting the data (DISSOLVE PART)
If I need to edit the data of one of the tracks you can use the MIDI pull down option: DISSOLVE PARTS _ by channel… This separates the four Parts to four tracks for easier viewing.
Once I have my rhythm section tracks in a reasonably workable state… I render them as audio. (the process of transferring the MIDI data to Audio: simply playing back the MIDI data and recording the Audio Output of the Montage to an Audio Track… rather than utilizing the Montage hardware to recreate the data, I will now have an audio waveform documenting these musical parts.
This allows me to play along with them while I free my Montage for more creative duties. I keep the MIDI Tracks in a muted folder -so that if later I change my mind about what’s there, I have my original data.
I’ve found that working with the rhythm section and rendering audio via the 32 studio bus outputs is awesome workflow… Every Part can use discreet outputs, every Part can have its own dual Insertion Effects… And depending on the Project I can even route each drum on its own discreet output to its own audio track (future article)! Heaven!
Now that the rhythm section is rendered as audio, I’m free to use anything I want on my Montage. Because we have MIDI clock, adding things, after-the-fact, like arpeggios, tempo driven effects and LFOs, even replacing earlier Parts, is totally possible.
Finally, everyone will find their own “best method” of working! Scores of variations exist. Spend time learning the available tools in Cubase. If Pattern mode is your workflow of choice, you can setup Cubase AI (free download) to function this way, as described above. Those with Cubase Pro 8 have more options as there is an ARRANGER – PLAY ORDER feature that makes Chaining Sections, placing/creating fill-ins, and the overall task of arranging your data, a breeze. Enjoy!
Want to join the conversation about this lesson? Post your comments on the Forum here.
Next time: we’ll look at recording Part 4 using an Arpeggio in “CUBASE SETUP GUIDE WORKFLOW 2: ARP REC on DAW” – now available here.